RMA & Returns
Generate RMA numbers to initiate returns, then check in returned shipments to trigger return profile logic such as refunds and cancellations.
The return process in Vrio has two steps: first generate an RMA (Return Merchandise Authorization) number, then check in the return once the product is received. Checking in a return triggers any Return Profile logic you have configured, such as automatic refunds or subscription cancellations.
Key Takeaways
- Returns rely on Return Profiles to automate refund and cancellation logic
- RMA numbers are automatically generated and associated with a shipment
- Only one RMA is allowed per shipment
- A Return is when a shipment has been checked in by the warehouse or provider — this is what triggers return profile logic
- You can skip the RMA step and go directly to checking in a return if you don't require the product back
Consider digital gift cardsVrio can generate individual gift cards loaded with any amount, usable only on your store. This strategy can help deflect refunds and drive additional sales.
Common Return Flow
- Generate an RMA number — this is provided to the customer and the warehouse
- The customer sends the product back to the return address
- The warehouse or return provider receives the product
- The shipment is marked as Returned in Vrio
- Return Profile logic runs (refunds, cancellations, etc.)
Generate an RMA
Prerequisites
The RMA action is available when all of the following conditions are met:
| Condition | Details |
|---|---|
| Shipment is not Pending Transaction | Status must not be Pending Transaction |
| No existing RMA | The shipment must not already have an RMA number assigned |
| Shipment is not cancelled | The shipment has not been cancelled |
| Shipment is not skipped | The shipment has not been skipped |
How to Generate an RMA
Step 1: Navigate to the Shipment
Find the shipment you want to generate an RMA for. The most common methods are:
From the Customer Page:
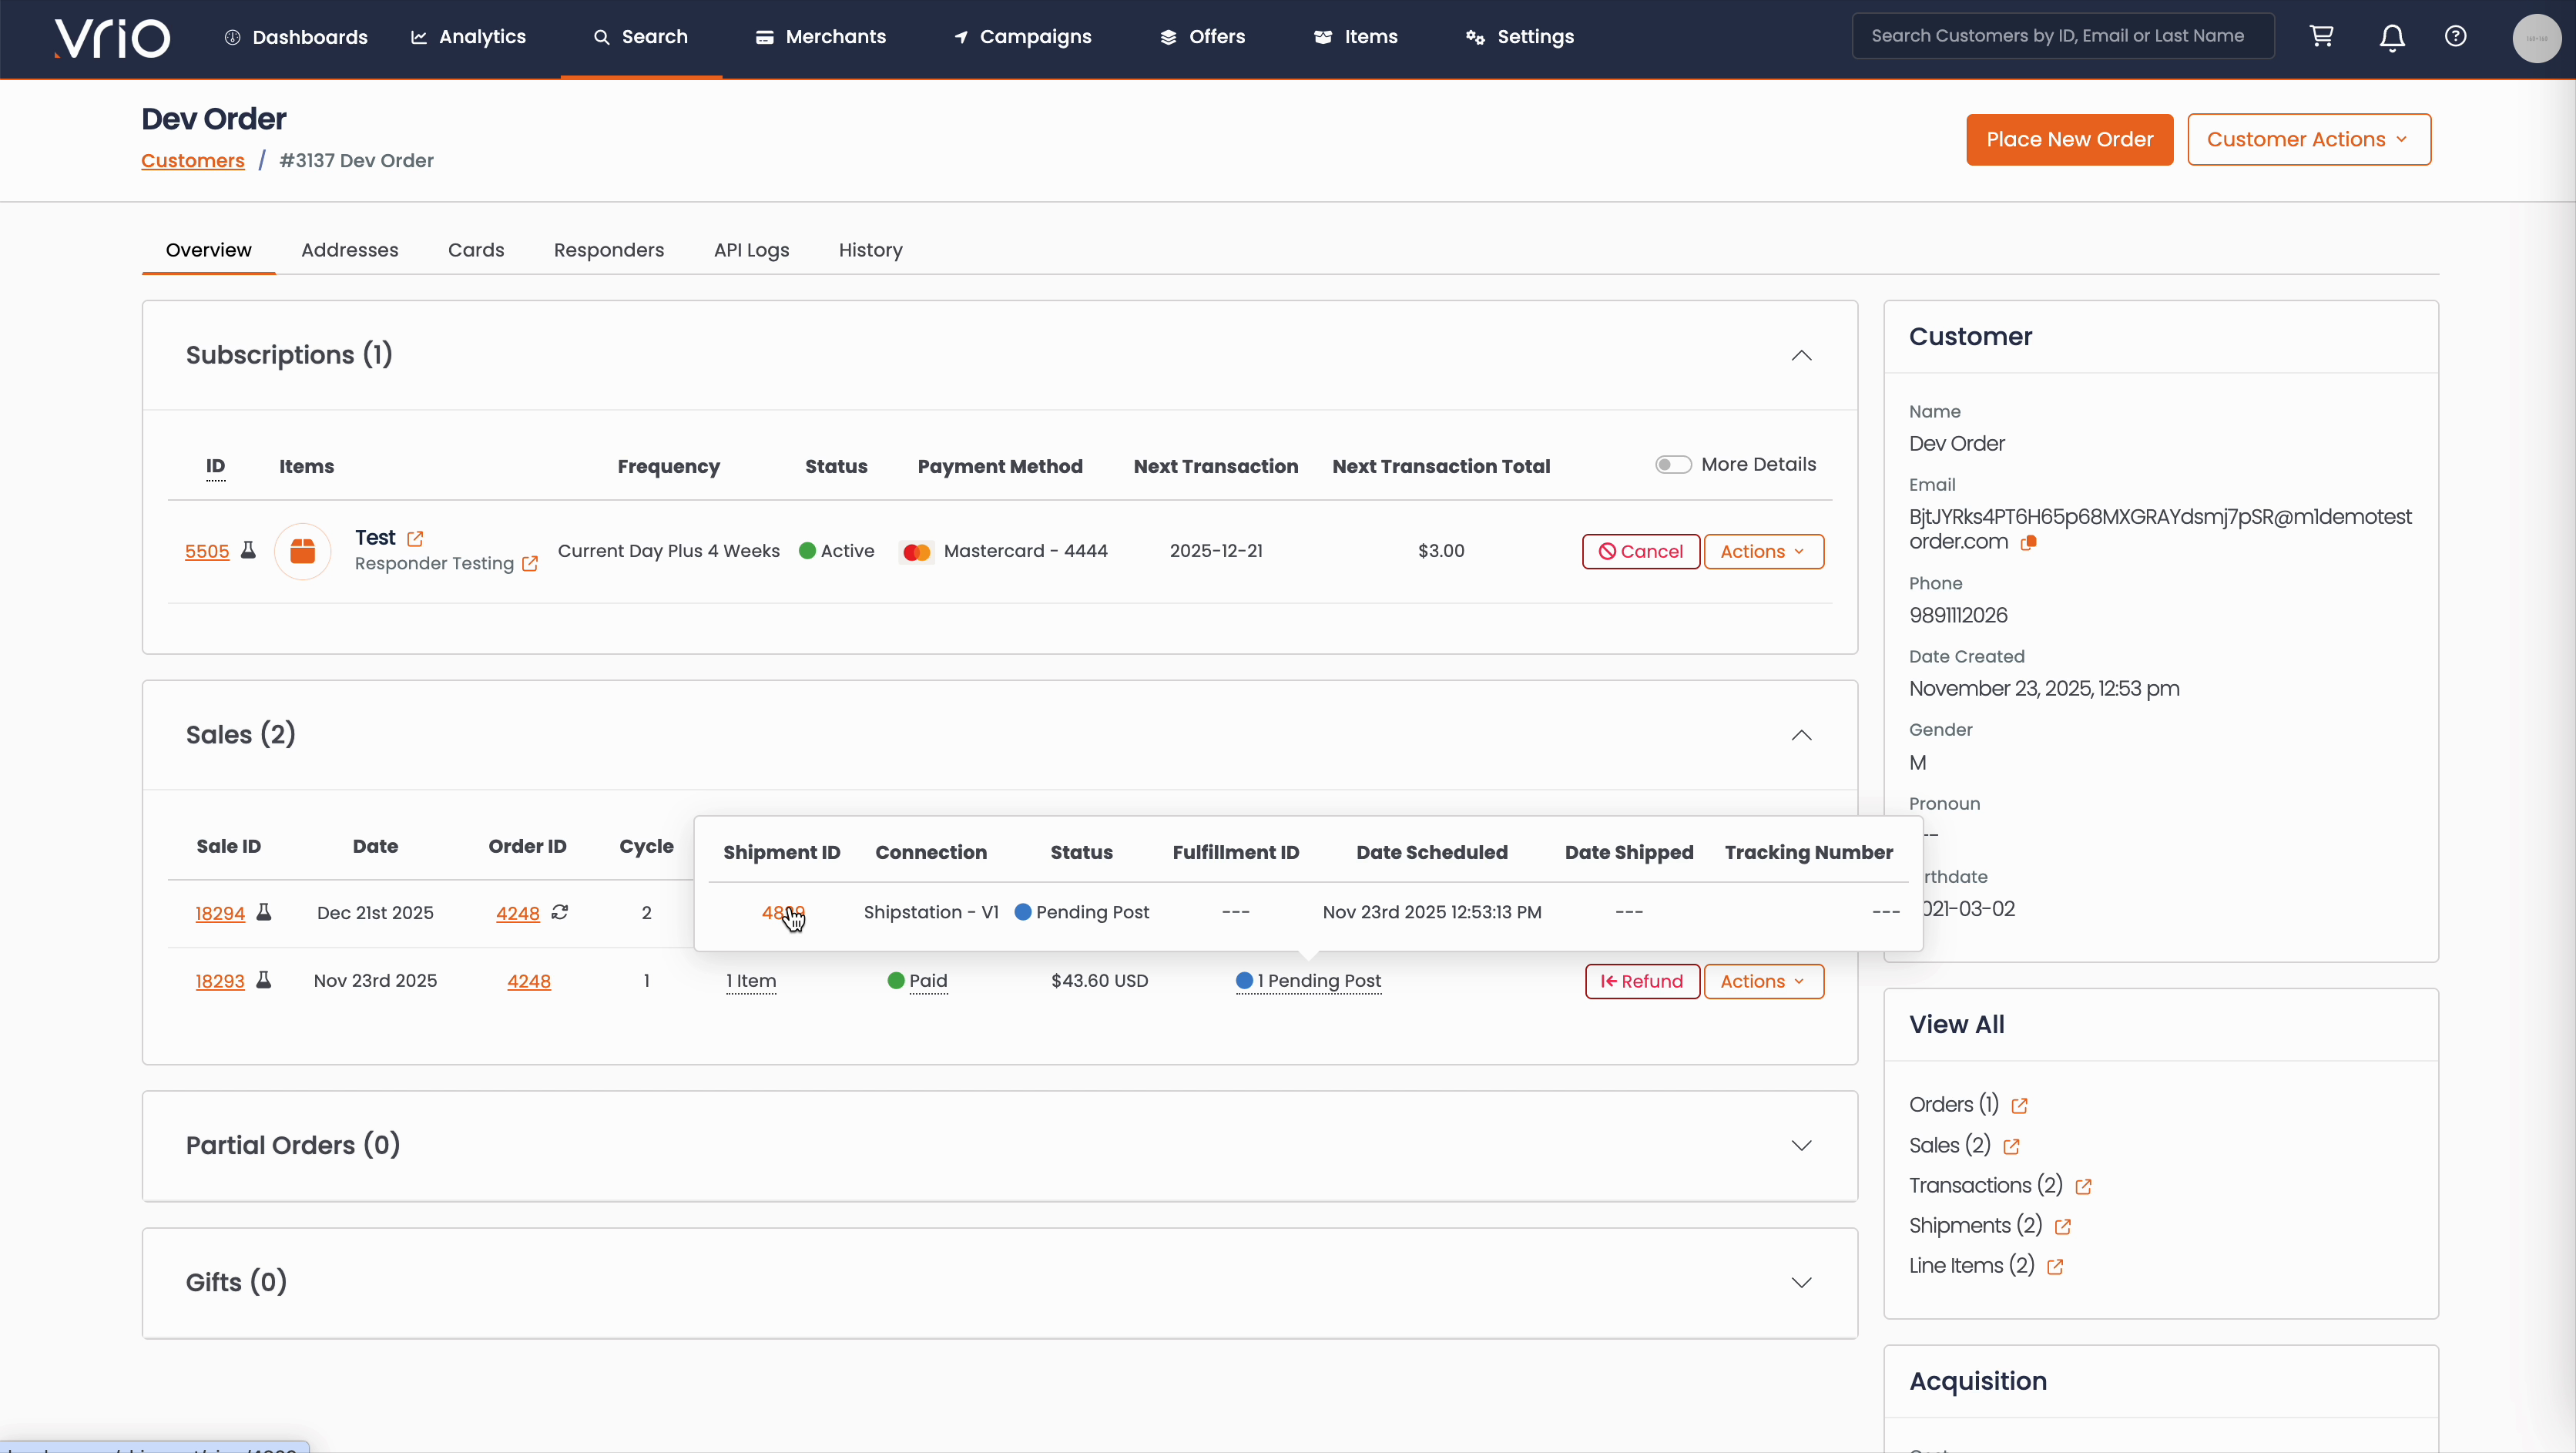
- Navigate to Search → Customers tab and find the customer record
- On the customer detail page, scroll to the Sales section
- Hover over the Shipment Status to expand and show shipment details
- Click on the Shipment ID
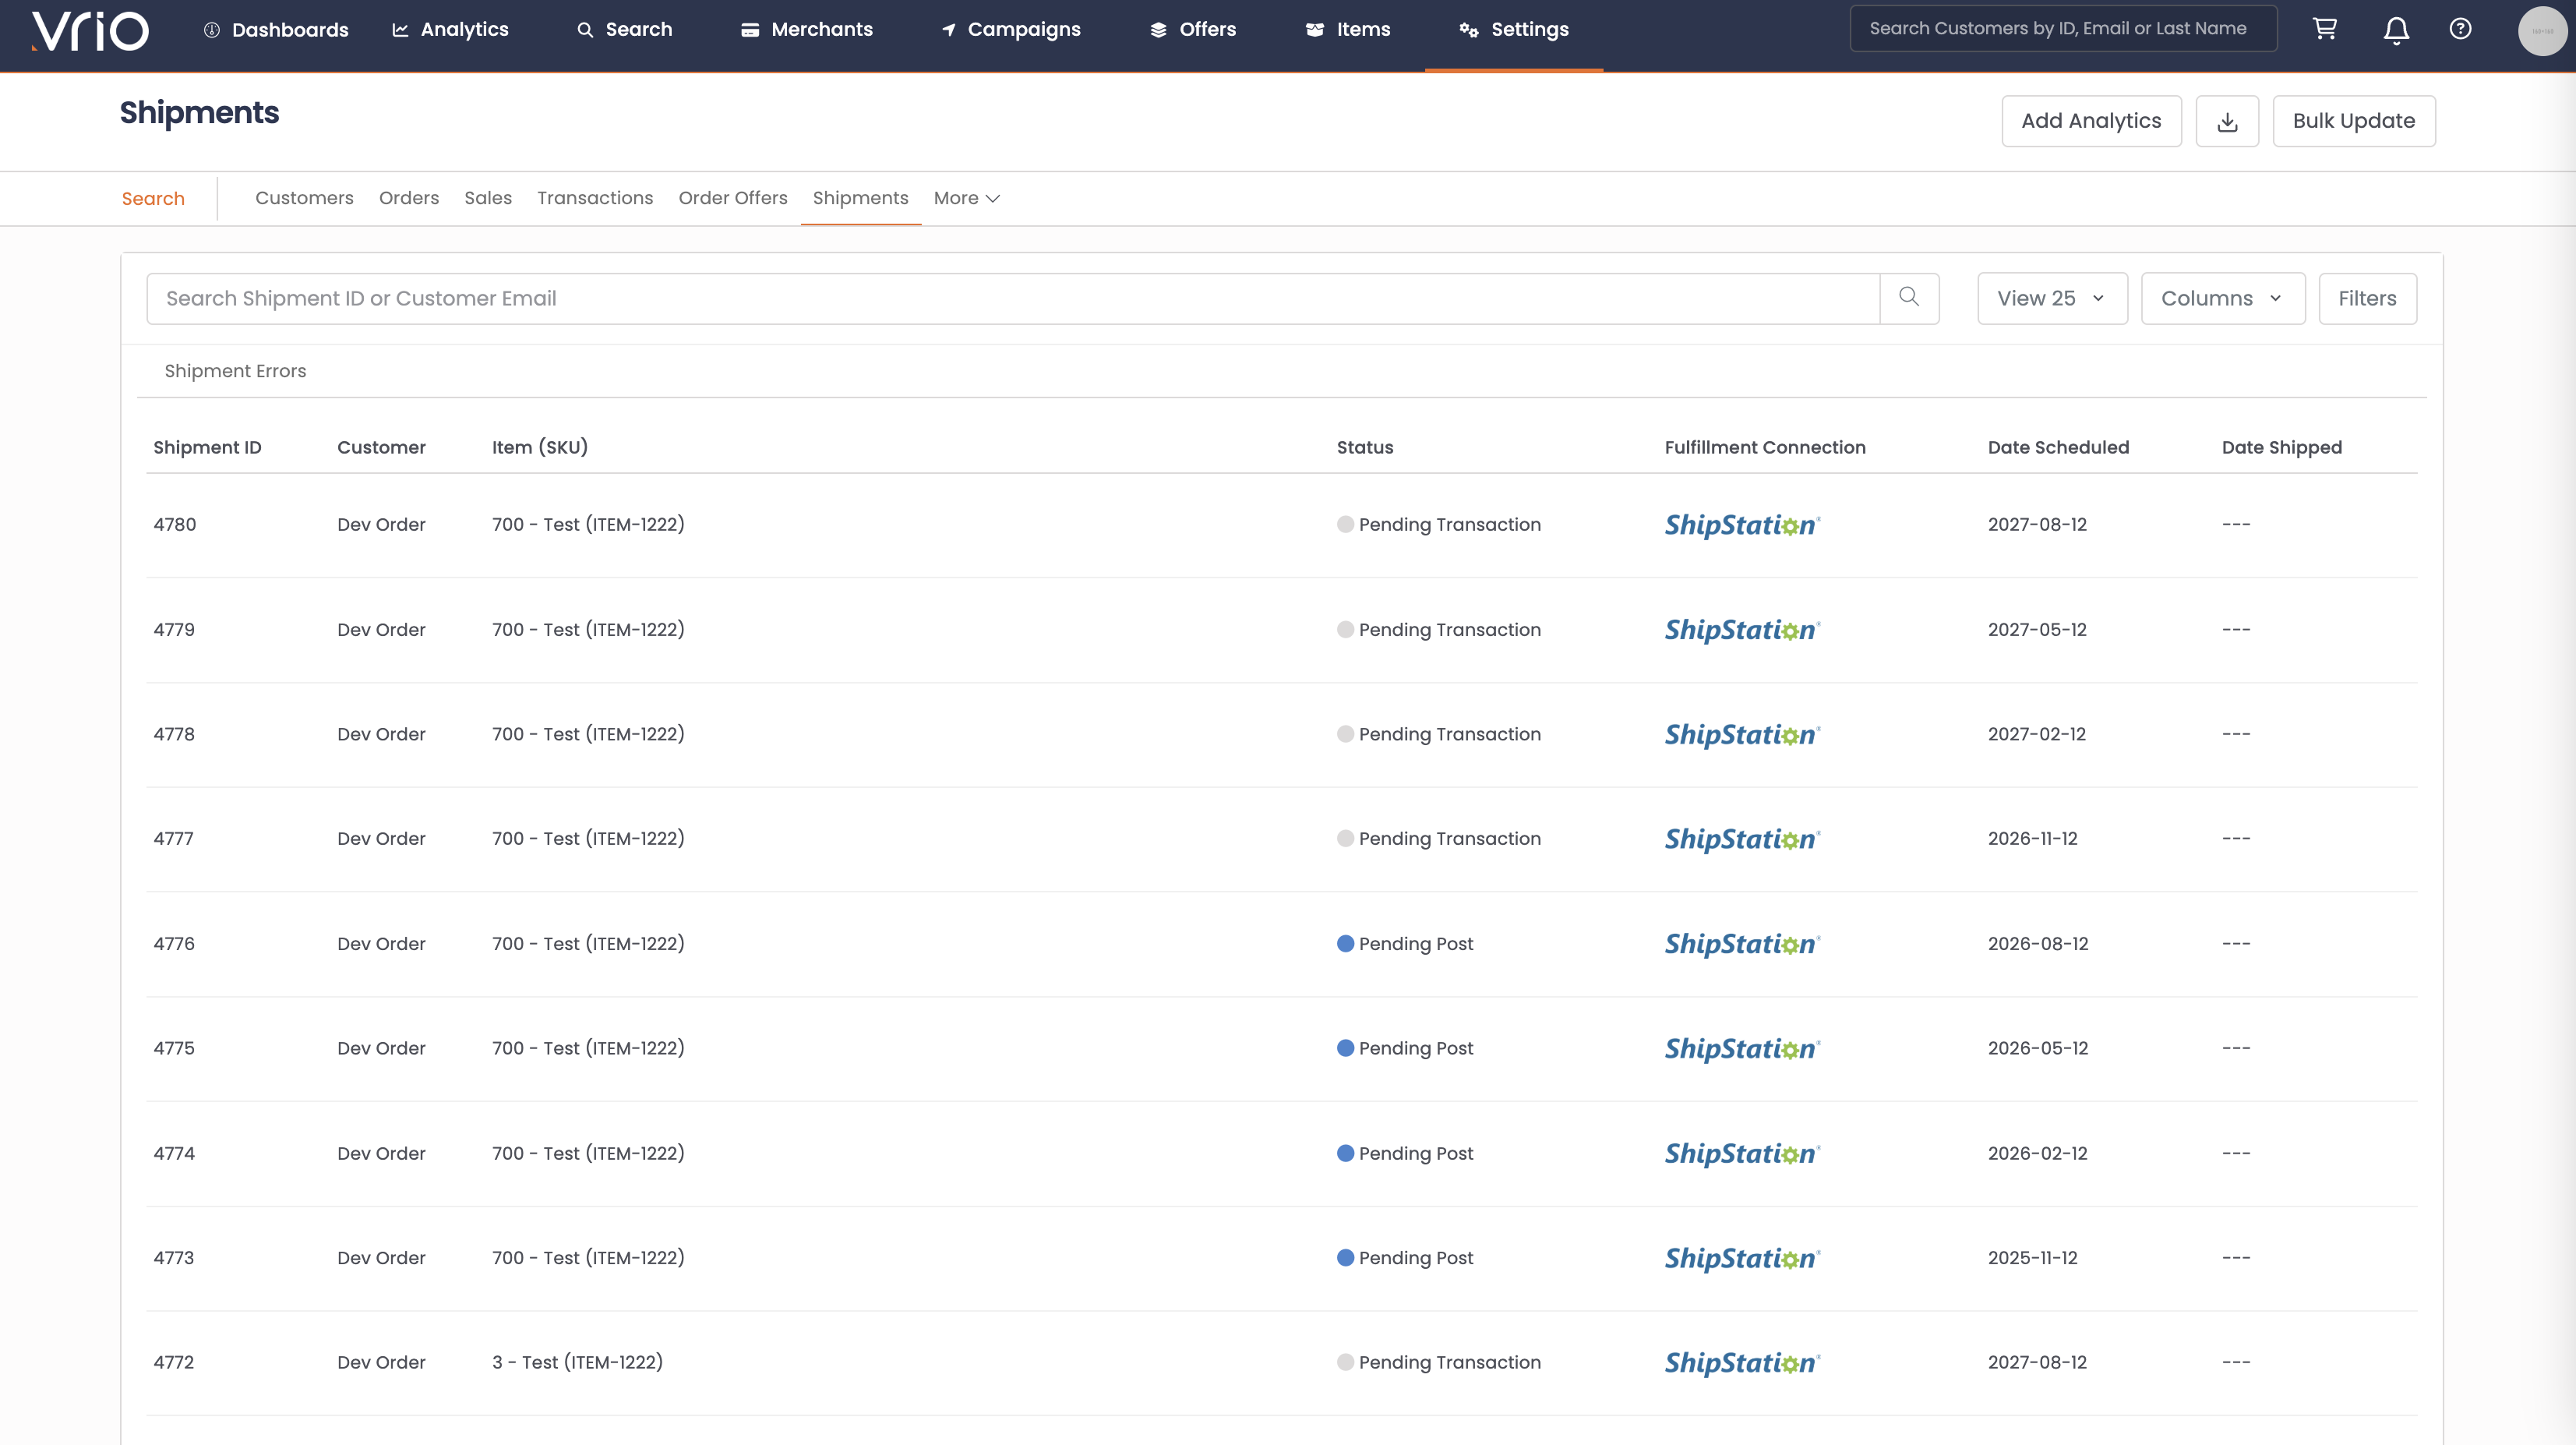
From the Shipments List:
- Navigate to Search → Shipments tab
- Use filters or browse to find the shipment
- Click on the Shipment to open the shipment detail page
Step 2: Open the RMA Form
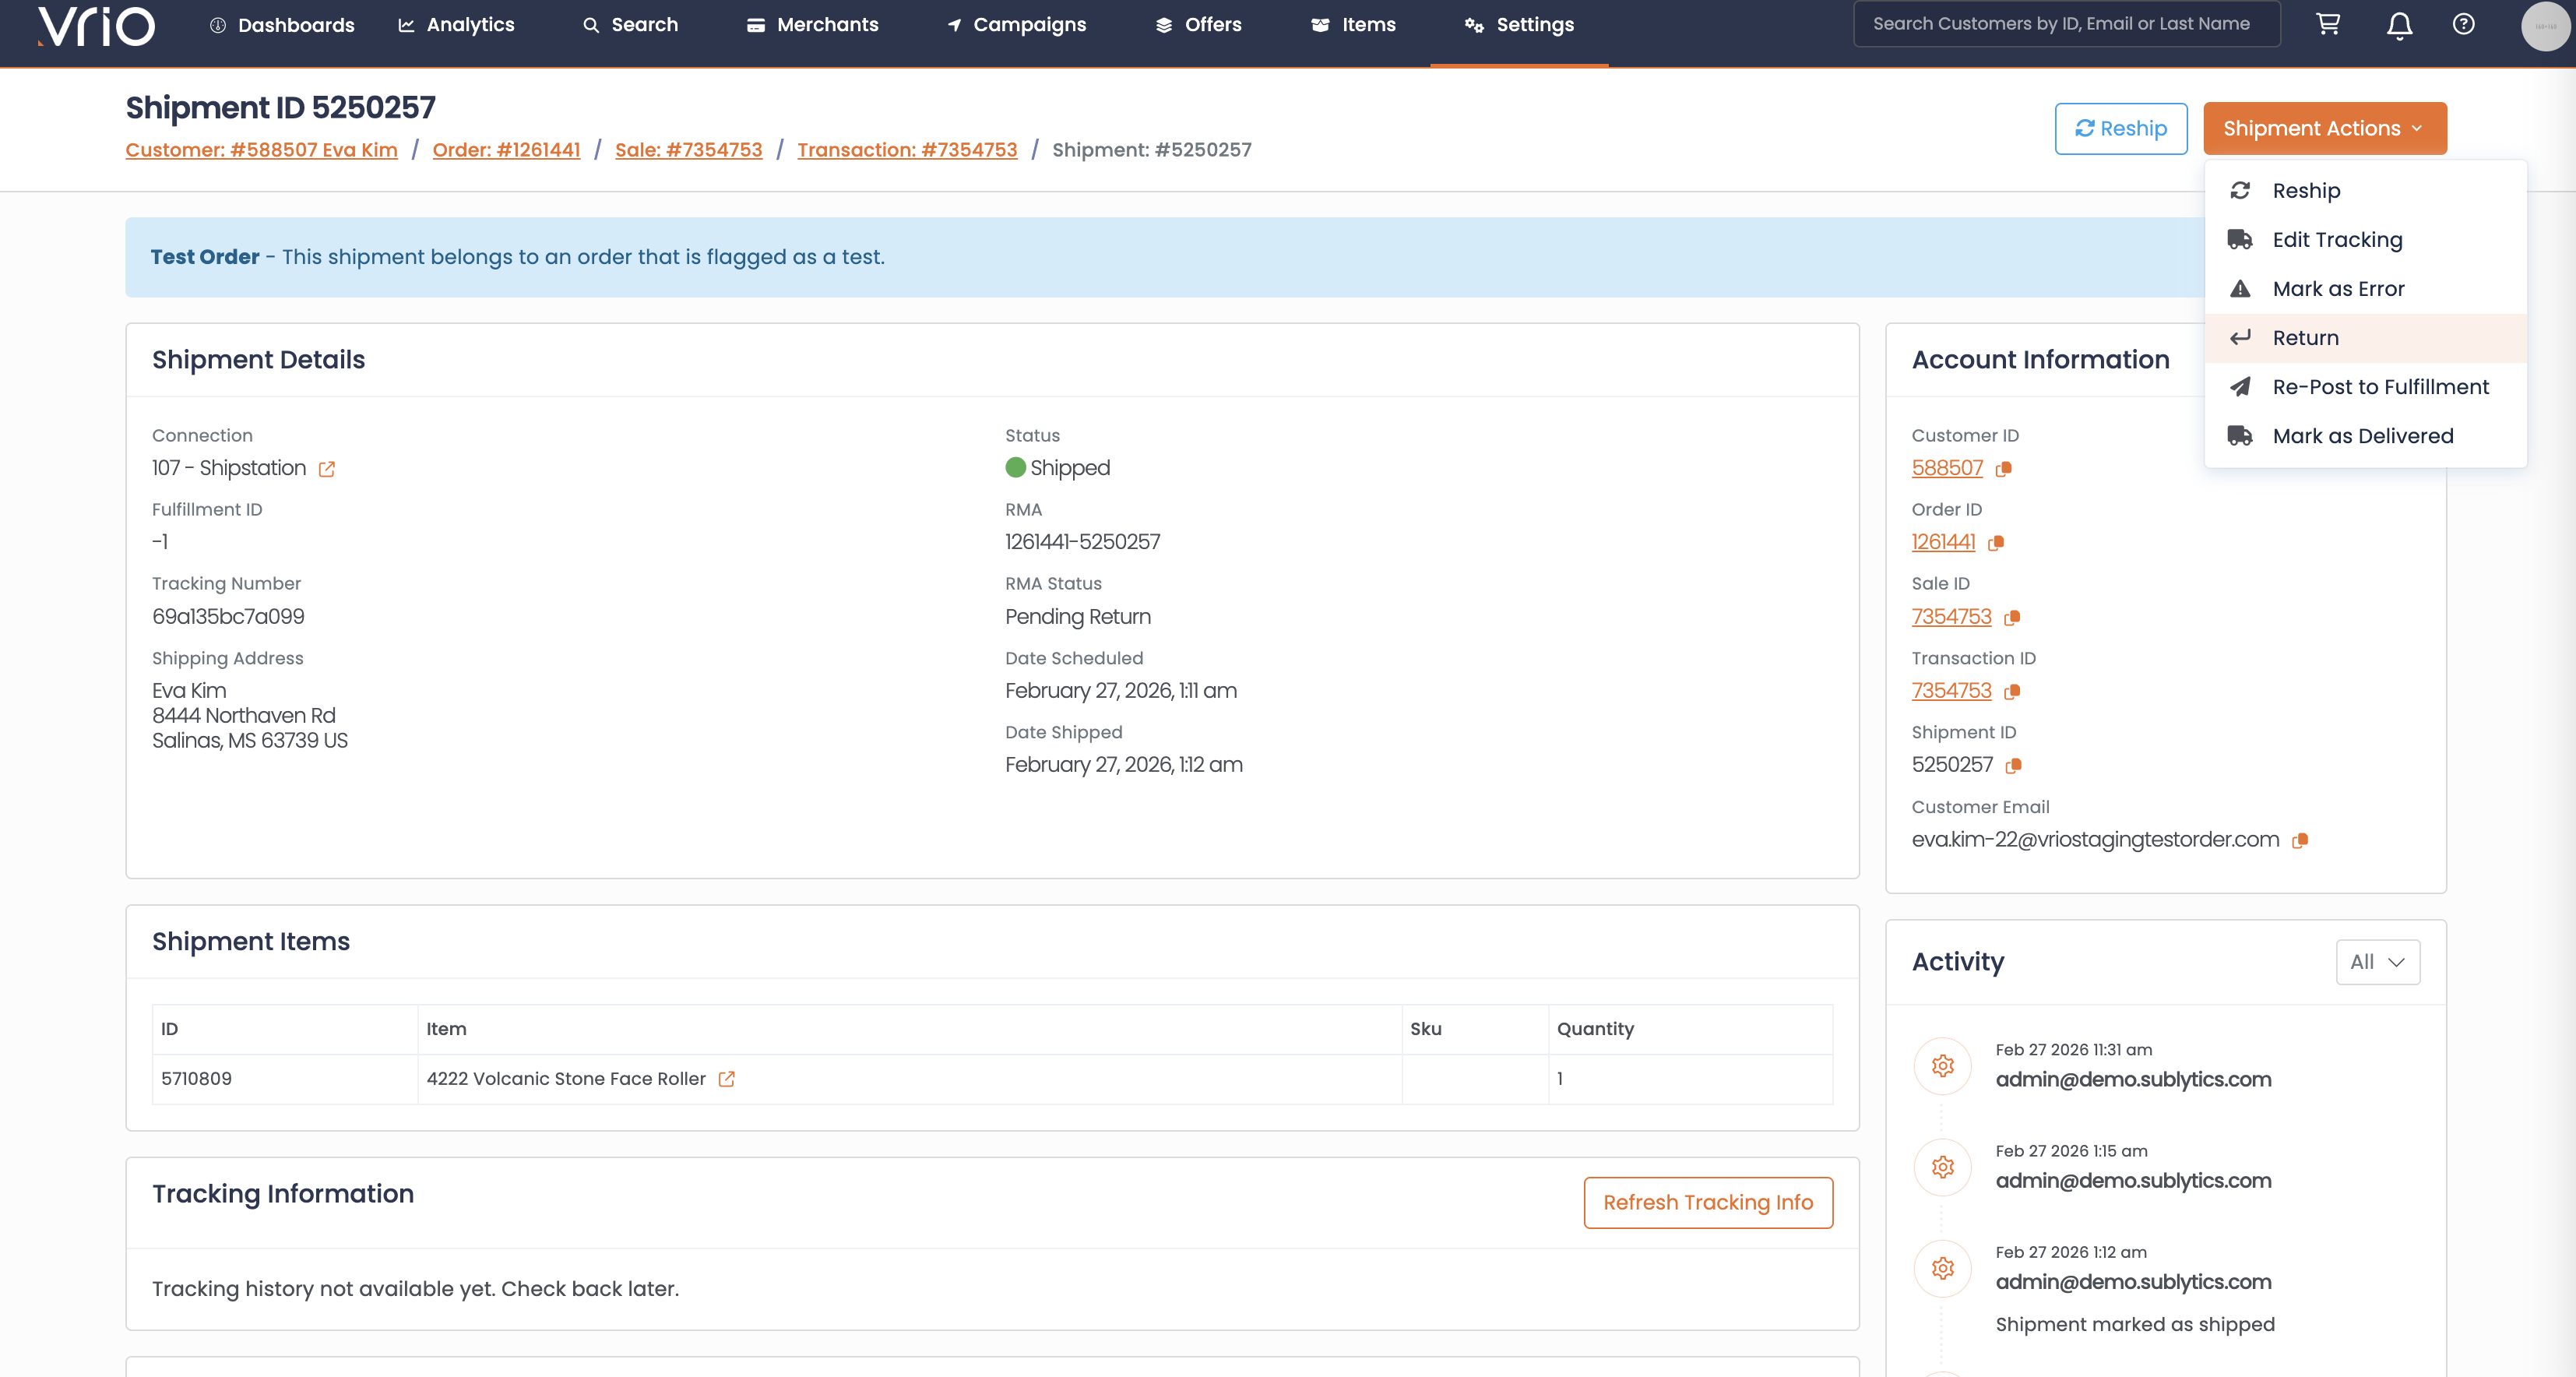
On the shipment detail page, click RMA from the Shipment Actions.
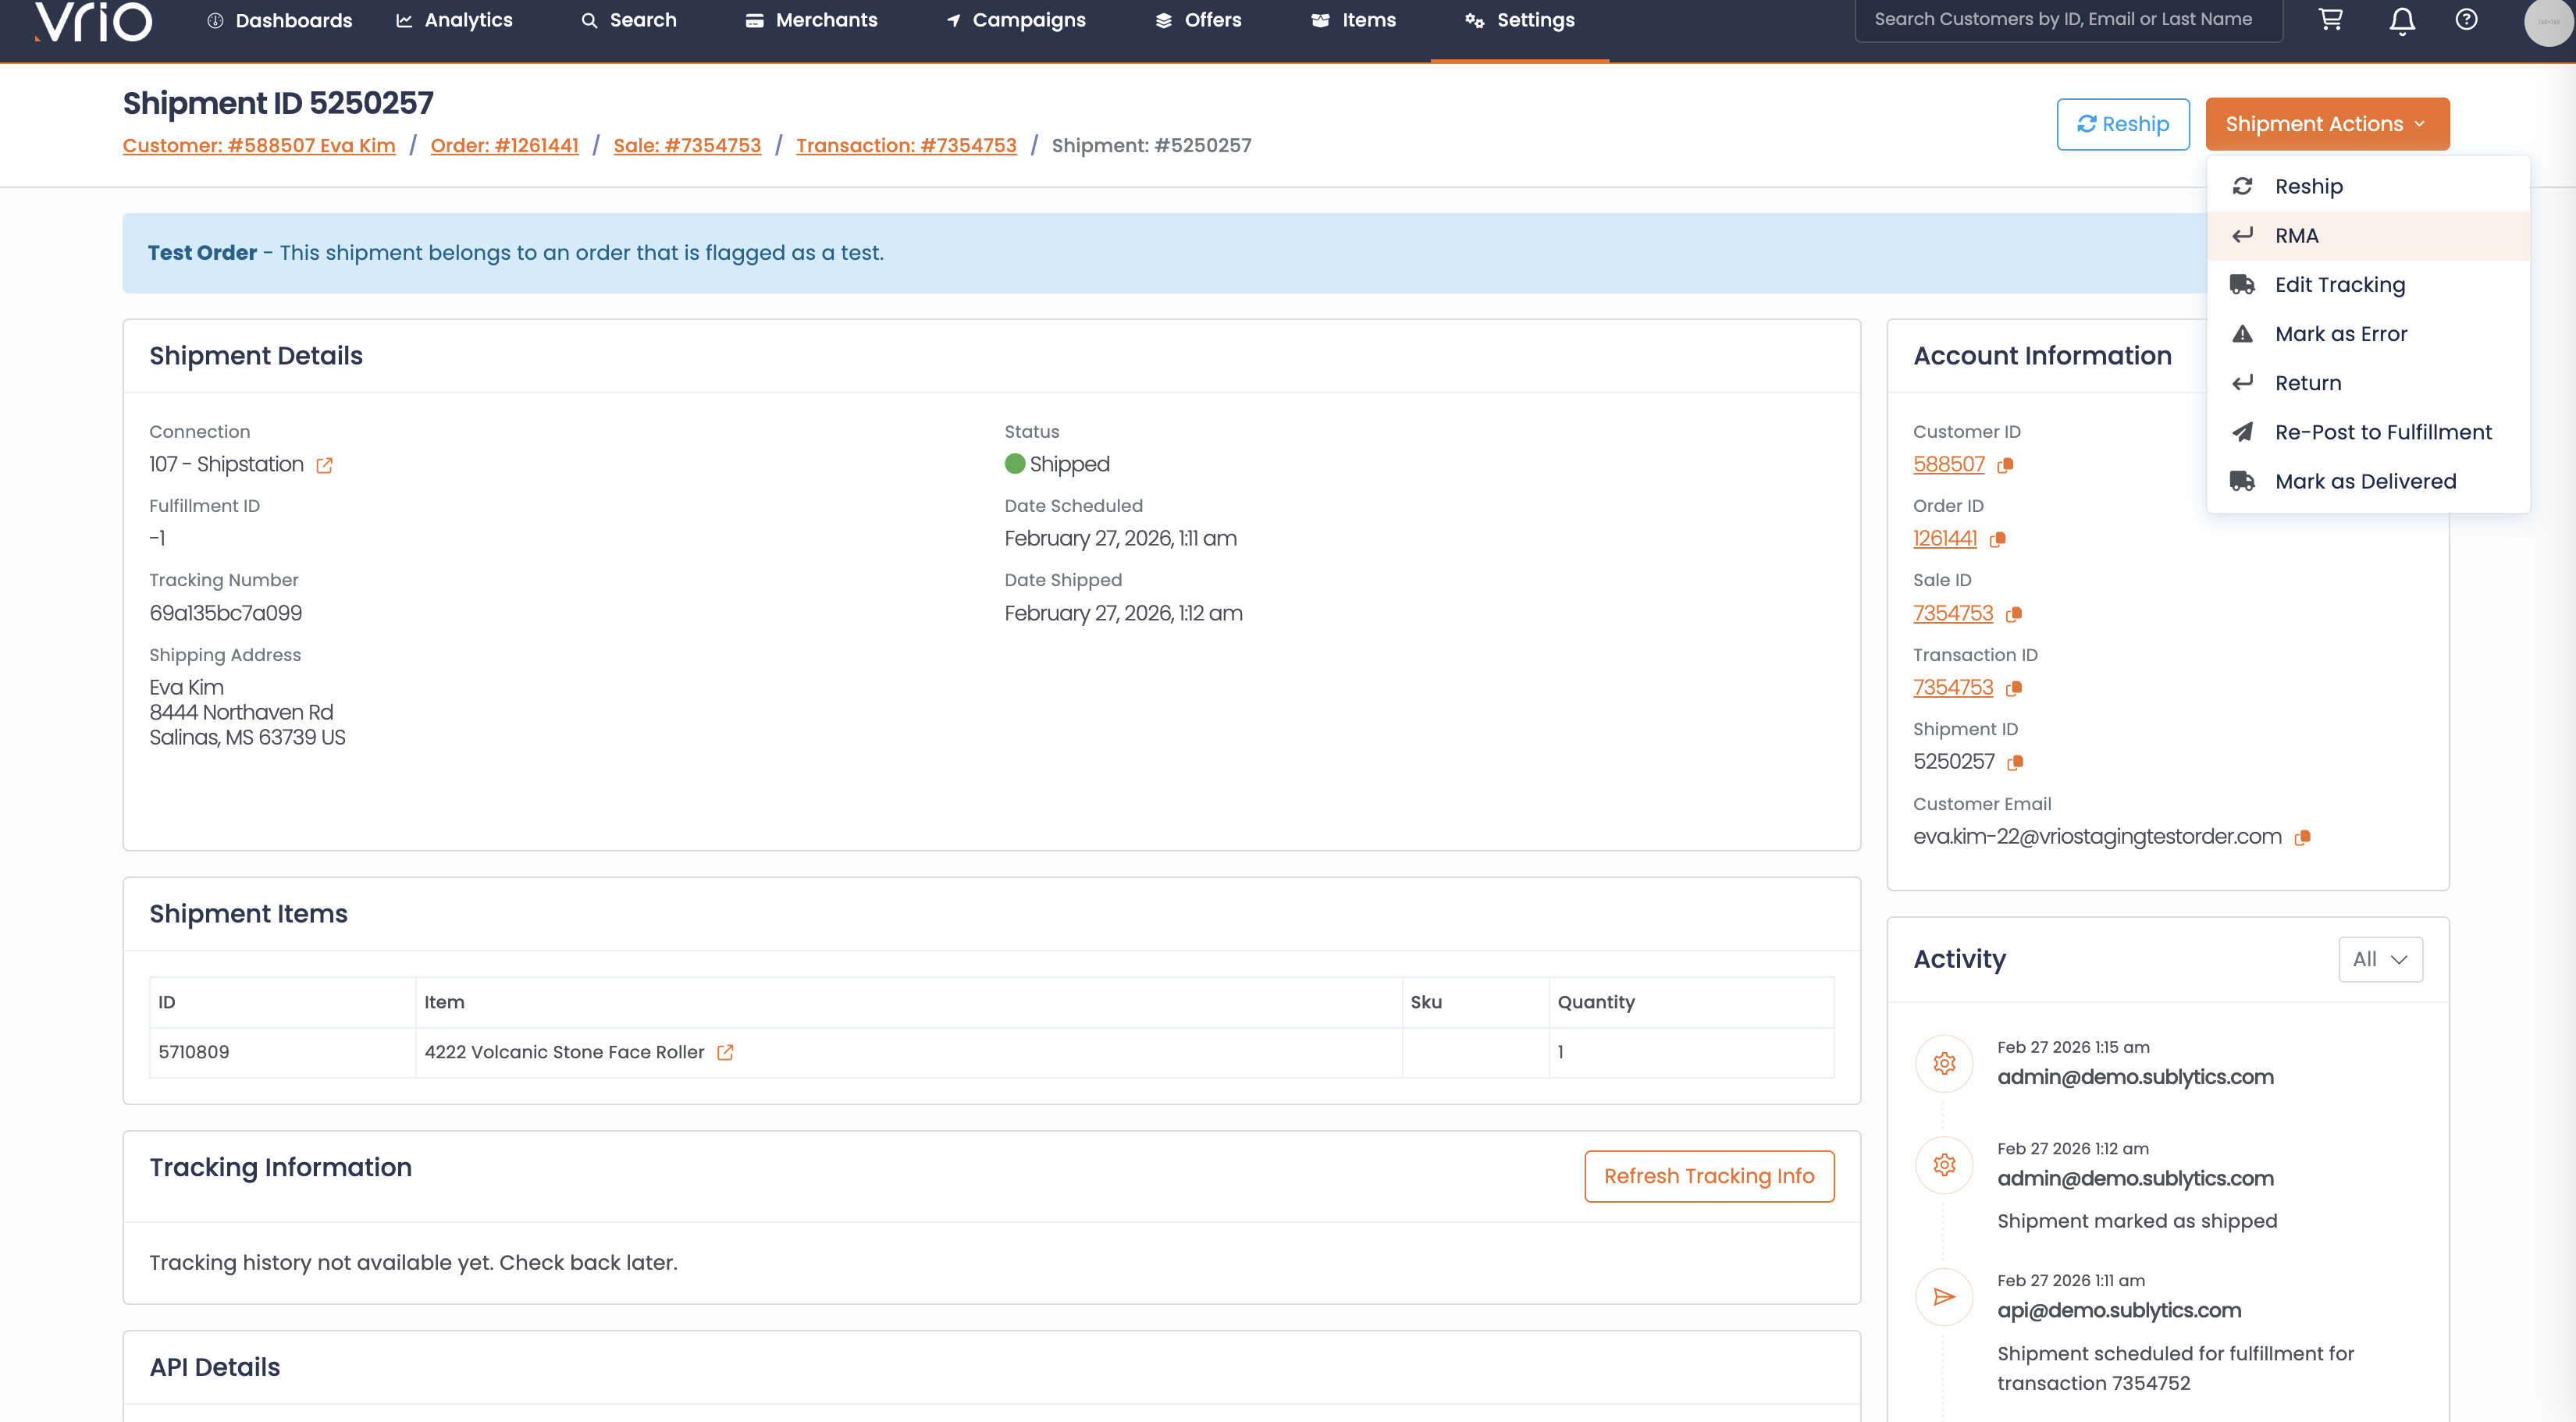
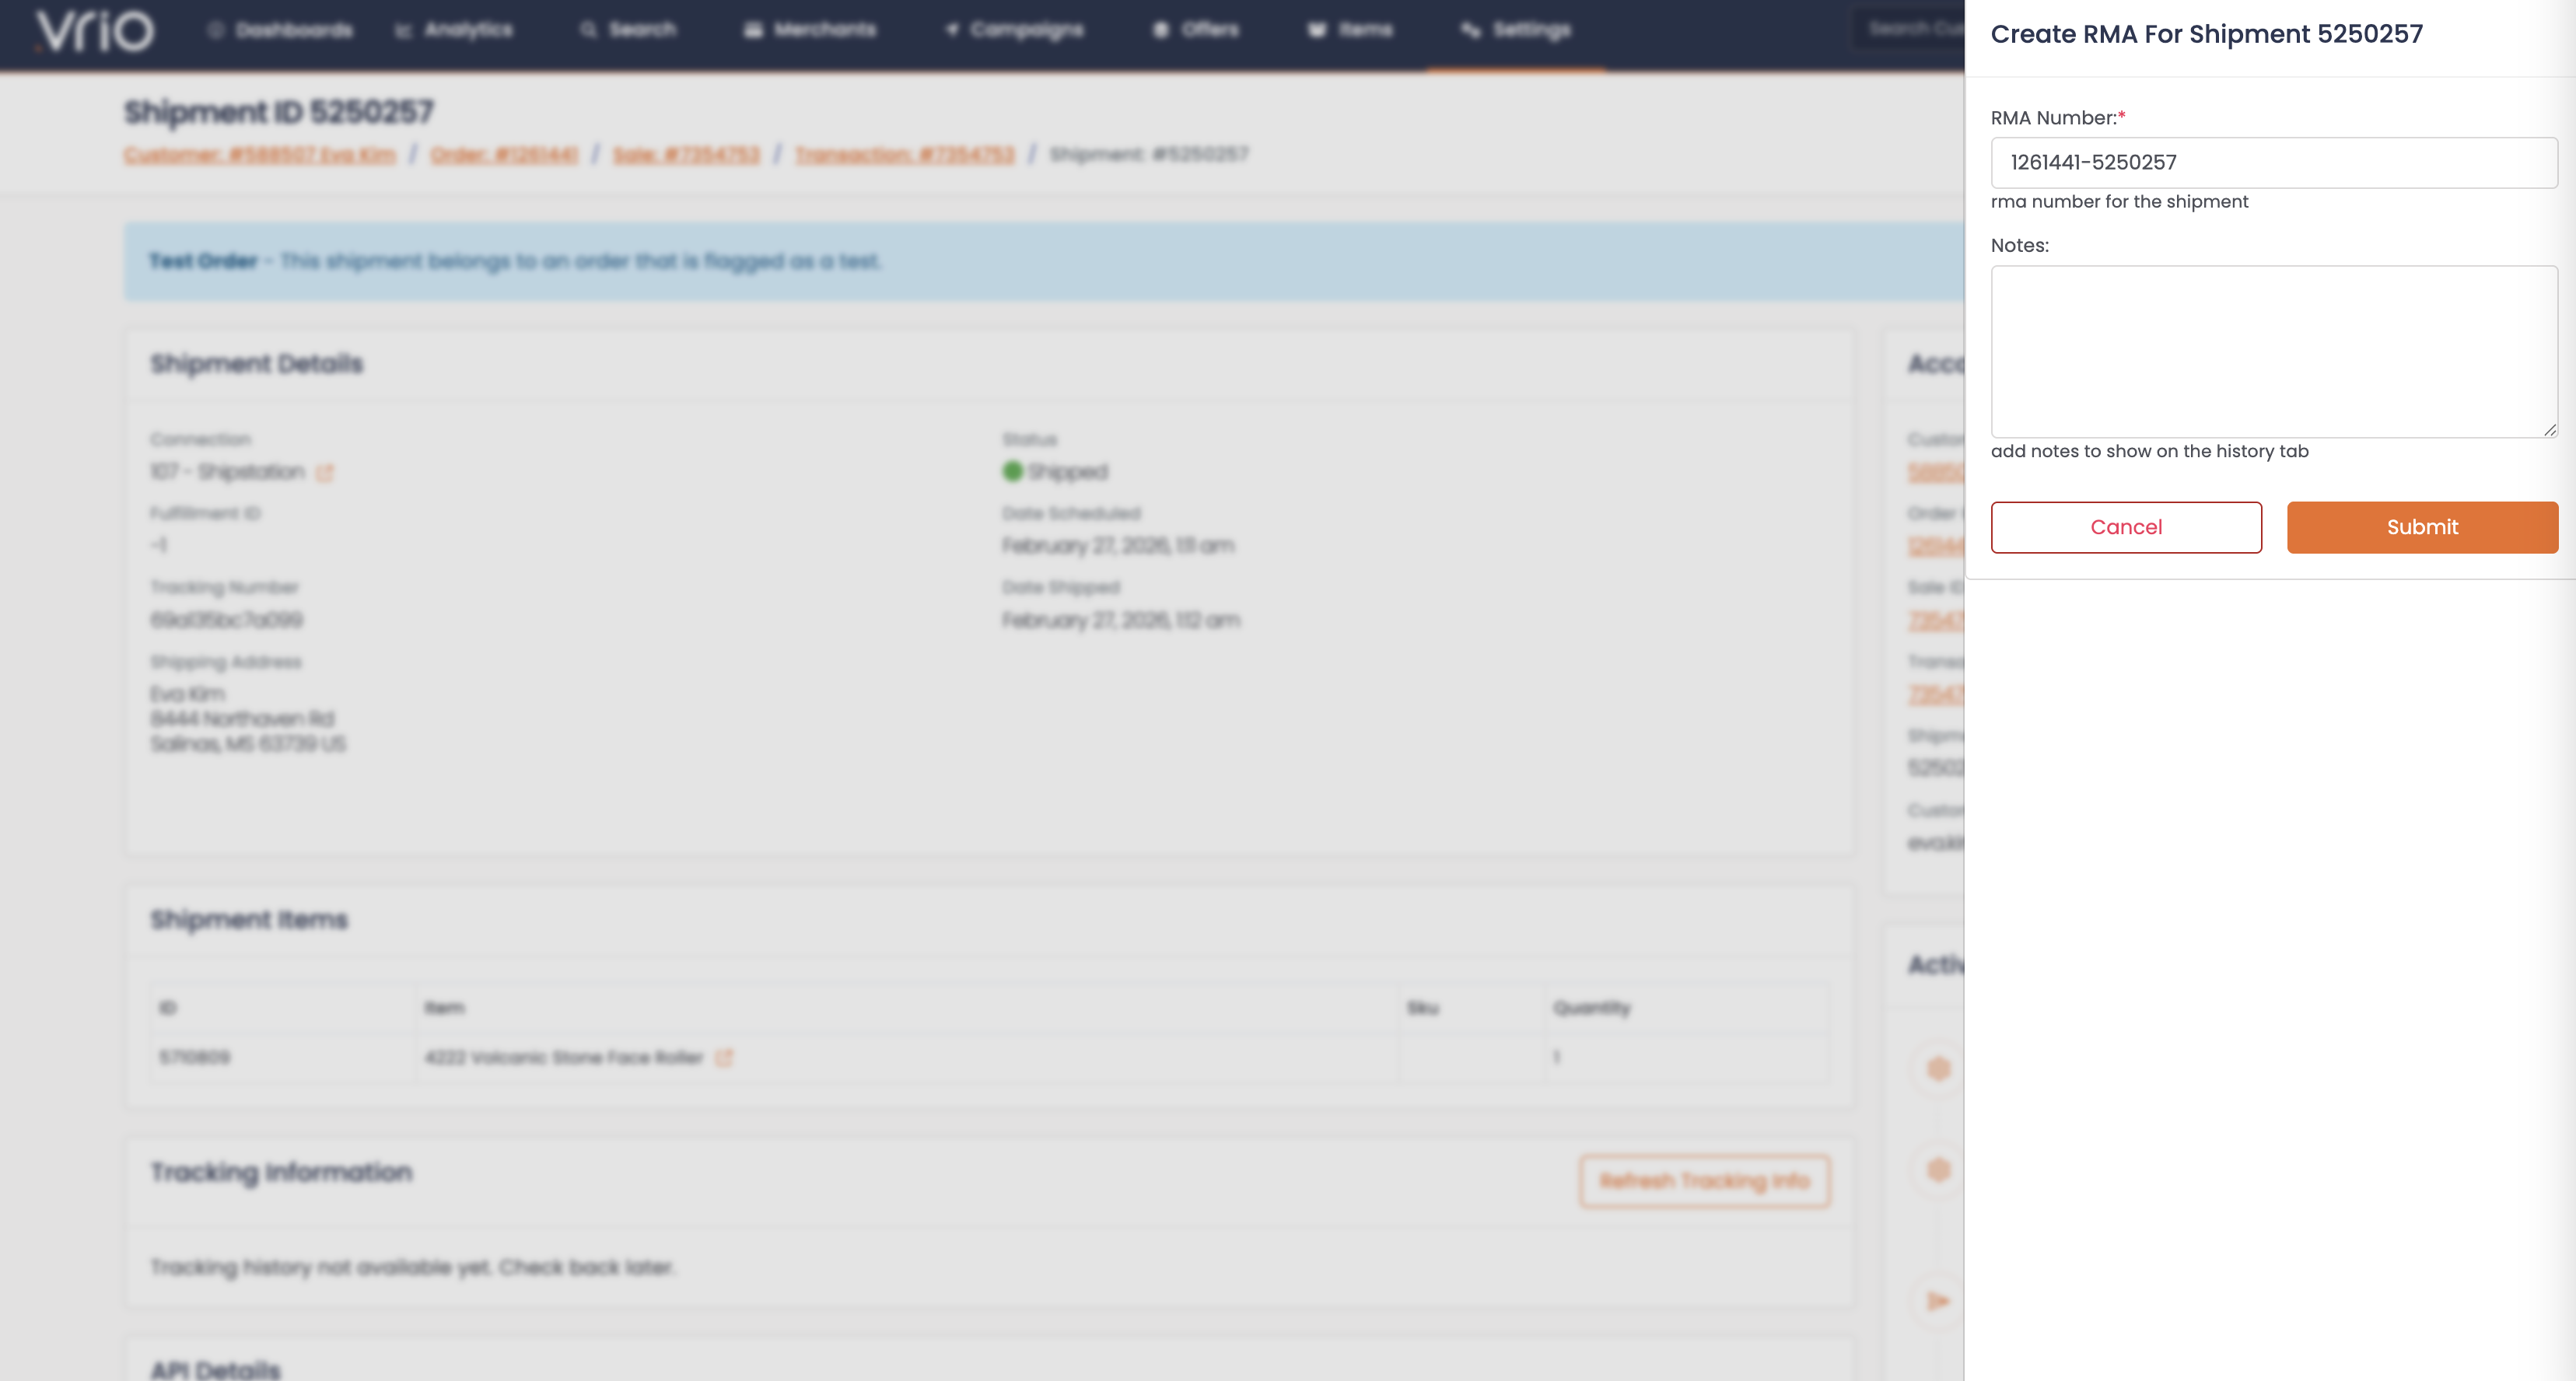
Step 3: Complete the RMA Form
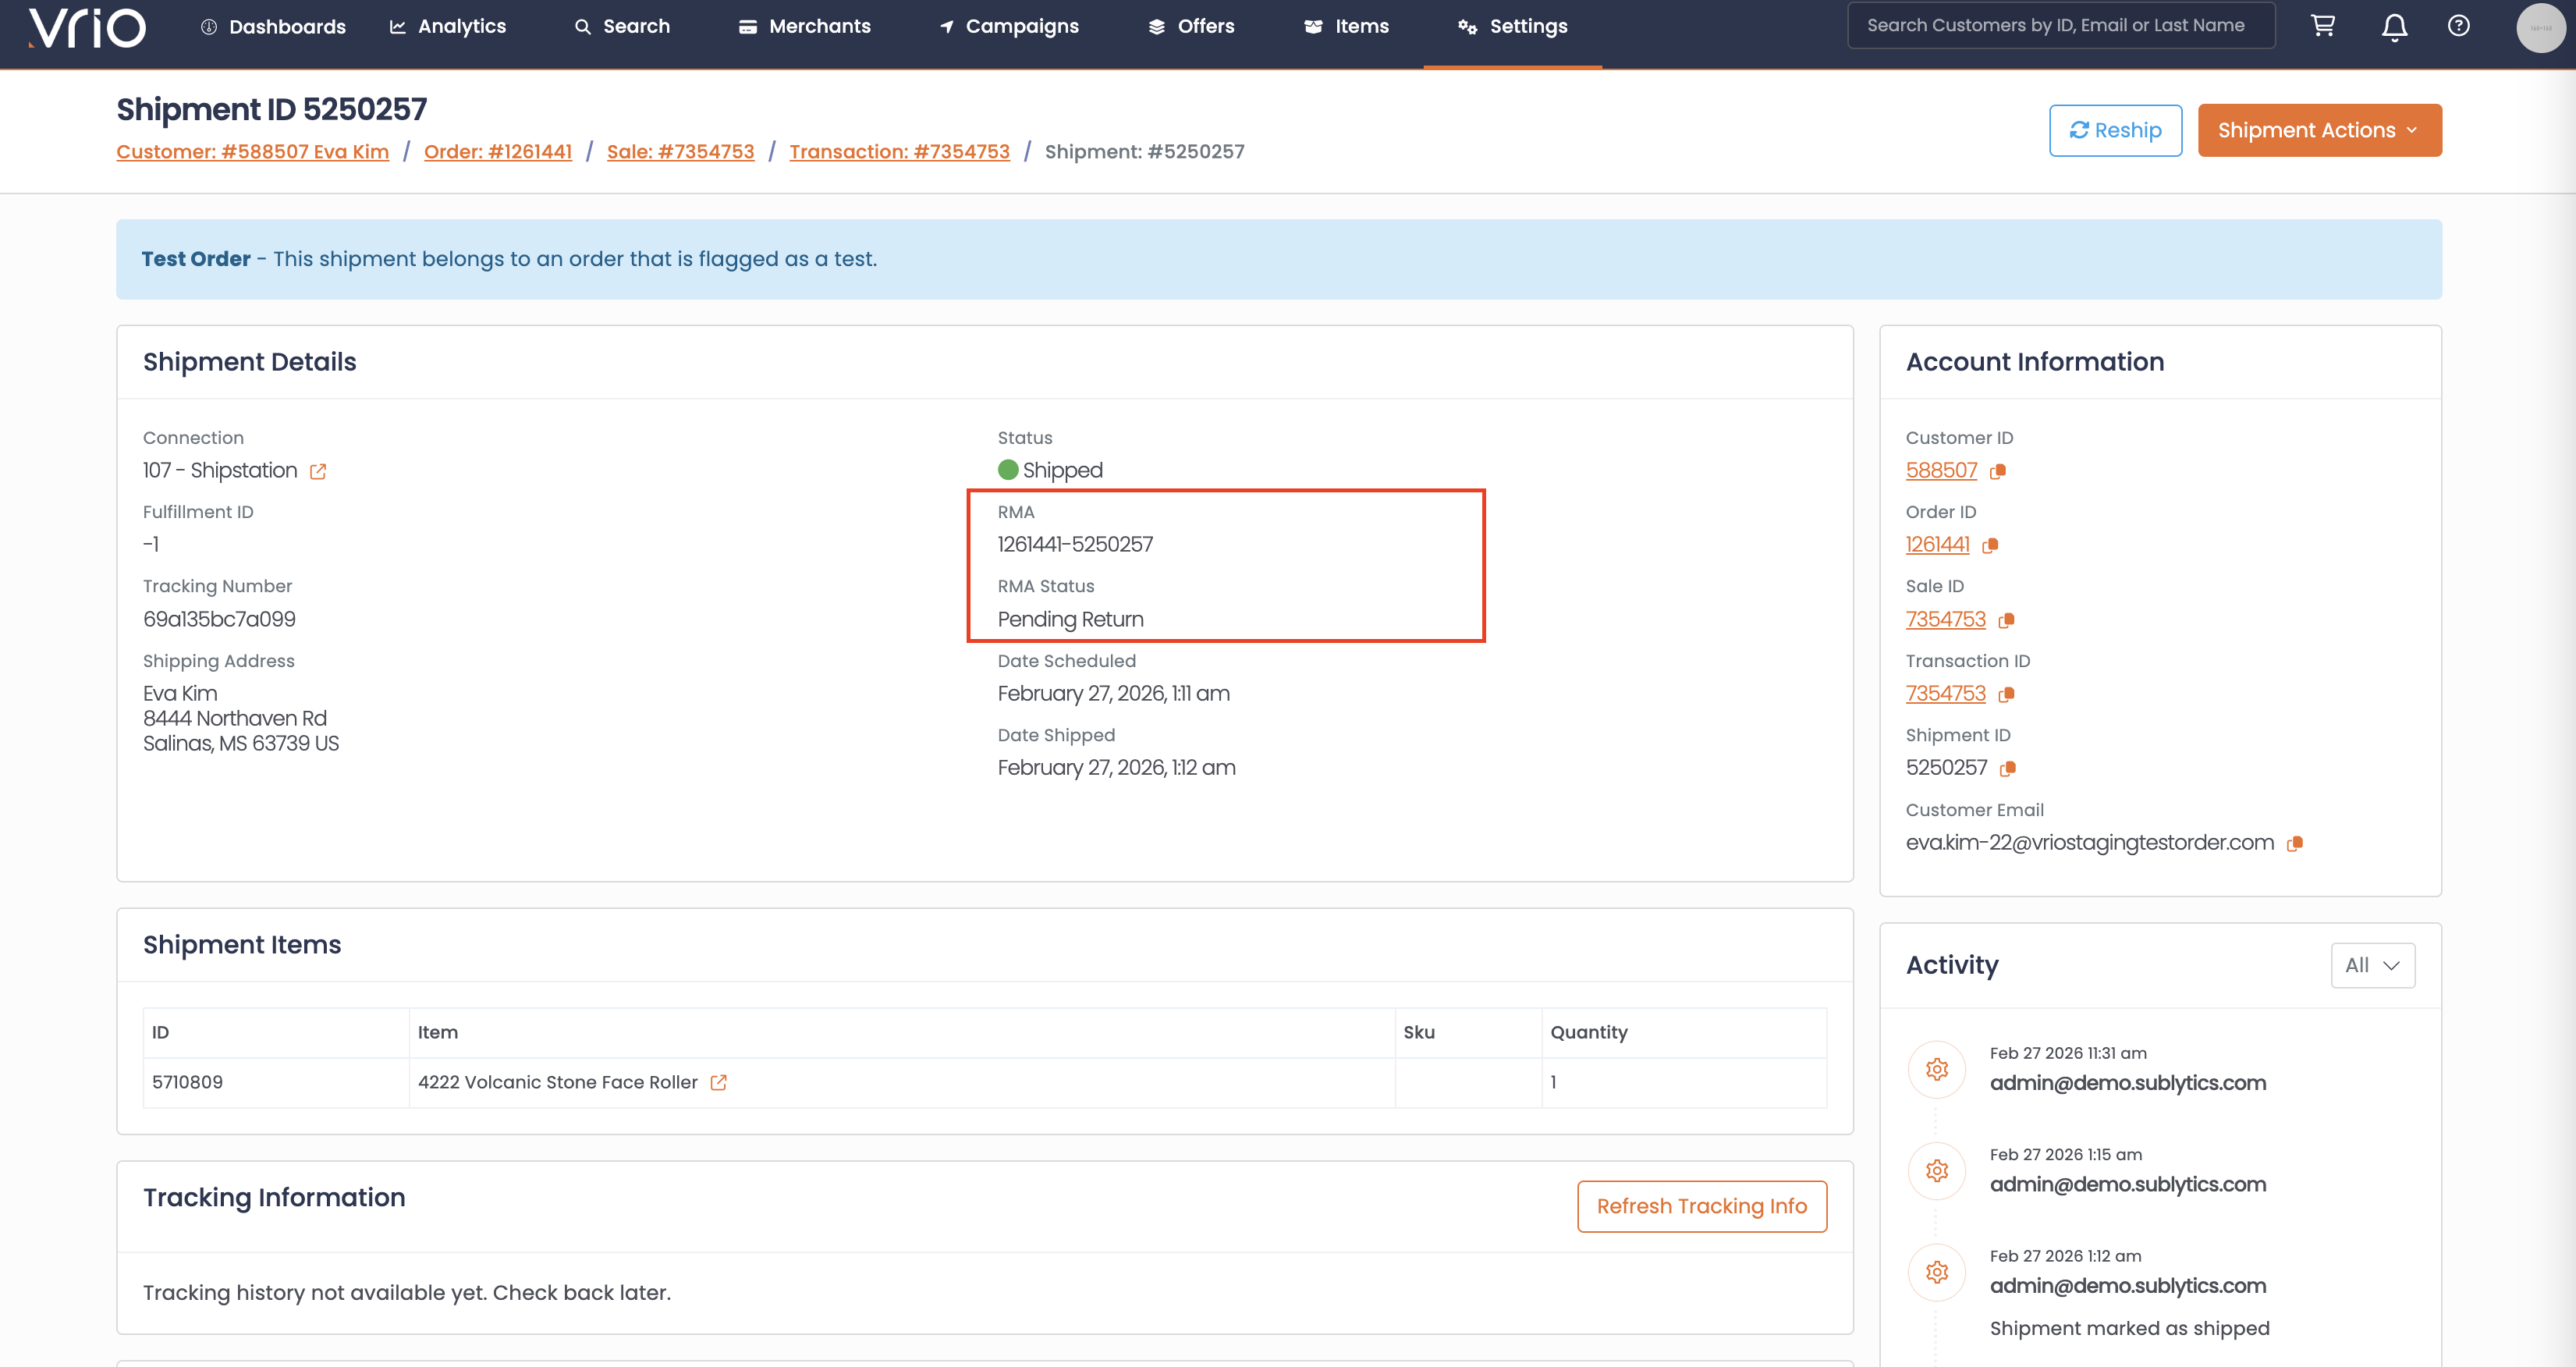
- RMA Number — Automatically populated. This is the number you provide to the customer and warehouse.
- Cancel Recurring — Checked by default. If unchecked, the subscription will remain active and will rely on Return Profile logic once the shipment is checked in as returned.
- Notes (optional) — Add any additional notes.
- Click Submit
What Happens After Submitting
-
RMA assigned — The RMA number is recorded on the shipment
-
Subscription cancelled — If "Cancel Recurring" is checked, the associated subscription is cancelled
-
RMA responder sent — An RMA notification is sent to the customer, if configured at the offer or campaign level
Check in a Return
Once a customer has returned a package, mark the shipment as returned to trigger Return Profile logic.
If you do not require the product to be returnedYou can skip the RMA step and immediately check in a return. This marks the shipment as returned and runs the Return Profile logic.
Prerequisites
The Return action is available when all of the following conditions are met:
| Condition | Details |
|---|---|
| Shipment is completed | The shipment must have been shipped (has a completion date) |
| Shipment is not already returned | The shipment has not already been marked as returned |
| Shipment is not cancelled | The shipment has not been cancelled |
| Shipment is not skipped | The shipment has not been skipped |
| Items available to return | At least one item on the shipment has not already been returned |
How to Check in a Return
Step 1: Navigate to the Shipment
Navigate to the shipment using the same methods described above (from the Customer Page or Shipments List).
Step 2: Open the Return Form
On the shipment detail page, click Return from the Shipment Actions.
Step 3: Complete the Return Form
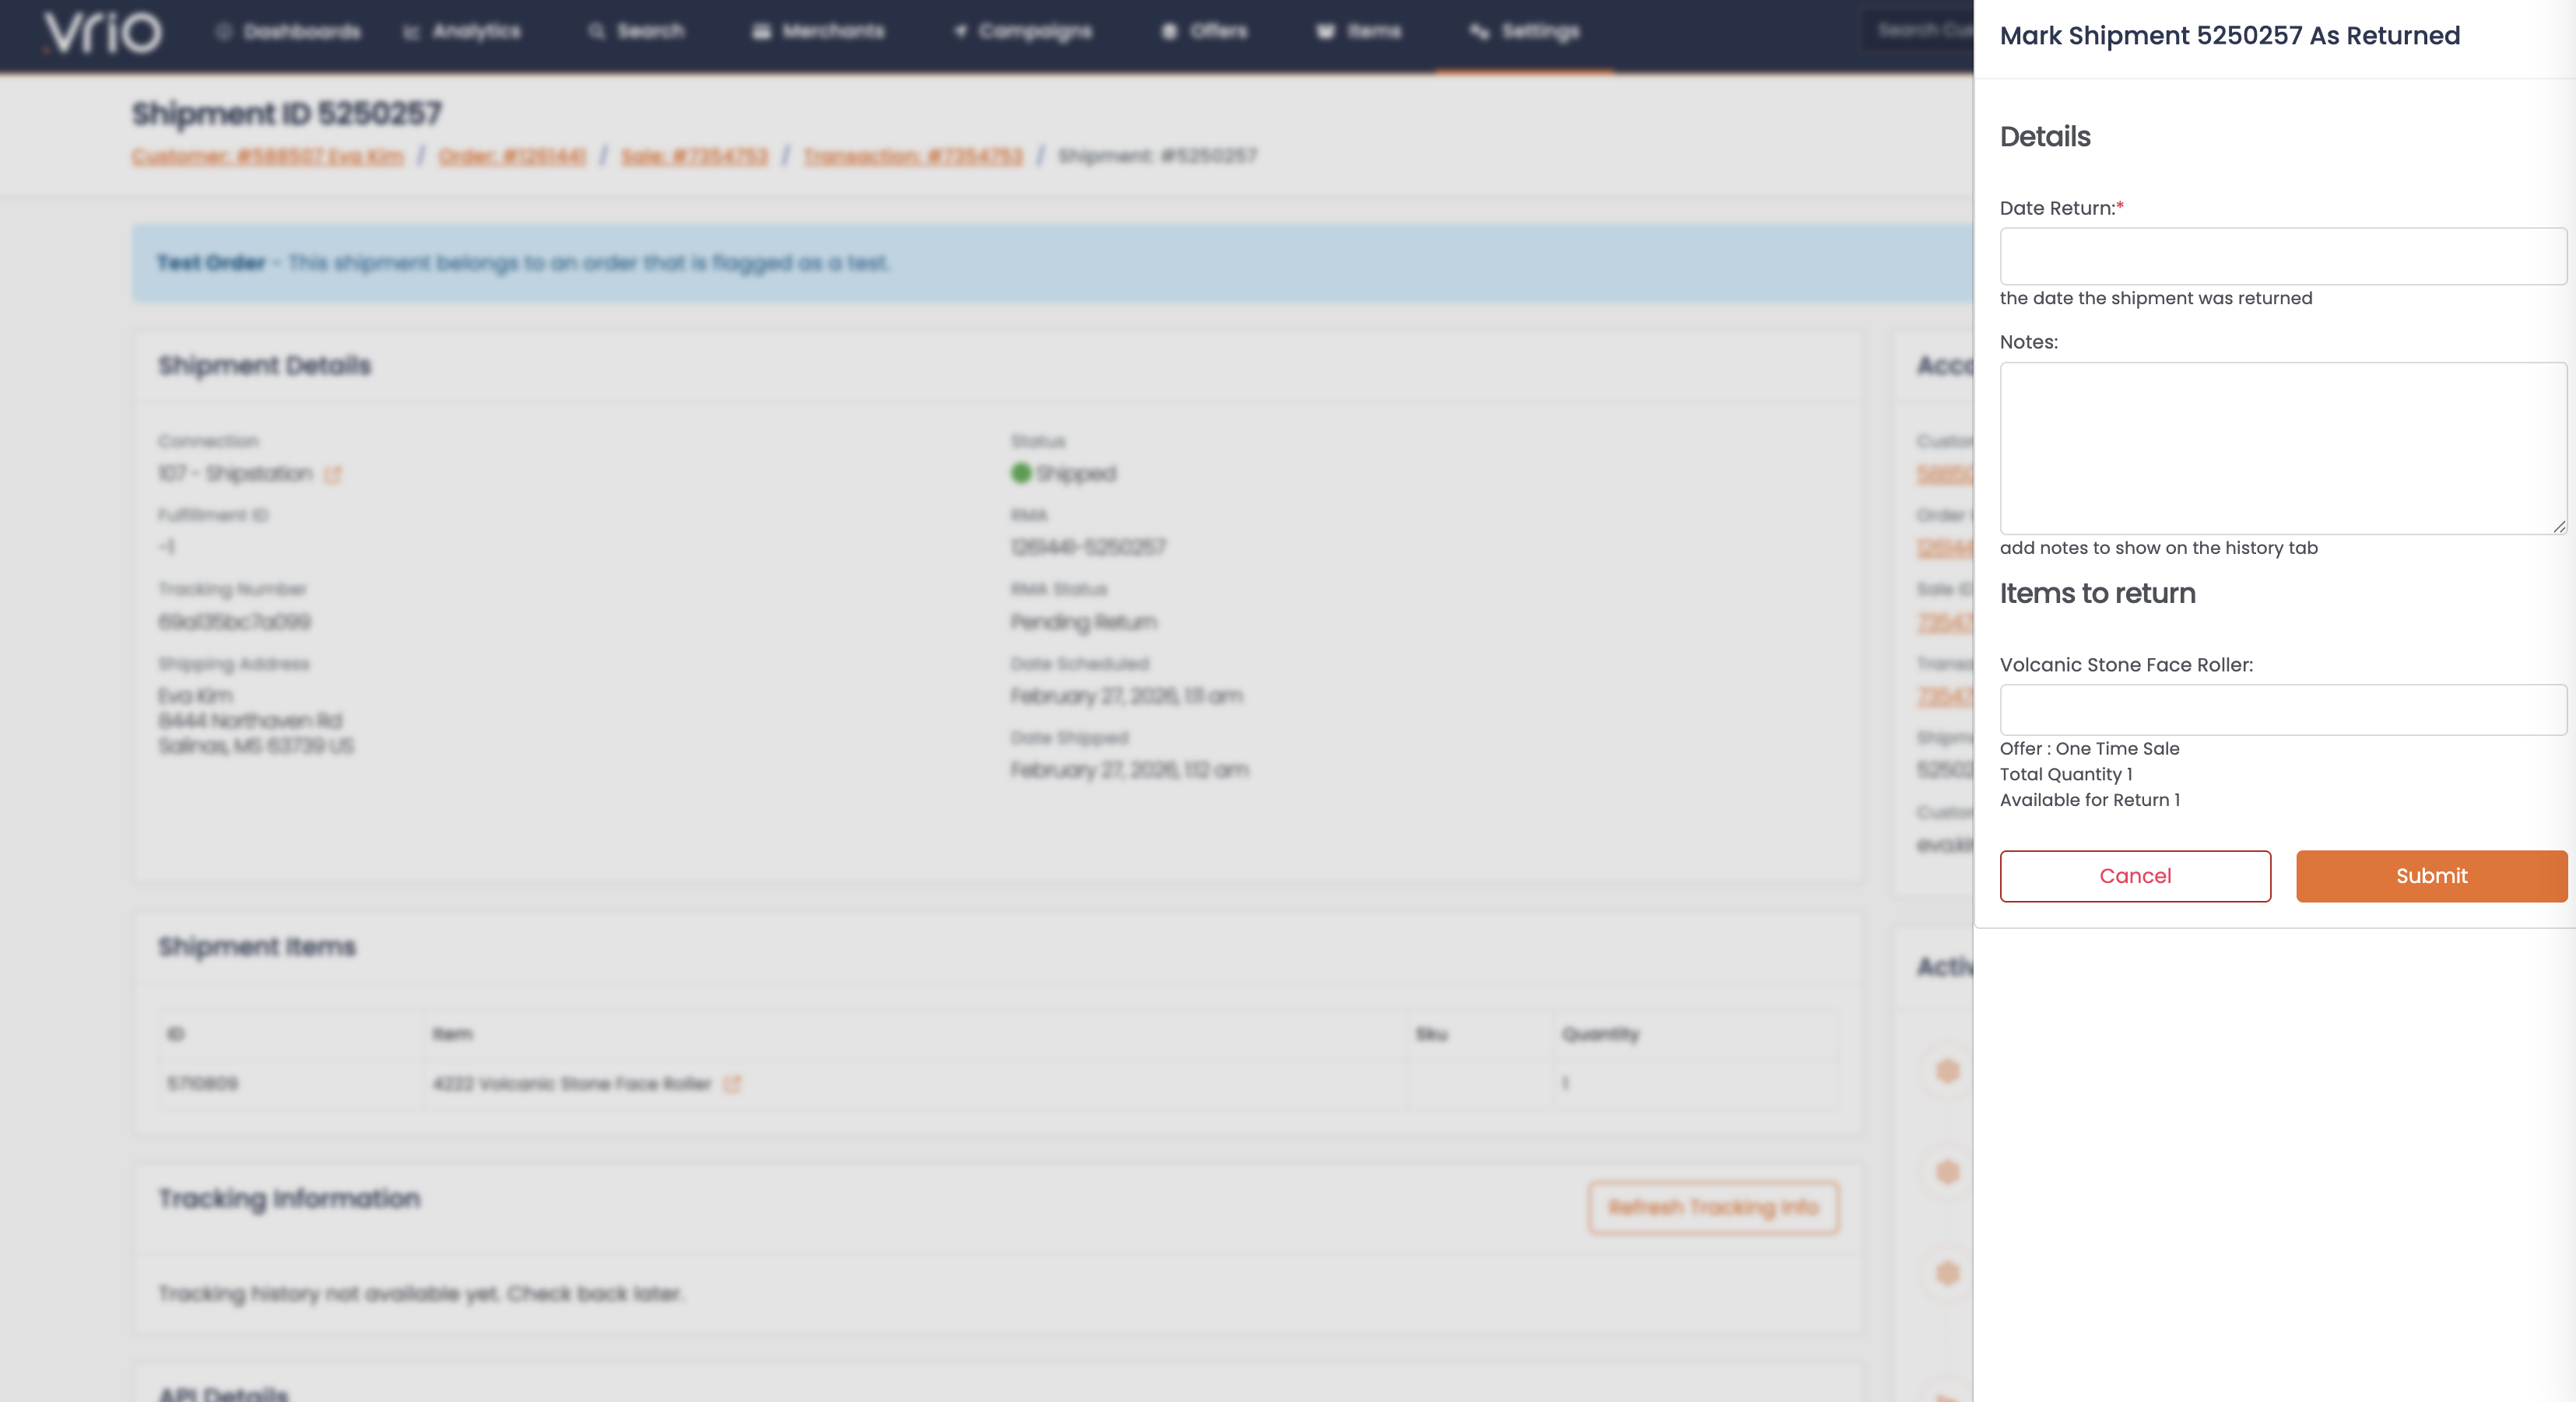
- Date Returned (required) — Select the date the product was returned
- Items Returned (required) — Select which items and quantities are being returned
- Click Submit
What Happens After Submitting
- Items marked as returned — The selected items are marked as returned with the return date
- Return responder sent — A return notification is sent to the customer, if configured at the offer or campaign level
- Return Profile logic runs — Any automated refund or cancellation logic configured in your Return Profile is triggered
If a shipment has an RMA but is never marked as a Return, the Return Profile logic will not run.
Other Ways to Manage Returns
- RMA via API — POST /shipments/{id}/rma to generate an RMA programmatically
- Return via API — POST /shipments/{id}/return to check in a return programmatically
FAQ
Q: Can I generate an RMA on a shipment that hasn't shipped yet?
A: Yes. An RMA number can be generated at any time as long as the shipment doesn't already have one and isn't cancelled or skipped. However, the Return (check-in) action requires the shipment to be in Shipped status.
Q: What if I don't use Return Profiles?
A: If you are not using a Return Profile, your support team will need to manually handle refunds and cancellations according to your policy after marking a shipment as returned.
Q: Can I return individual items from a multi-item shipment?
A: Yes. When checking in a return, you can select specific items and quantities. You don't have to return all items at once.