Adding a User
User permissions will allow you to invite additional team members and partners to use the platform and gain insights into the parts of your business that affect them most. You can organize users based upon job function, experience level, marketing type and any other factors that differentiate their role in your business.
The permissions will provide limited access to specific reports and report views, as well as dashboards, connections, settings and more. The below guide will walk through the setting of individual User Permissions.
User Types
There are four different user types. This will determine capabilities of the user.
| Type | Description | Restrictions |
|---|---|---|
| User Interface | This user type has access to login to the platform. | |
| Customer | Customer Account refers to a user that would require a login to the Customer Portal. | This is for external customers to manage their subscriptions within your organization's Customer Portal. This user will not be able to login to the User Interface with this User Type. |
| Vrio API | This is the newest version API user. This user type will have access to the Vrio API. An API Key will be generated when the user is created. This API Key lives under the User (Settings -> Permission -> Users) | This user will not be able to login to the User Interface with this User Type. |
| Legacy API | This user type should only be used if your account was setup prior to September 2023. This is a legacy version API user. | This user will not be able to login to the User Interface with this User Type. |
All New API Users should be set up as a Vrio API user.
User Groups
User Groups are permission levels already defined that are assigned to individual Users. This is a way to ensure permissions are setup as expected then applied to Users as created.
User Groups can be added and permission levels adjusted.
Learn more about User Groups here.
Individual User
Adding a User
-
Select Settings in the top navigation
-
Navigate to the Permissions tab
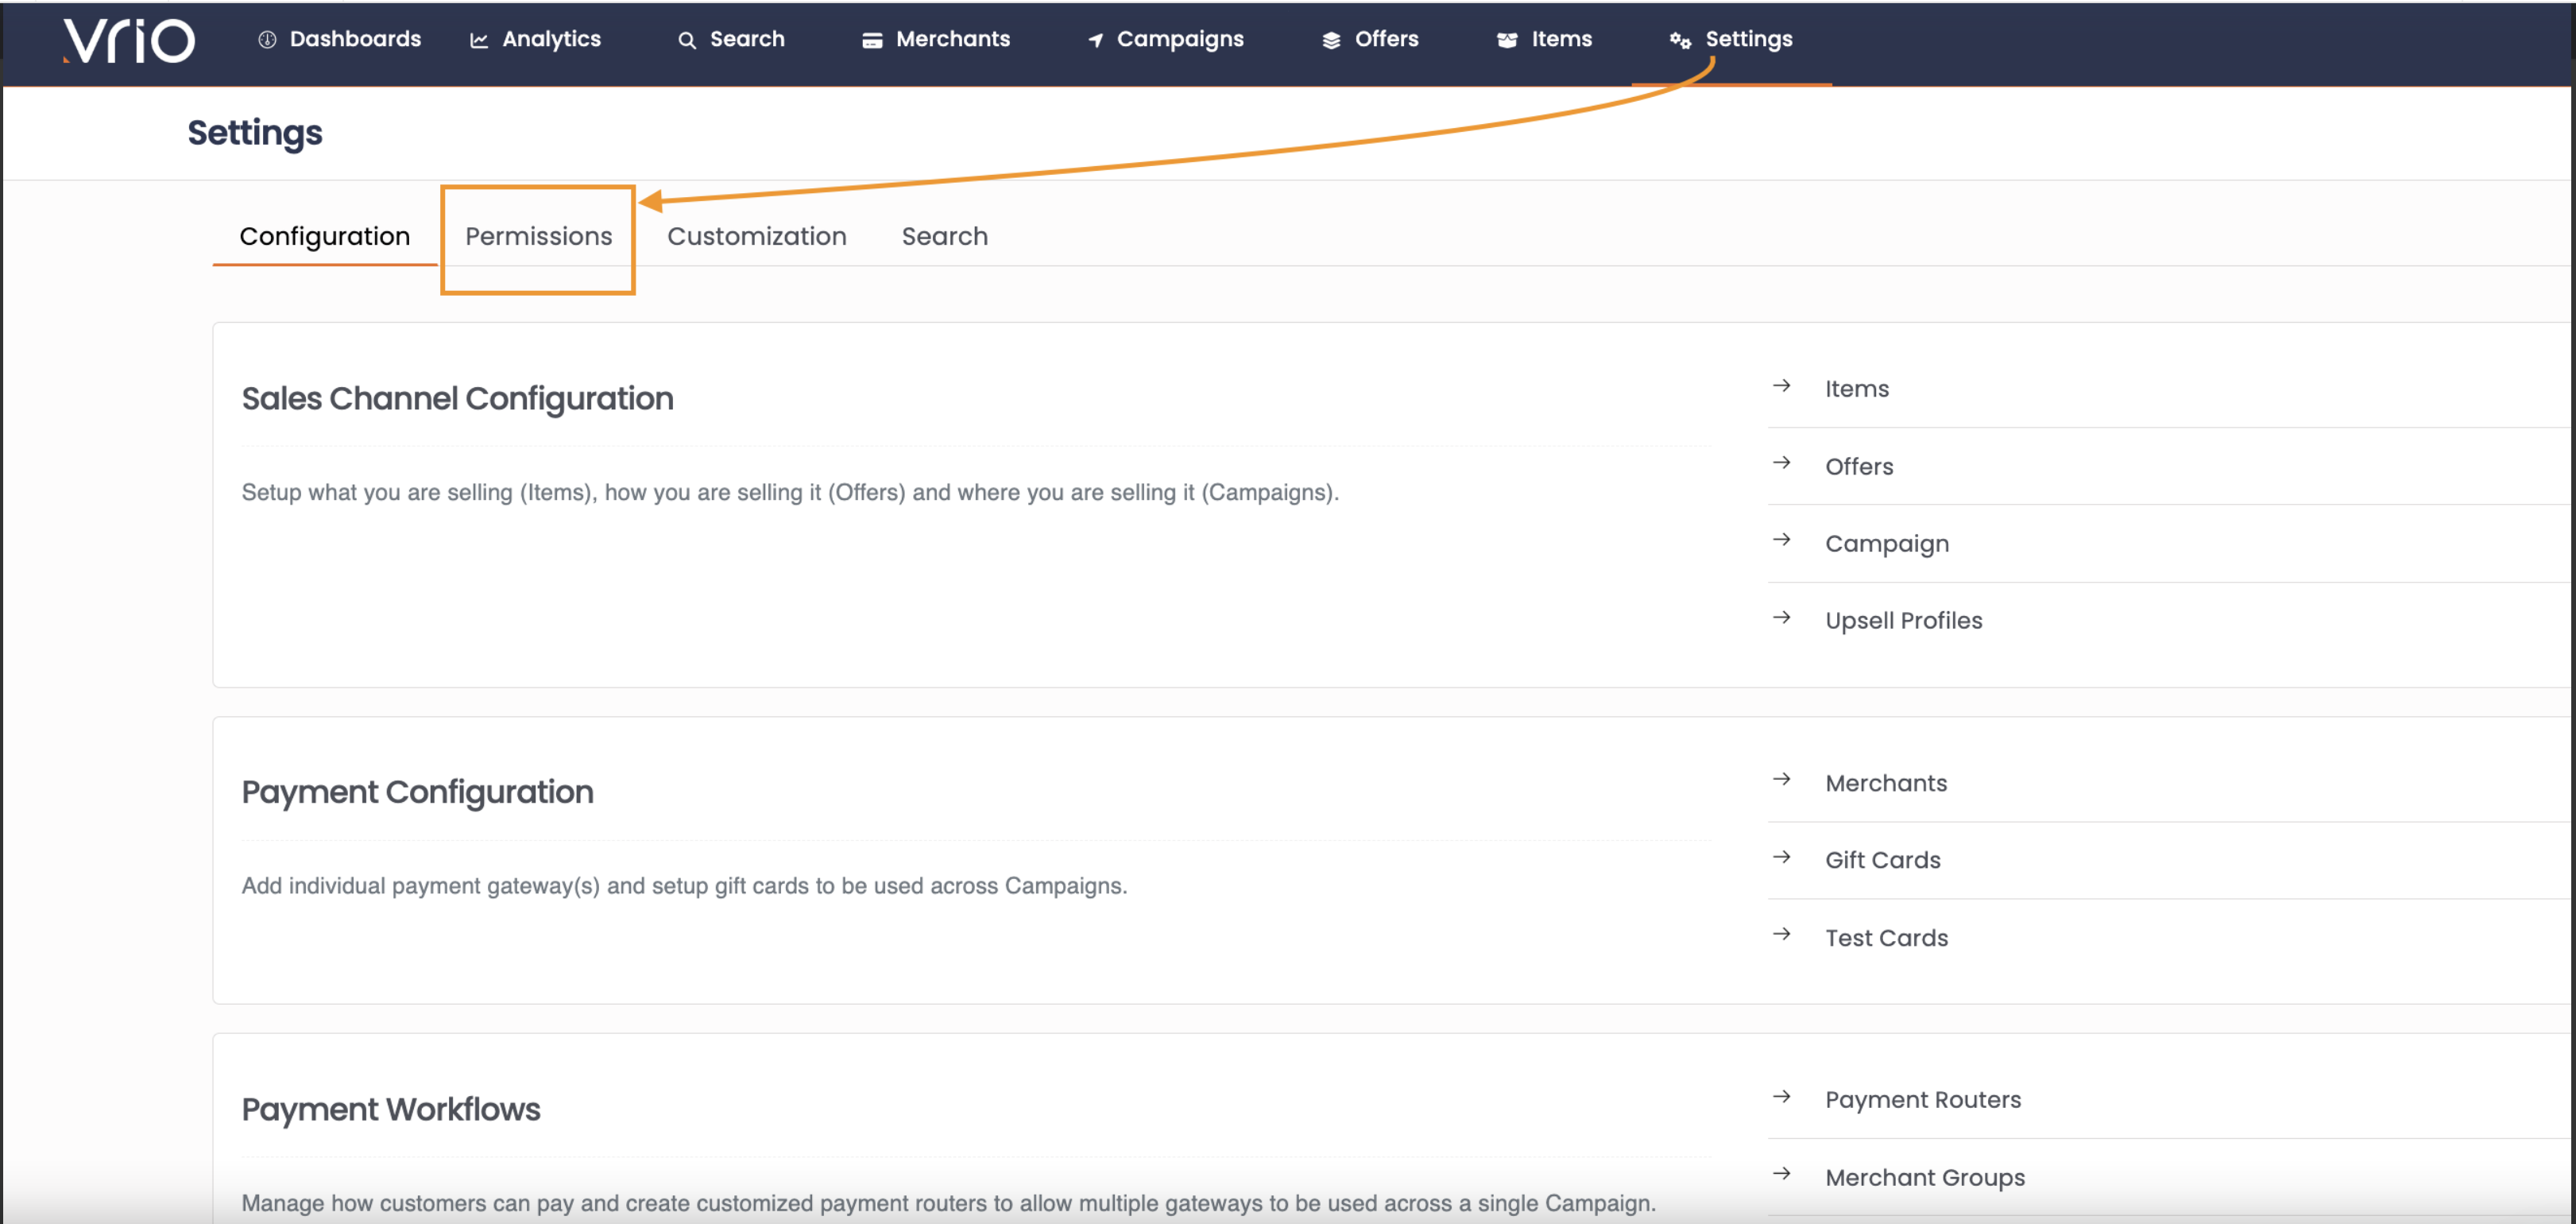
-
Select Users
-
Hit Add New User
- Enter First/Last Name & email for the user. unique email is required per user
- Select the User Group
- Set the User Type
- Send Activation email?
- If Checked, an email will be sent with a temporary password for the user to finalize setup of a unique & secure password.
- If Unchecked, you will be prompted to create the users password. If User Password is created, it can be reset within the UI.
-
Hit Submit
User Restrictions
In addition to assigning a User to a User Group for expanded or limited access, additional restrictions can be applied to the individual User level.
Individual Users may also be restricted to:
- Connections
- Campaigns
- Merchants
- Tracking1 Variable
- Offers
- IPs - IPv4 and IPv6
On the User, under the Restrictions Tab, you can implement these additional restrictions.
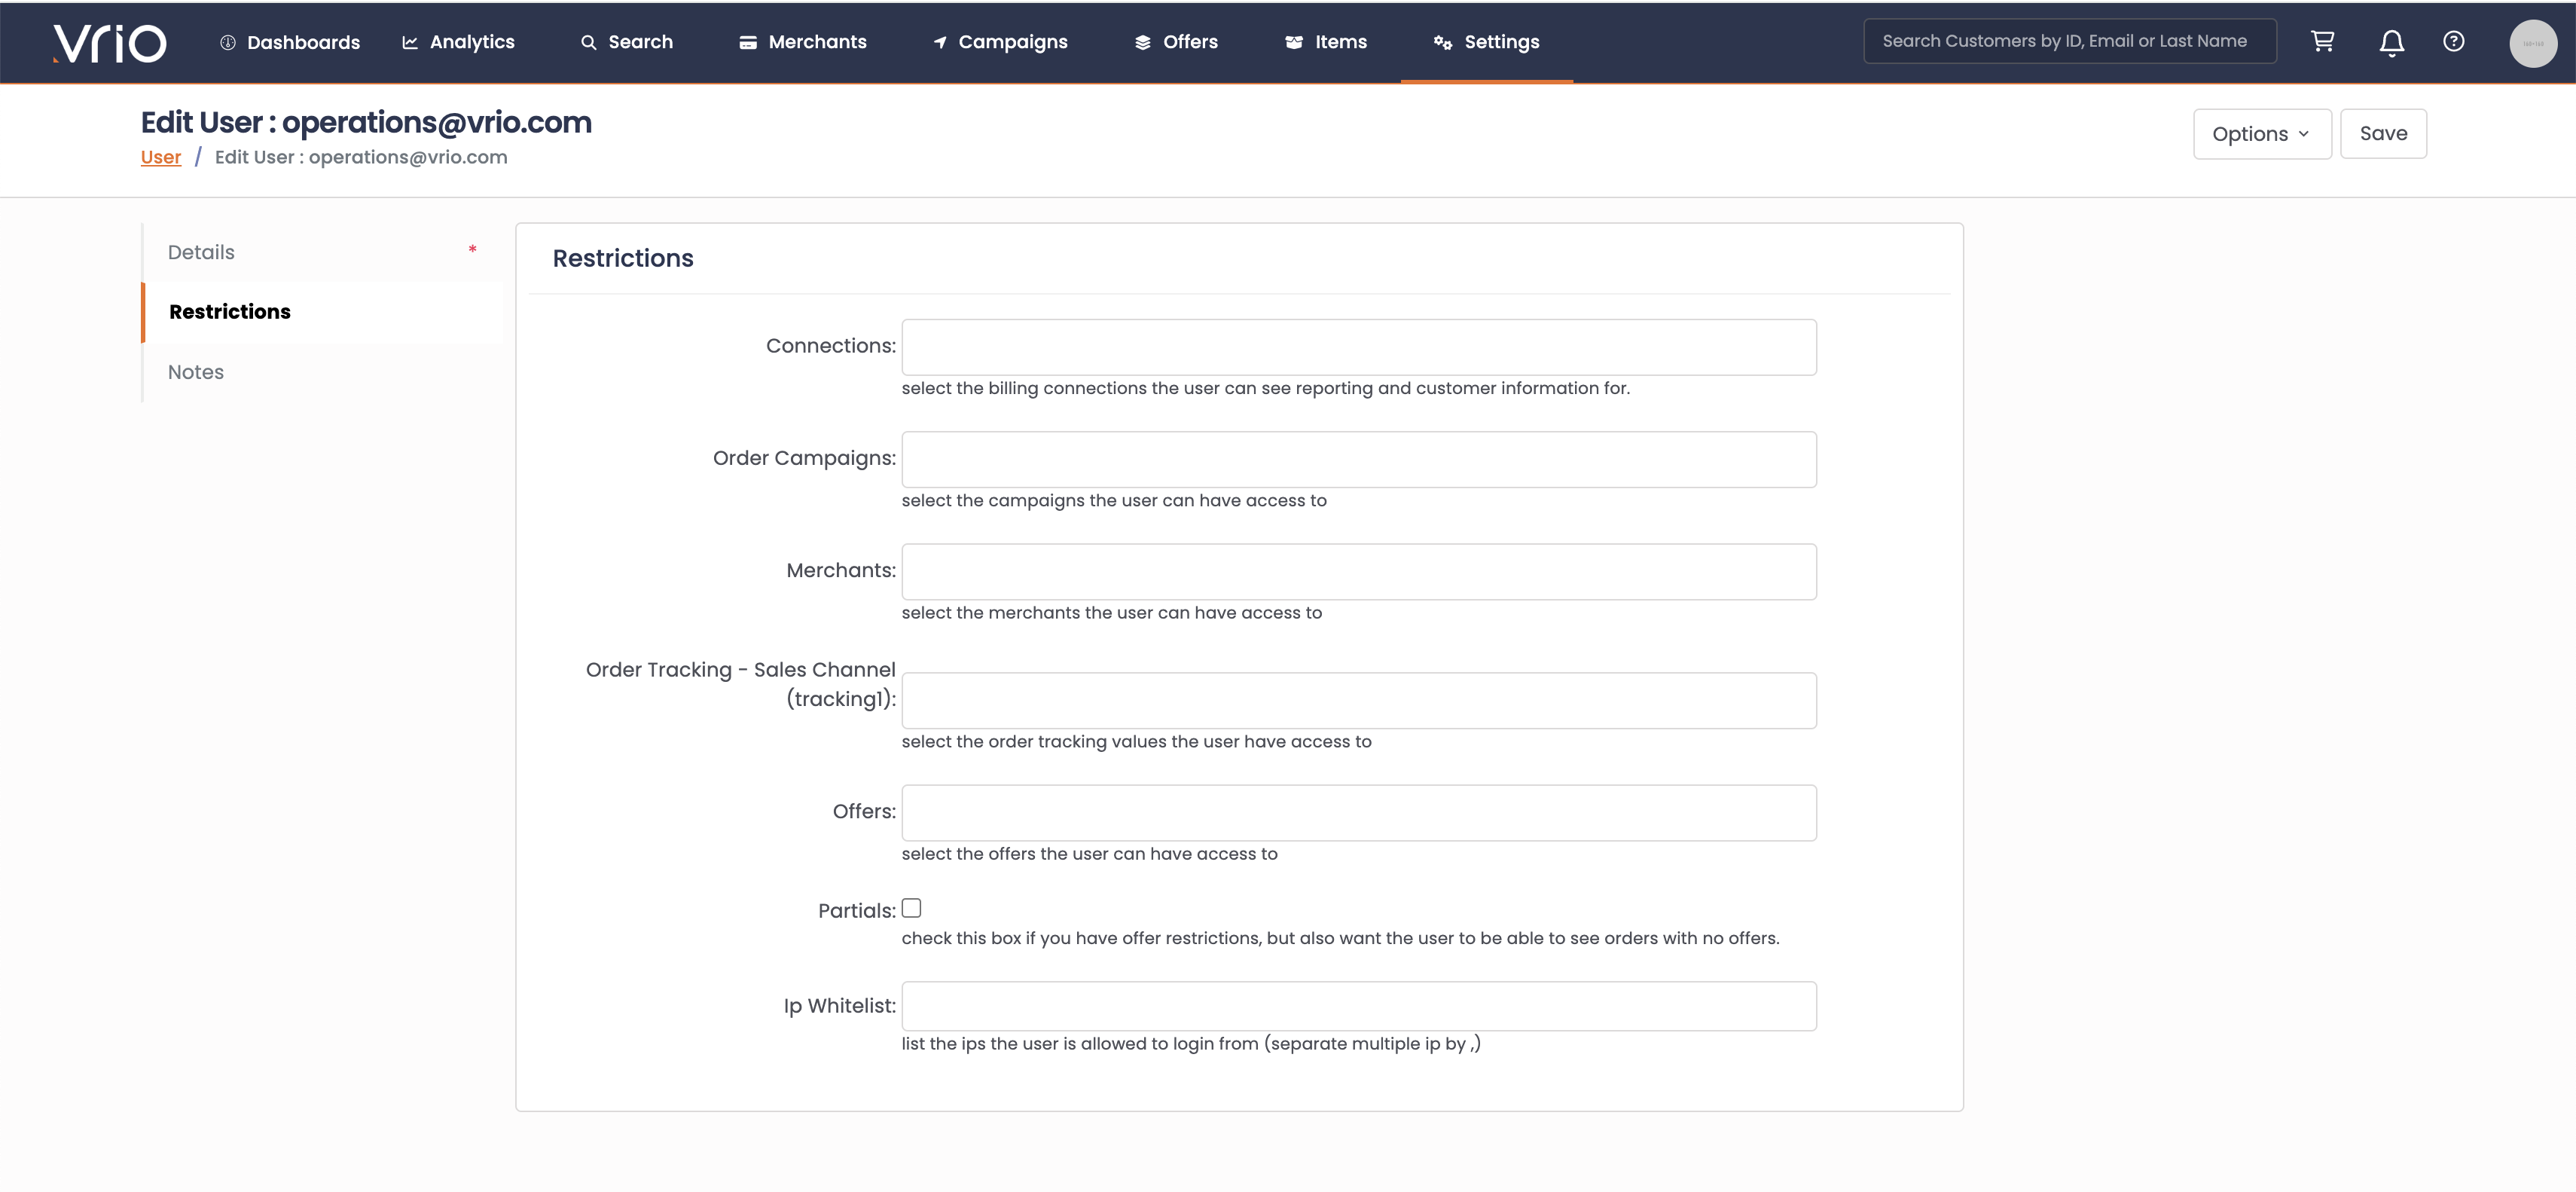
If the restriction sections are left blank, that means there are no restrictions in those areas.
Test & Validate
As always, if setting up strategic user permissions be sure to test those permissions prior to handing out access. Confirm you are limiting that user as expected.
It is easiest to do so by creating a test user for yourself and logging in to confirm you are seeing what is expected.
Hot tip, adding a "+" after your main gmail domain name, will allow you to create a unique email address. For example, if my email is [email protected] you can use [email protected]