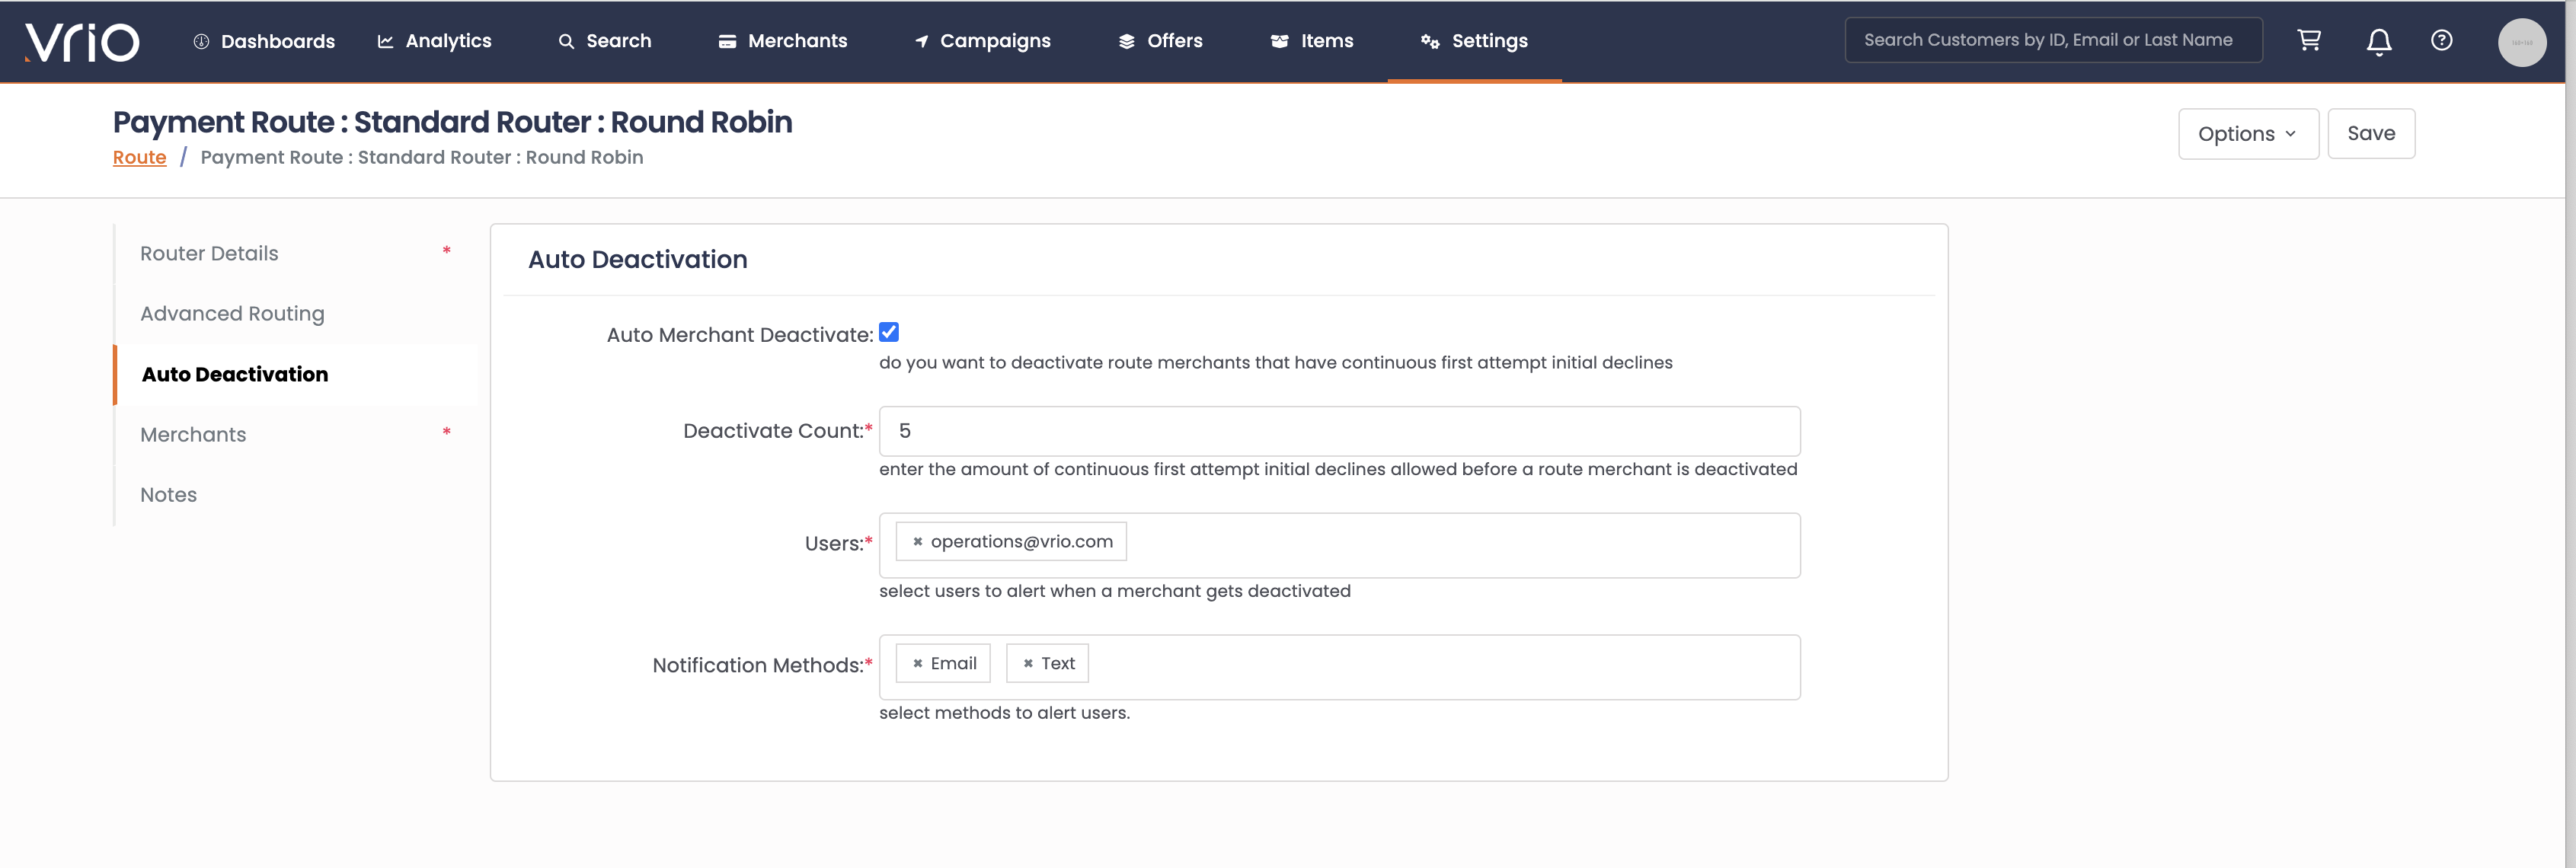
Auto Deactivation
Automatically deactivate route merchants with continuous initial declines to prevent lost sales and maintain optimal payment processing performance.
Automatically deactivate the route merchants that have continuous initial declines. This will deactivate that merchant from the specific Payment Router. Notifying a user that this rule has been reached.
Pay AttentionThis only deactivates the merchant from this Router. If this merchant is used in other Routers, the will remain active until logic within that router is met.
Criteria that must be met for Auto Merchant Deactivation
- Same Merchant
- Same Route
- Cycle 1
- Attempt 1
Why use Account Deactivation
This setting will limit your exposure to the loss of sales if there is an issue with a Merchant Account. If a merchant is declining continuously, this allows the system to turn that Merchant off within the Router and it will notify an organizations User that it was turned off due to continual declines.
To Enable Auto Deactivation
- Check "Auto Merchant Deactivate" to enable the setting
- Set Count of subsequent initial declines to trigger deactivation
- Select User to be alerted of deactivation
- Select Notification Method
- For Text a phone number must be set on the User
What to do if Notified?
If notified that a merchant was deactivated from a router, the next steps would be to determine why that merchant is declining so frequently.
The merchant will remain inactive until it is reactivated within the Router
Review a running list of the most recent transactions
- Navigate to Search
- Select Transactions
- Within the Filters you will want to limit your view to that specific Merchant
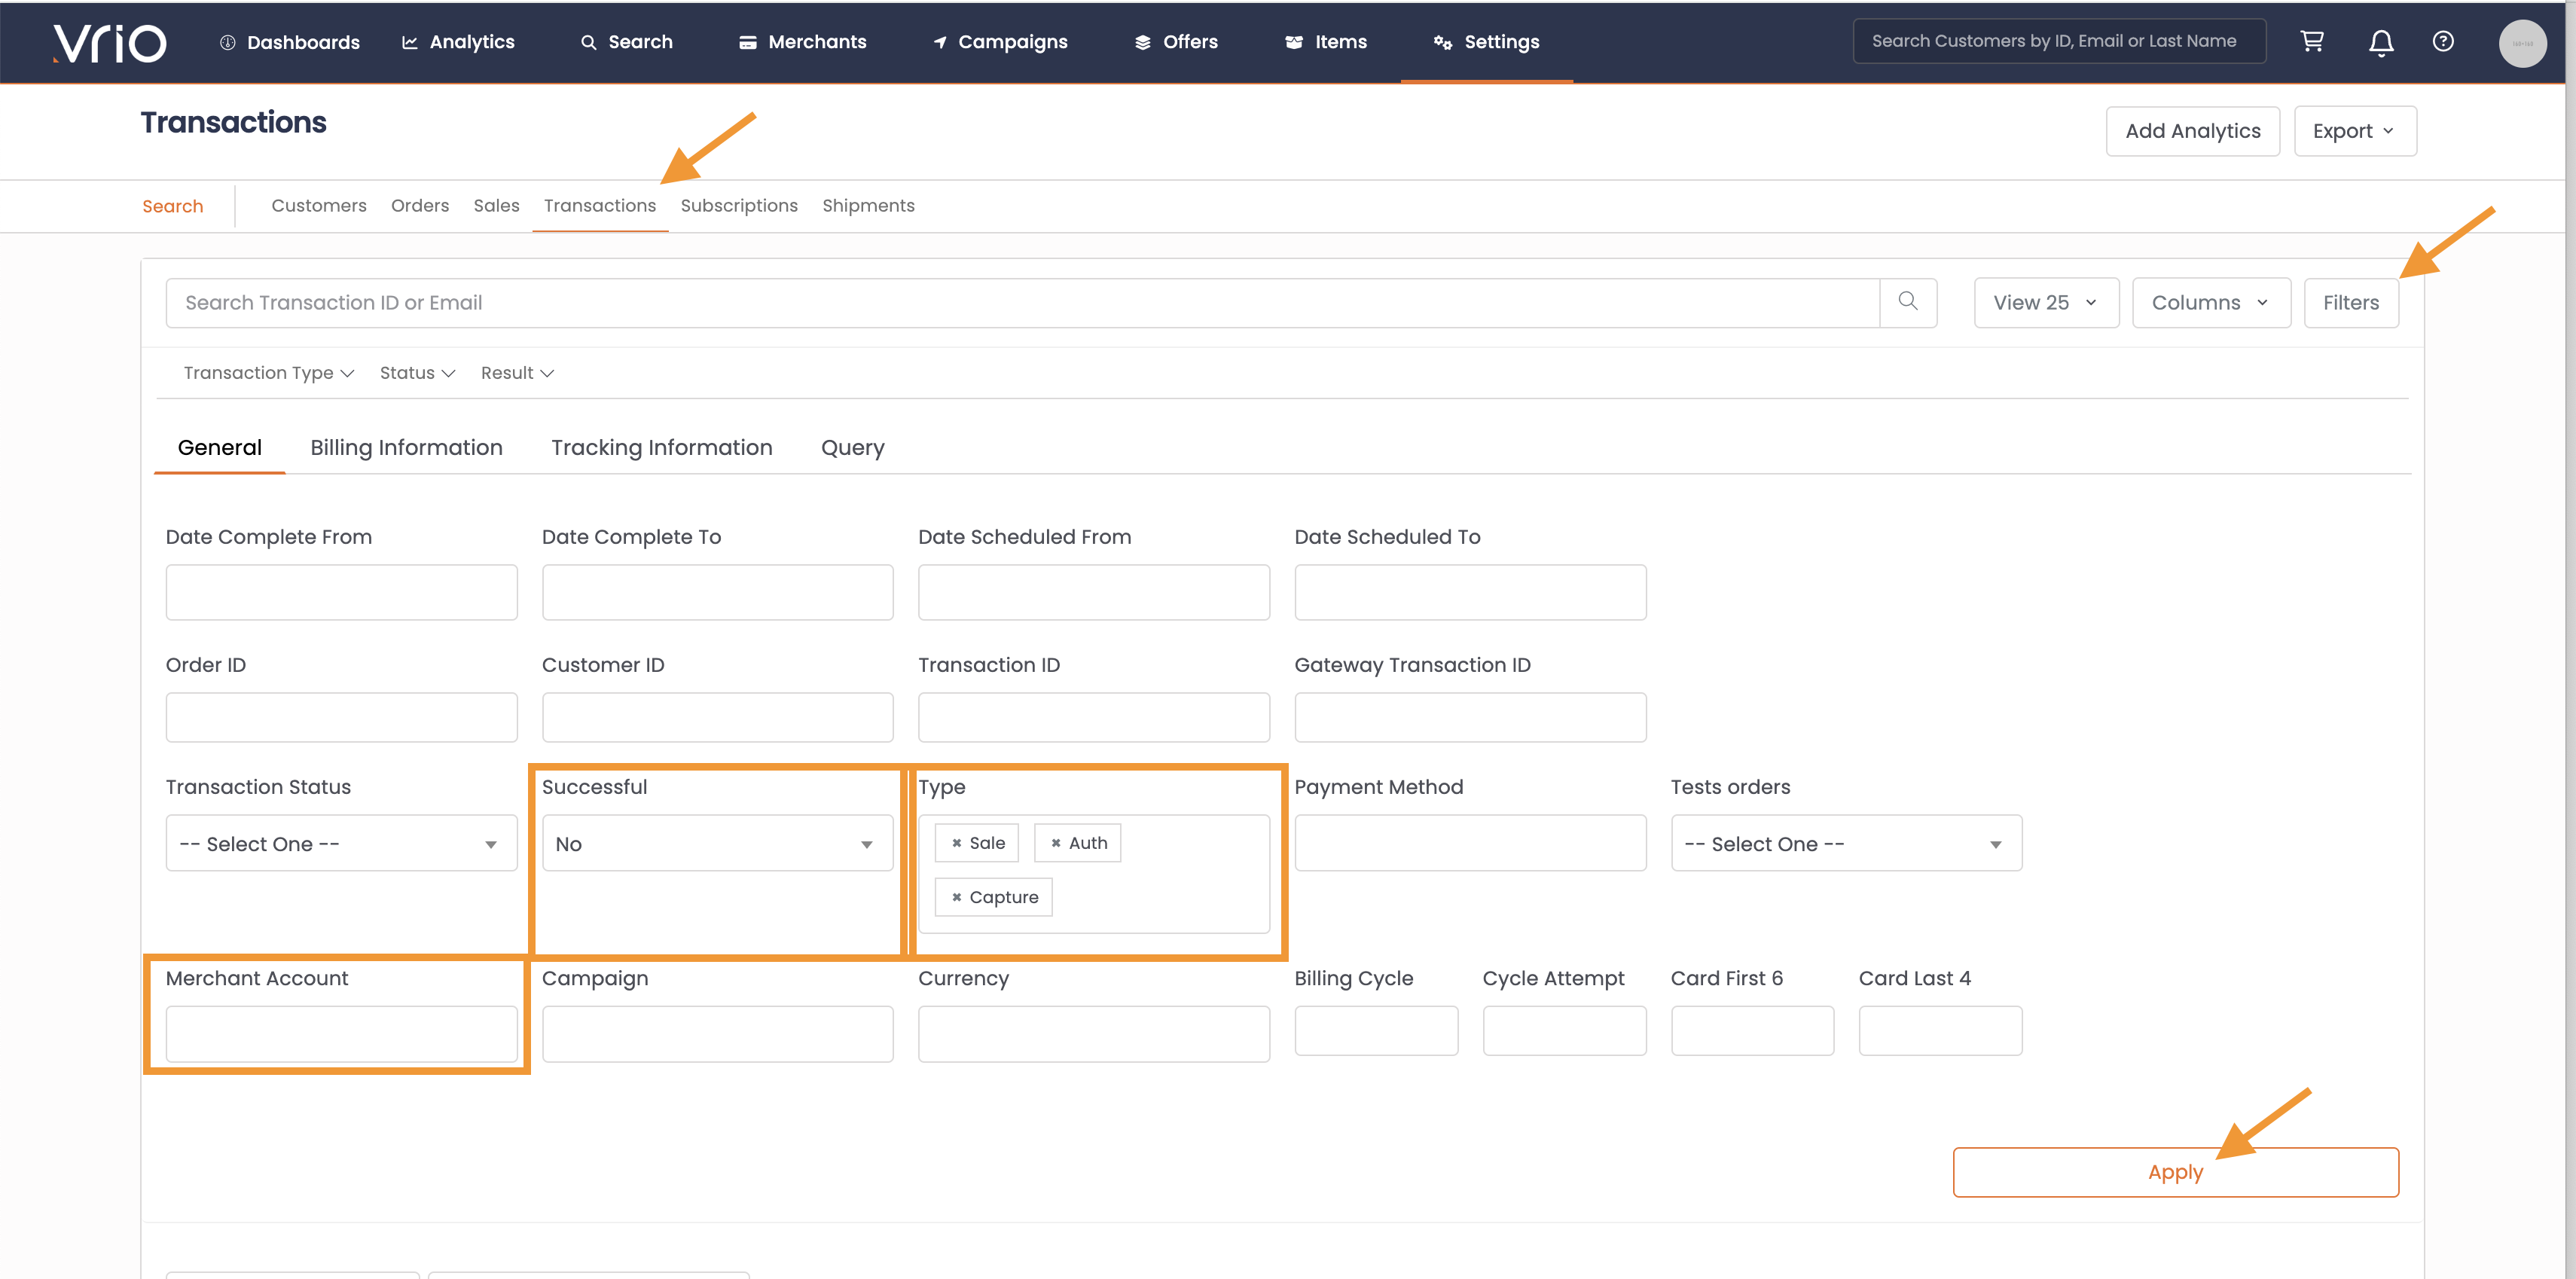
This will limit the data you are reviewing
- Next within Columns, turn on the Gateway Response Description
- Hit Apply

This will show the reason for the declines
Now you can review all of the most recent sale transactions for the merchant. This view will include all initials + renewal sales.
If you want to limit to just Billing Cycle 1, you can do so within step 3.
Look at overall performance for that merchant
After reviewing the individual transactions, you may want to also look at overall performance as a whole. For this you will navigate to the reports.
- Navigate to Analytics
- Select Transactions
- Within that report you will want your first dimension to be Merchants
- Add a Dimension
- Select Gateway Response