AvaTax Setup
Complete step-by-step guide to connect and configure Avalara AvaTax with Vrio, including API credentials setup, company configuration, and connection management.
Before Getting StartedYou must have an active Avalara account at avalara.com.
Install the Avalara Connection
- Login to your CRM instance https://{instance-name}.vrio.app
- Navigate to Settings, scroll down to the Connections section
- Select Add New Connection
- Select the Tax tab
- In the Avalara card click Connect Now
This will open a modal where you can input data from your Avalara account to complete the connection.
Configure Connection / Connect Avalara
-
Enter a name for the connection, ex. Avalara AvaTax or NewCo AvaTax
-
Login to your Avalara account
-
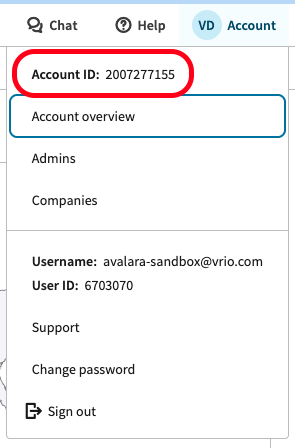
Retrieve your Account ID from Avalara and copy to the Vrio Connection
- Click on your user profile in the upper right corner.
-
-
Generate your License Key in Avalara and copy to the Vrio Connection
-
Navigate to Settings > Licenses and Api Keys
-
To generate a key, your user must be an Administrator in the Avalara Platform
-
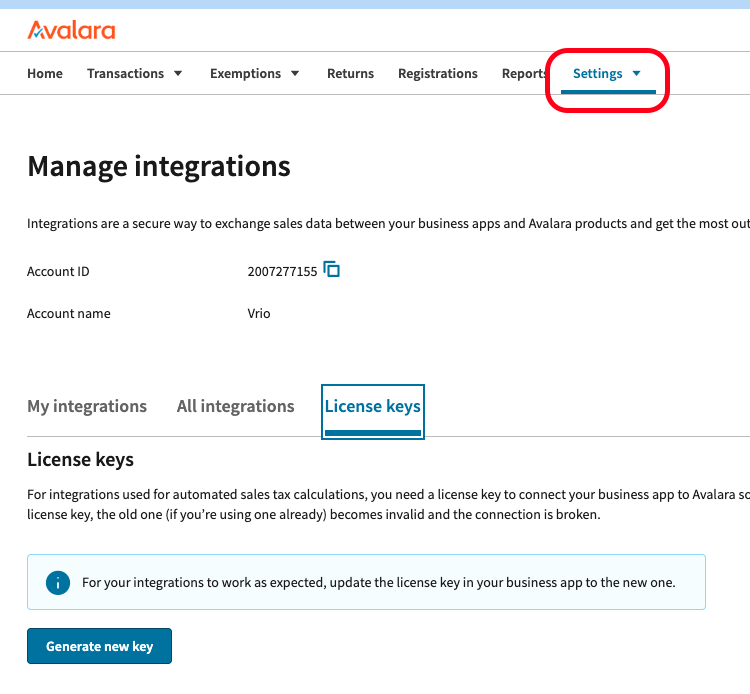 License Key
Once the key is generated, you must securely copy and store it, as it will not be accessible again. If the key is lost, you will need to generate a new one and update your Avalara connection in Vrio.
-
-
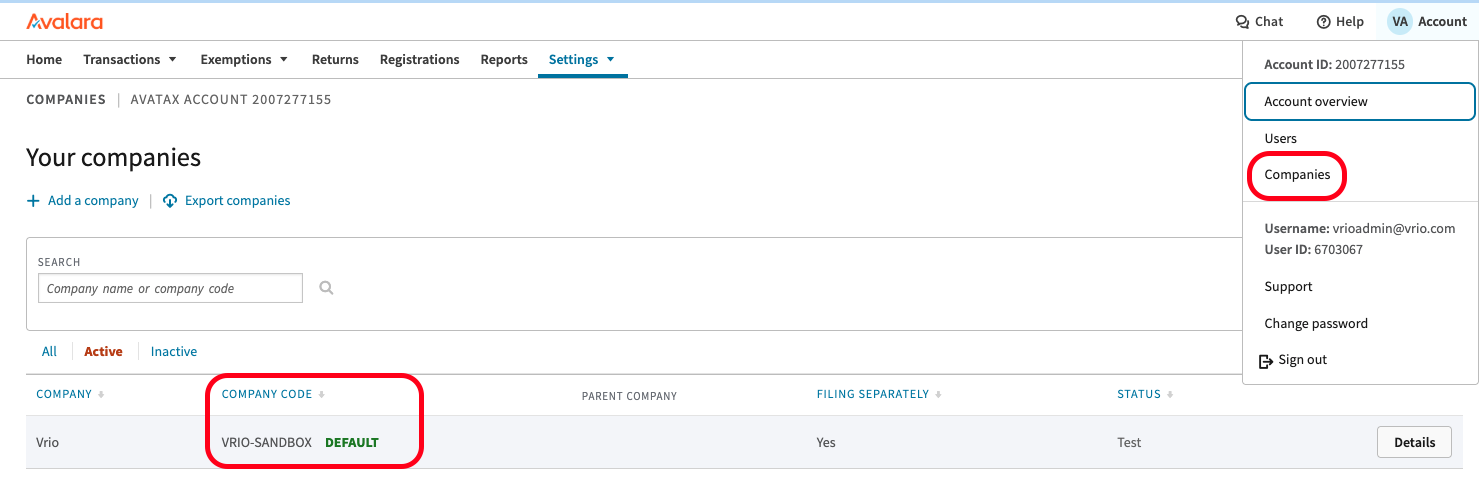
Retrieve your Company Code from Avalara and copy to the Vrio Connection
- To locate your company code in Avalara, log in to your account, click on your user profile, and select "Companies" from the dropdown menu.
-
-
Select the Sandbox checkbox if your Avalara account is in test mode.
-
Select the Commit and Record checkbox if Avalara is going to file sales tax on your company's behalf.
-
Click Submit
Manage the Avalara Connection
- Login to your CRM instance https://{instance-name}.vrio.app
- Navigate to Settings, scroll down to the Connections section
- Select View All
- Search for the Avalara connection
- Click on the connection to edit.
- If any changes are made, click on the Save button in the upper right.