Adding the plugin
Complete setup guide for installing and configuring the Vrio Payments plugin for WooCommerce with API key setup and connection configuration.
Follow the below guide to connect WP/Woo Commerce and Vrio
Before Getting StartedWooCommerce must be setup within your WordPress prior to connection Vrio
1. Install the Vrio Payments plugin to Woo Commerce
-
Vrio will provide a plugin .zip file
-
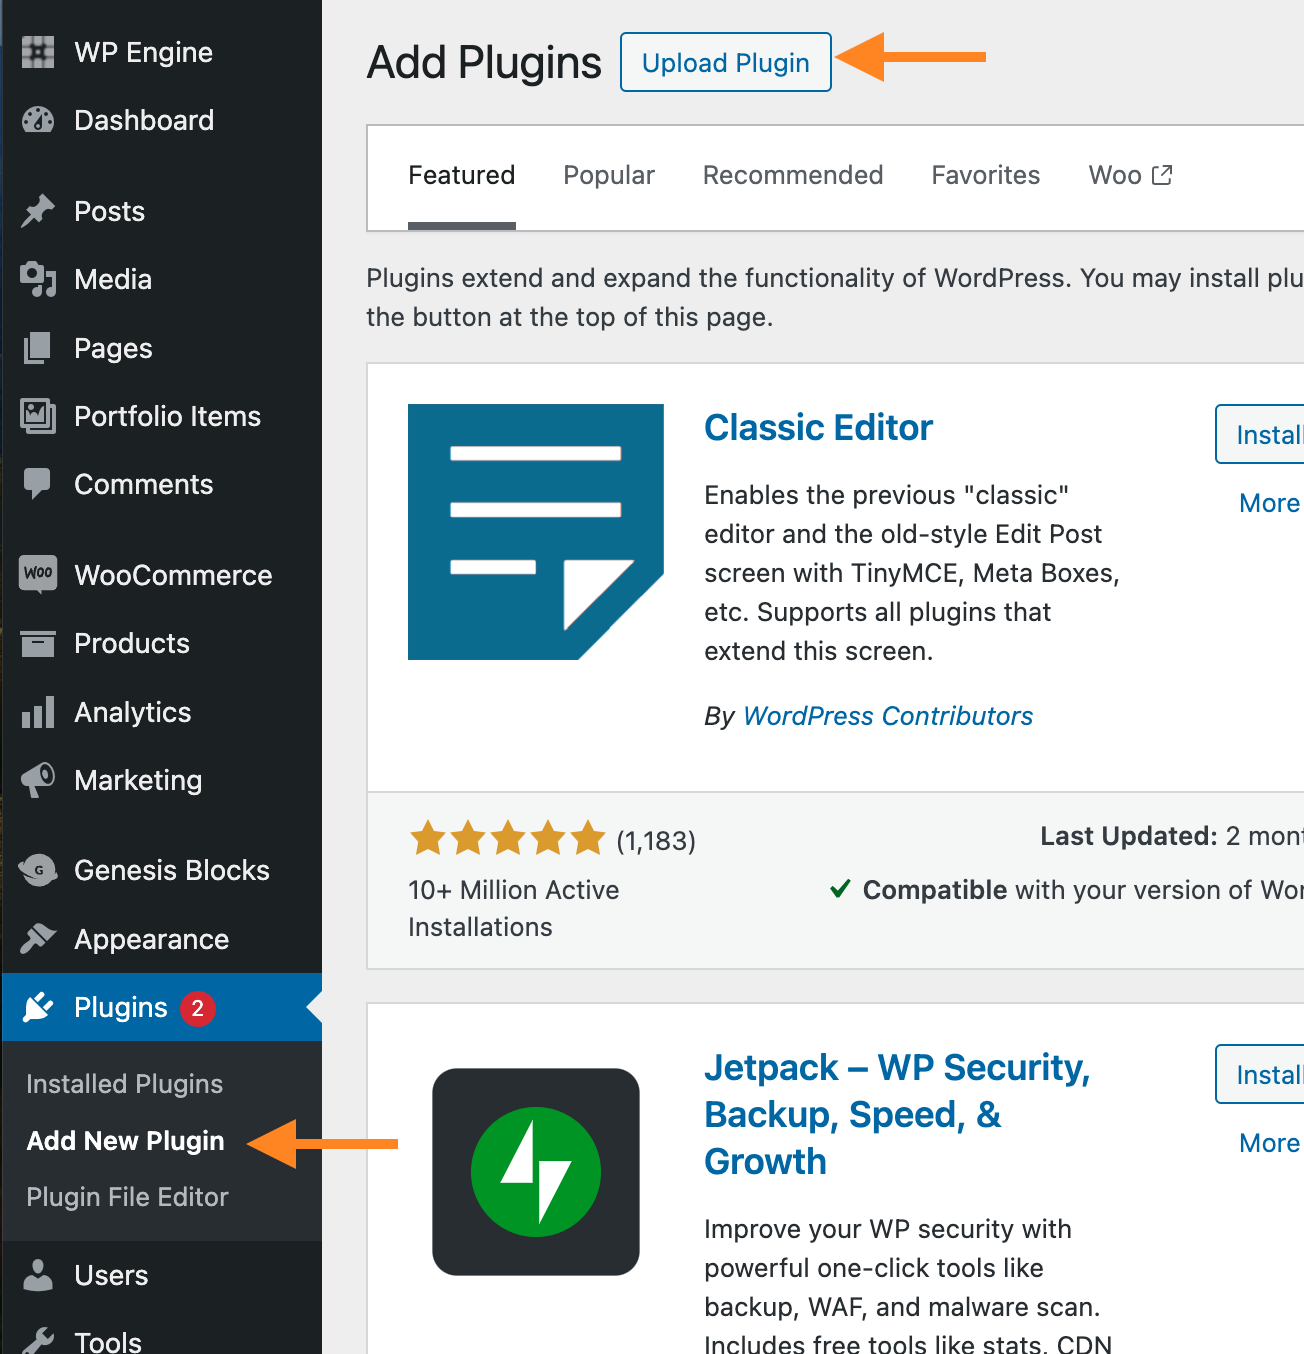
Navigate to Plugins
-
Select Add New Plugin
-
Select Upload Plugin
-
Click Install Now
-
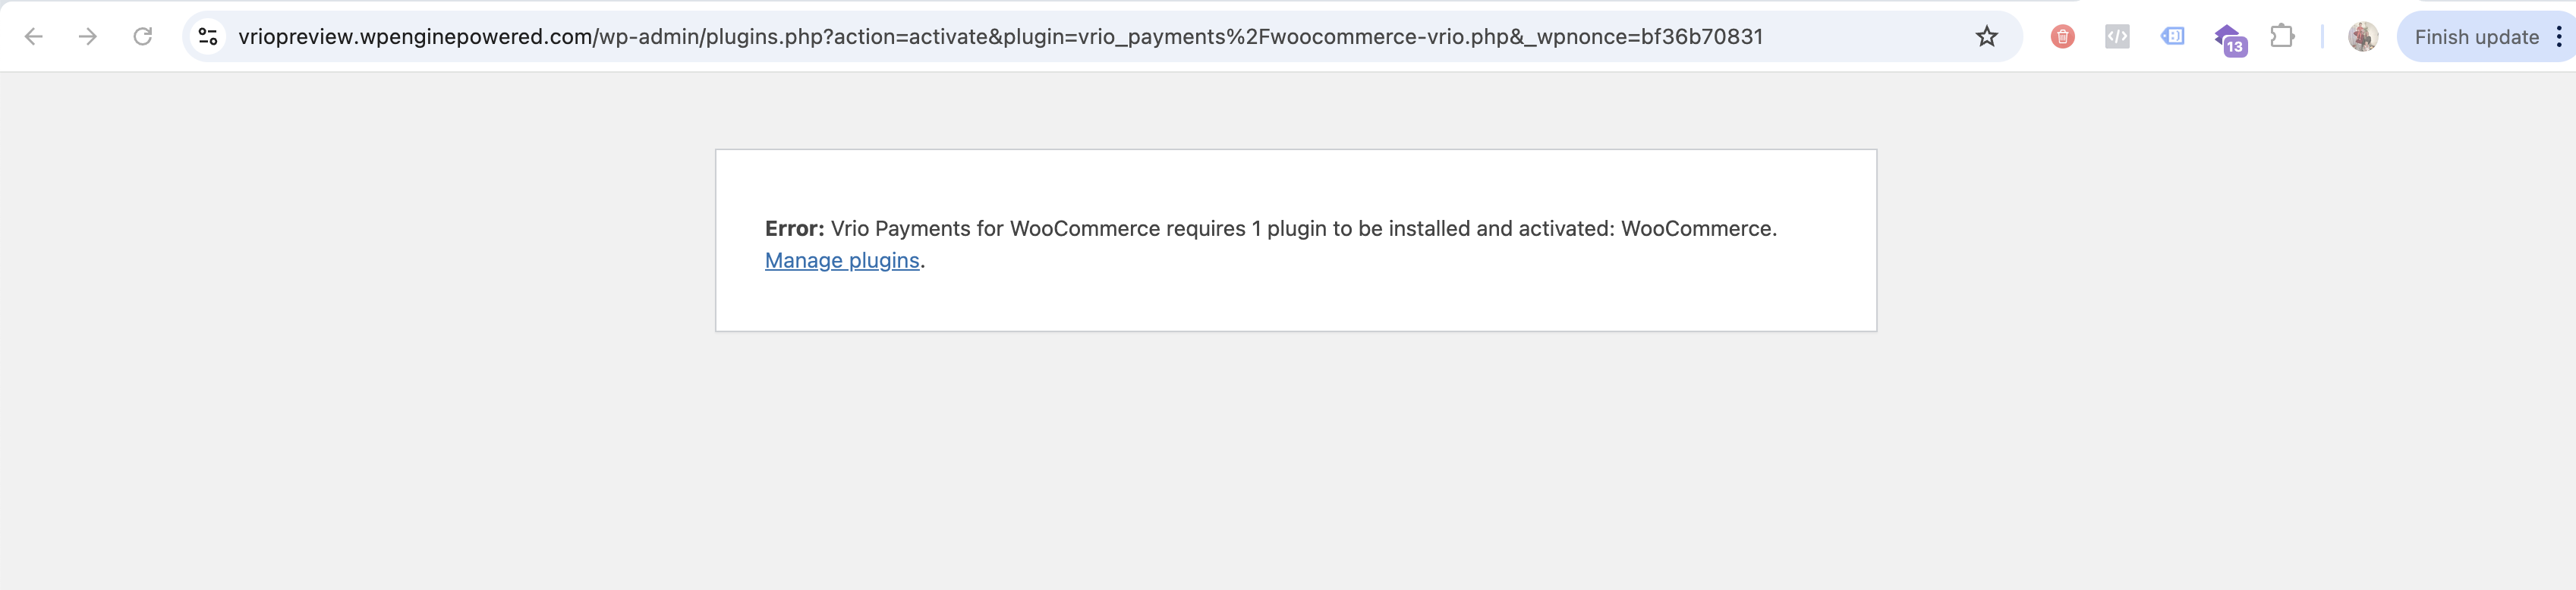
Once Plugin installed successfully, click Activate Plugin
-
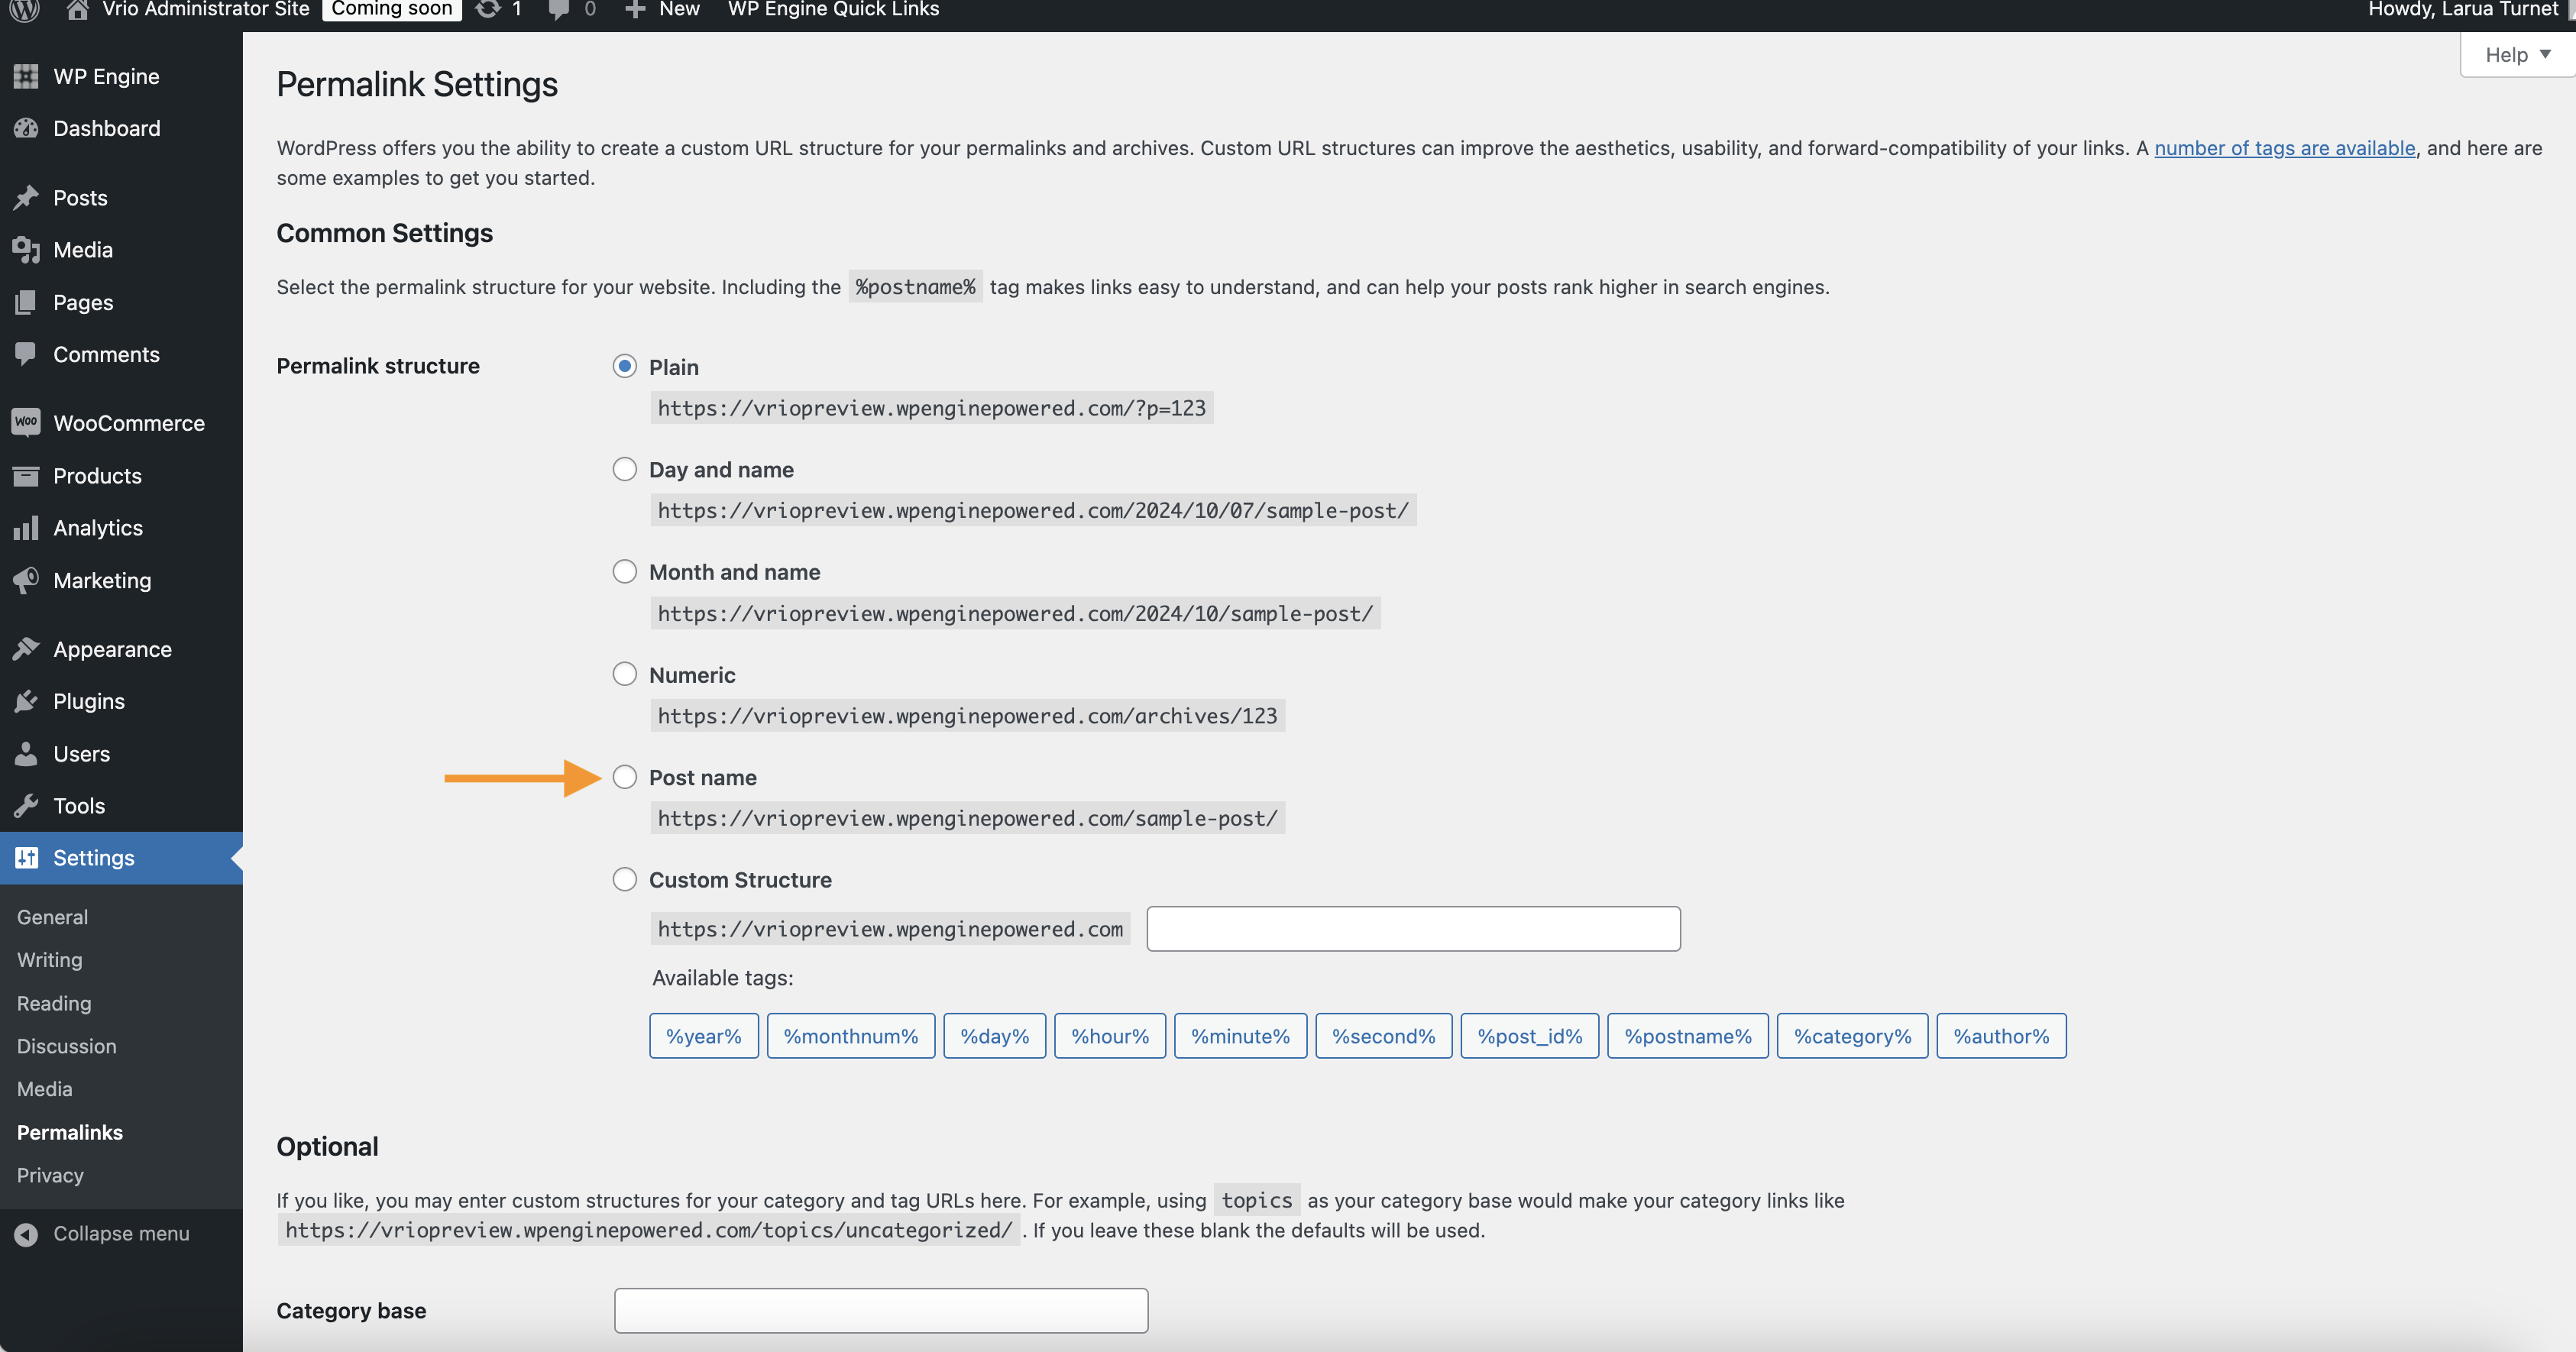
Navigate to Settings -> Permalinks
-
Under Permalink Structure, select Post Name
-
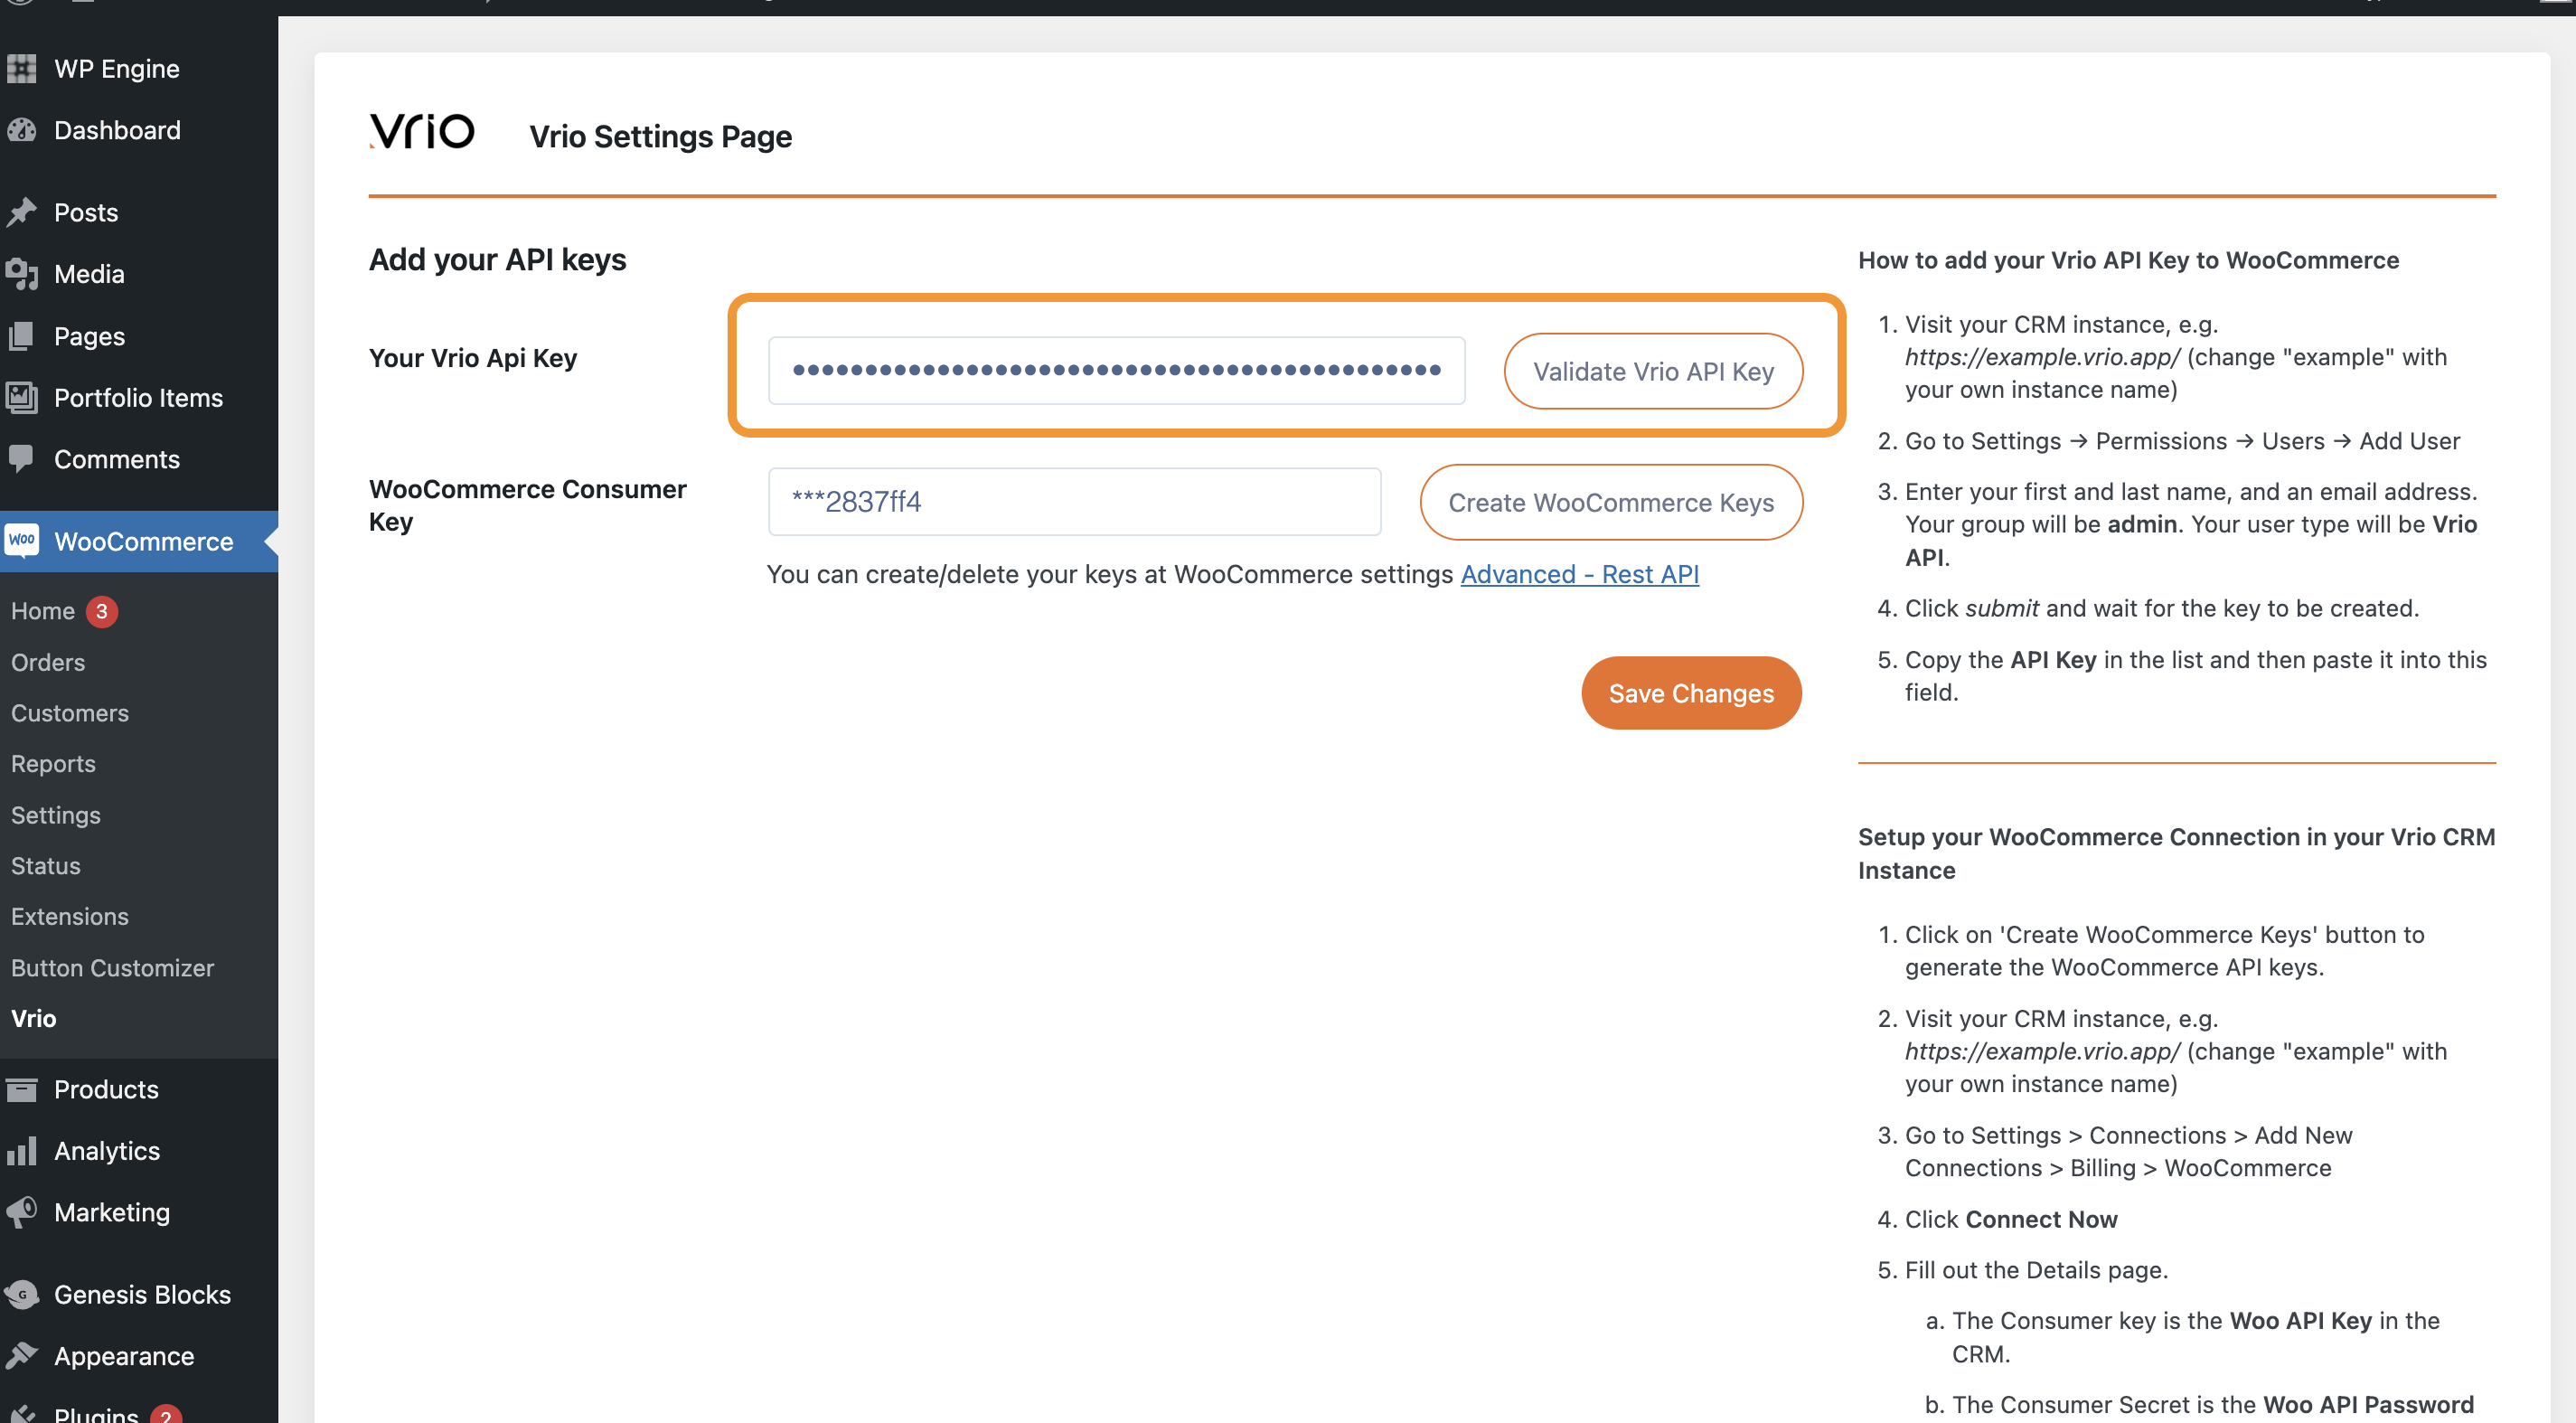
Enter your Vrio Api Key. Follow steps to obtain this key here
-
Enter your WooCommerce Customer Key. Follow steps to obtain this key here
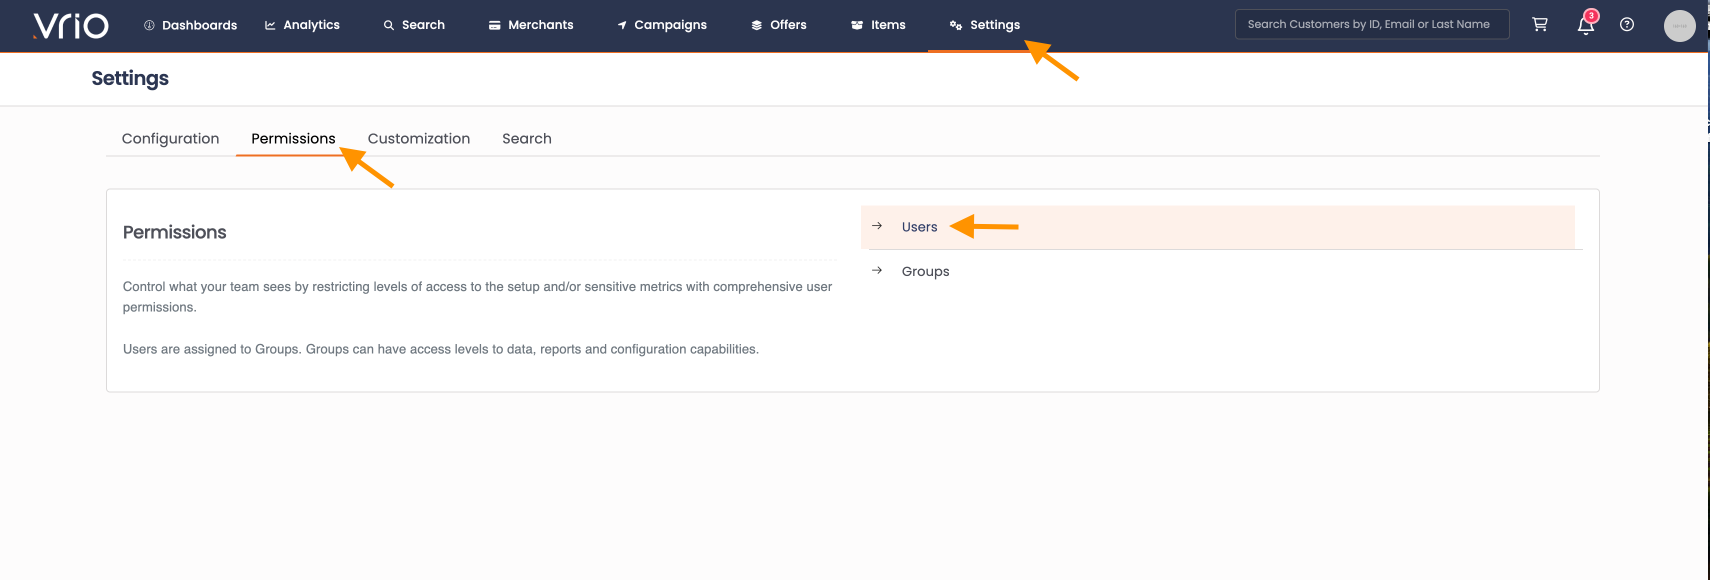
2. Add your Vrio API Key to WooCommerce
-
Visit your CRM instance, e.g. https://example.vrio.app/ (change "example" with your own instance name)
-
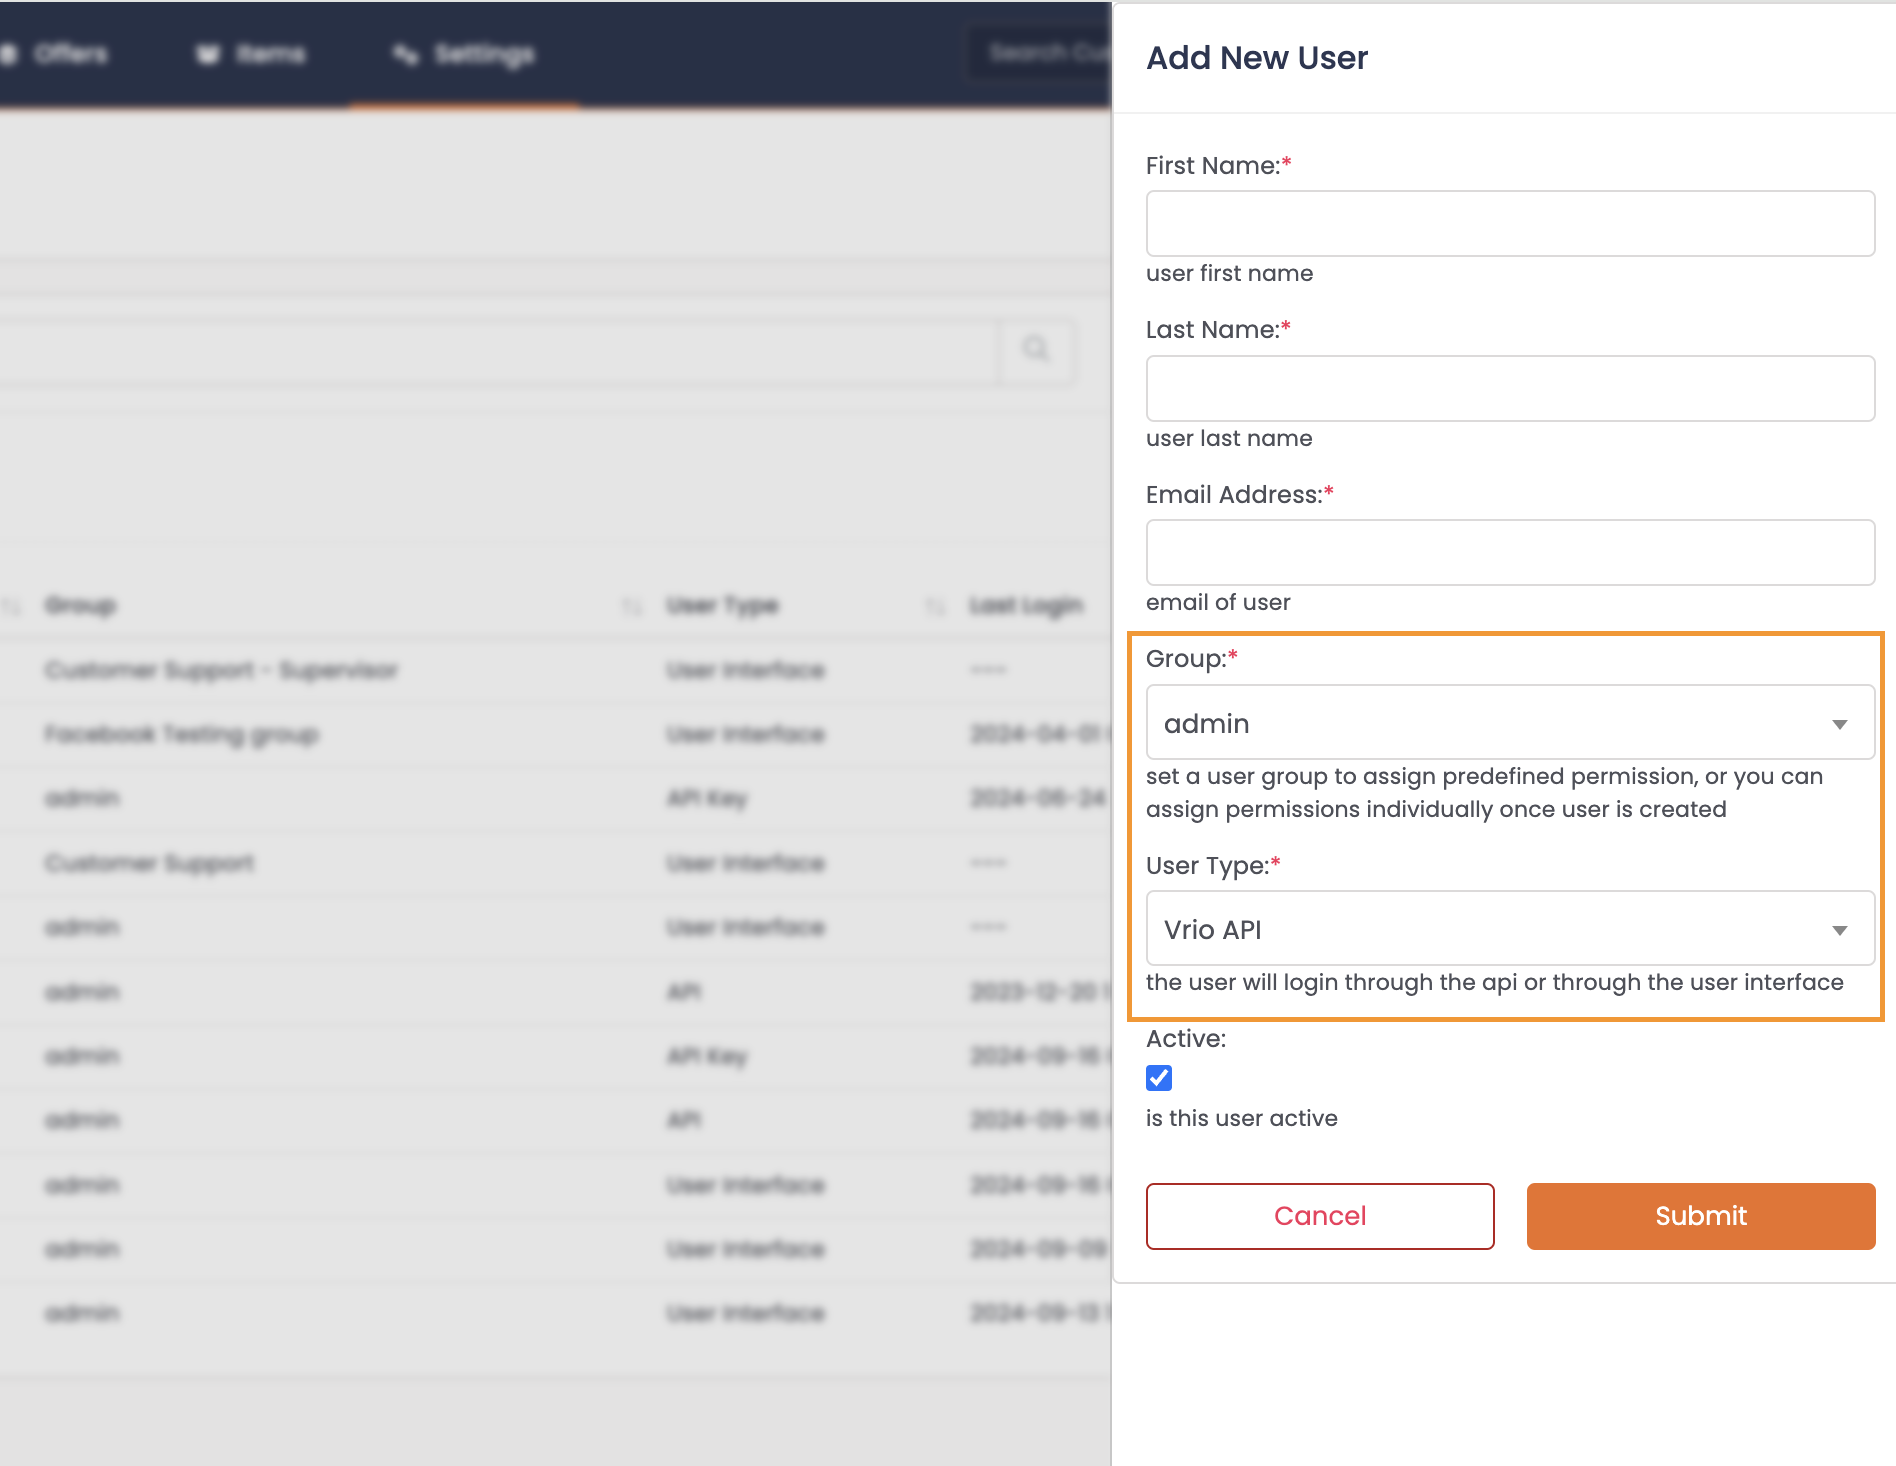
Go to Settings → Permissions → Users → Add User
-
Enter your first and last name, and an email address.
-
Your group will be admin.
-
Your user type will be Vrio API.
-
-
Click submit and wait for the key to be created.
-
Click into your API User to retrieve the API Key
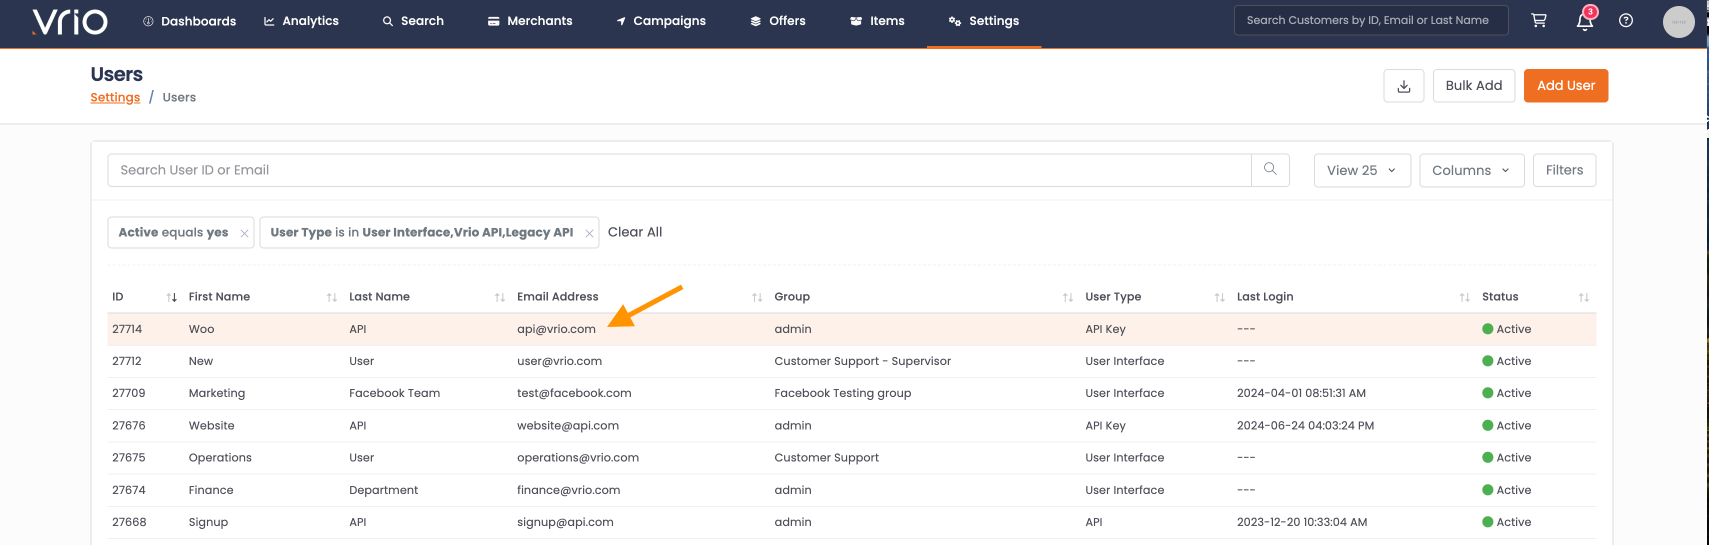
-
Copy the Vrio API Key
3. Generate your WooCommerce Consumer Key & Secret
-
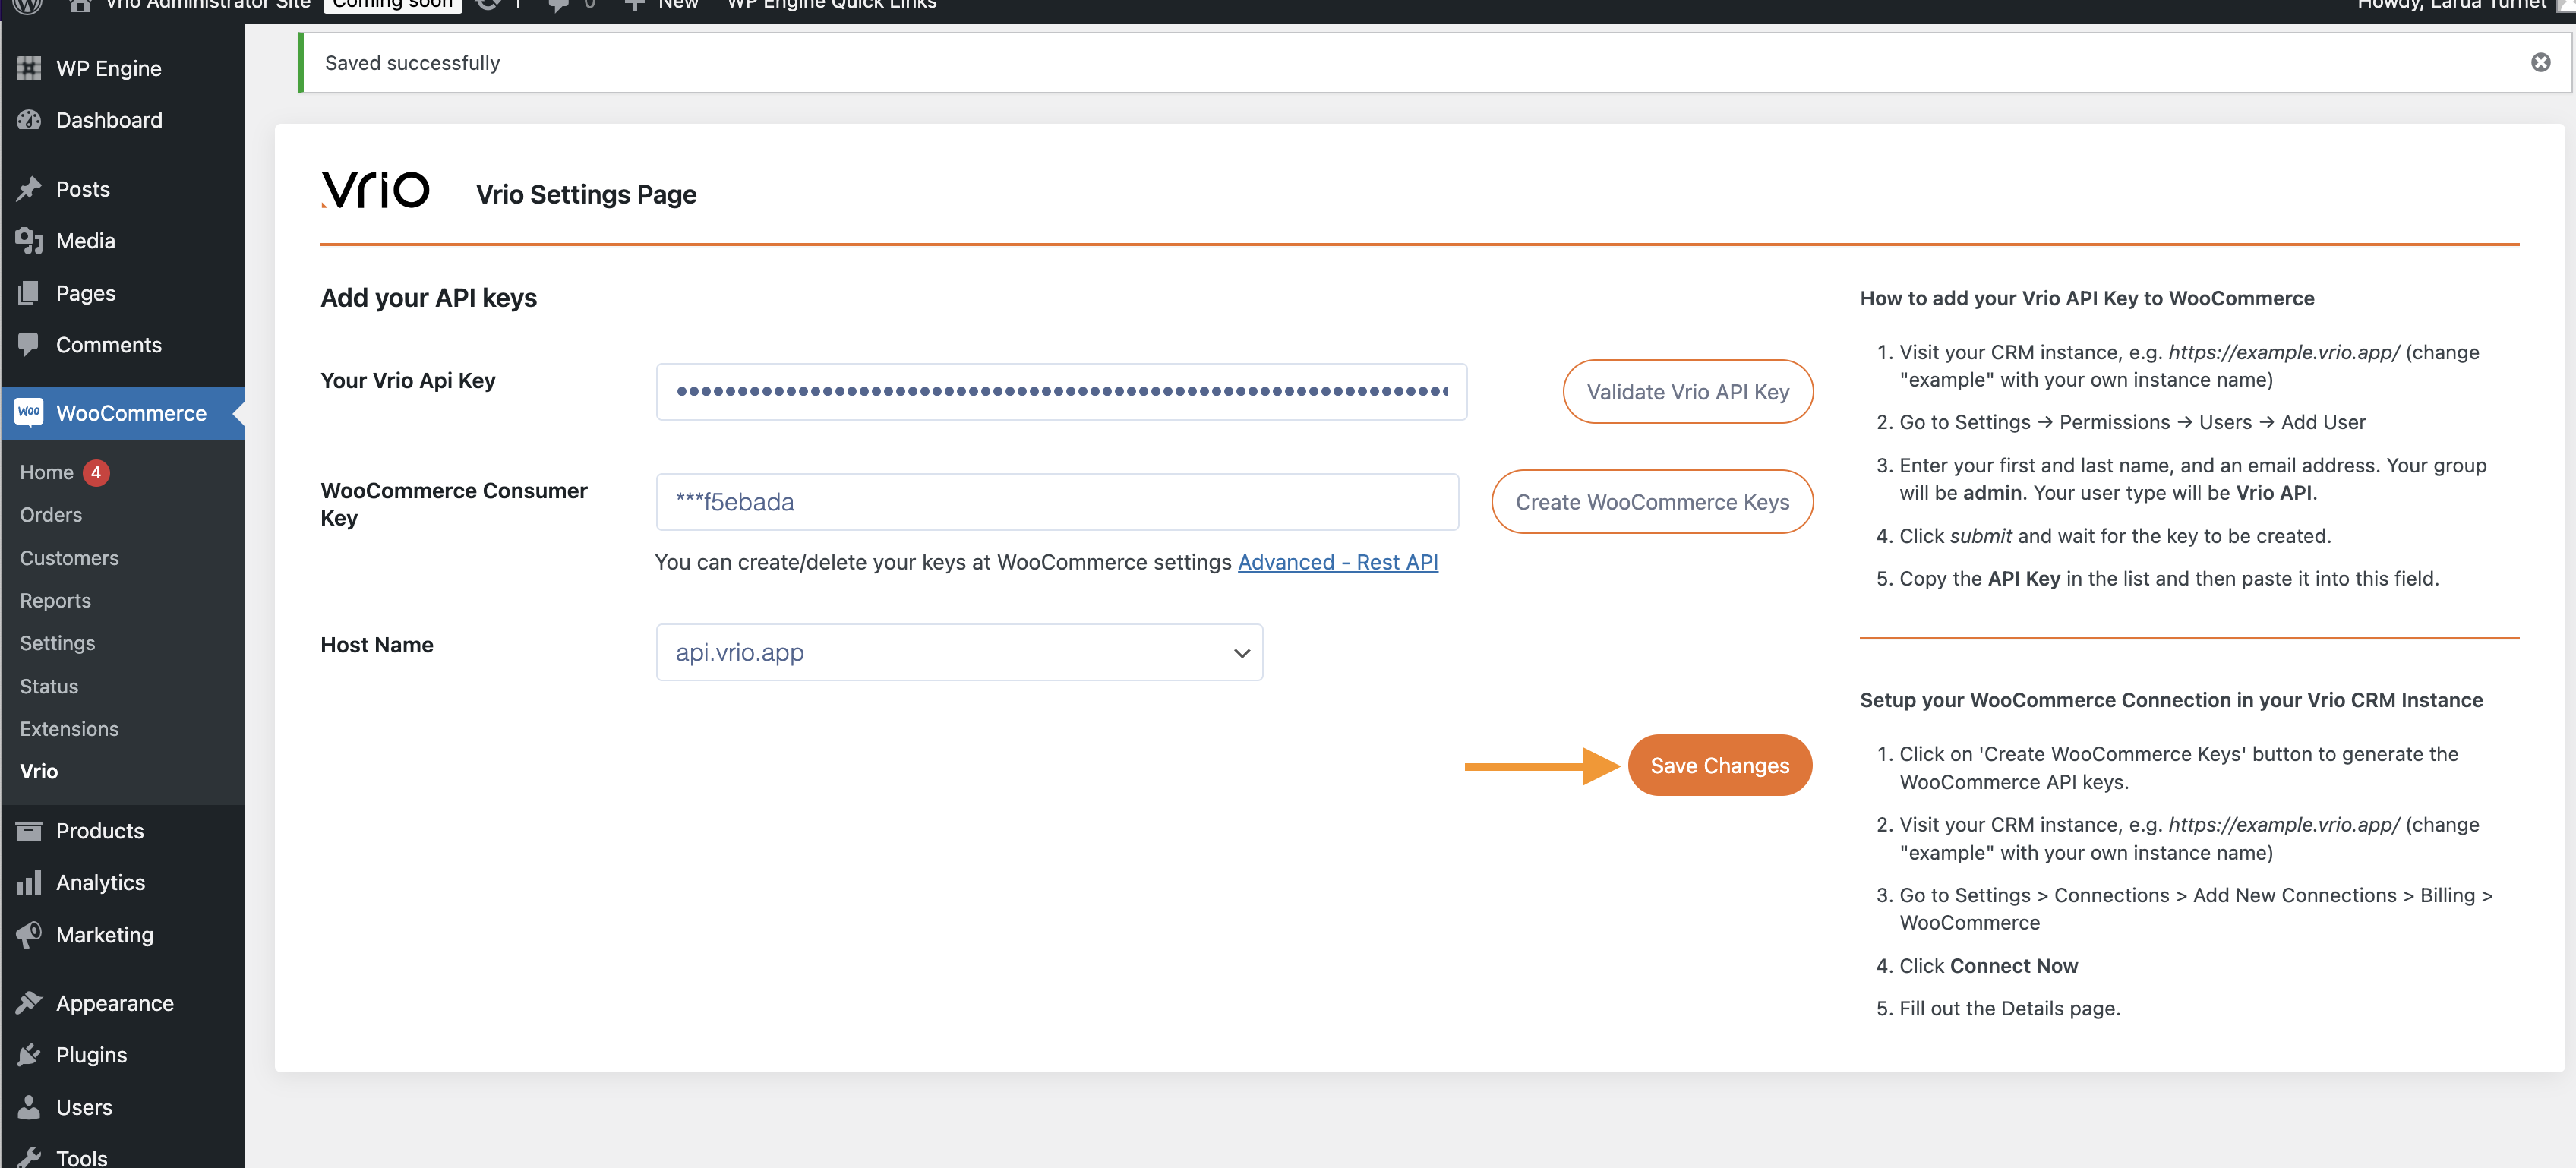
Navigate back to the WooCommerce Plugin and paste the key into the "Your Vrio API Key" field within the Vrio WooCommerce Plugin
-
Click Validate Vrio API Key
-
Within the WooCommerce Plugin, click "Create WooCommerce Keys"
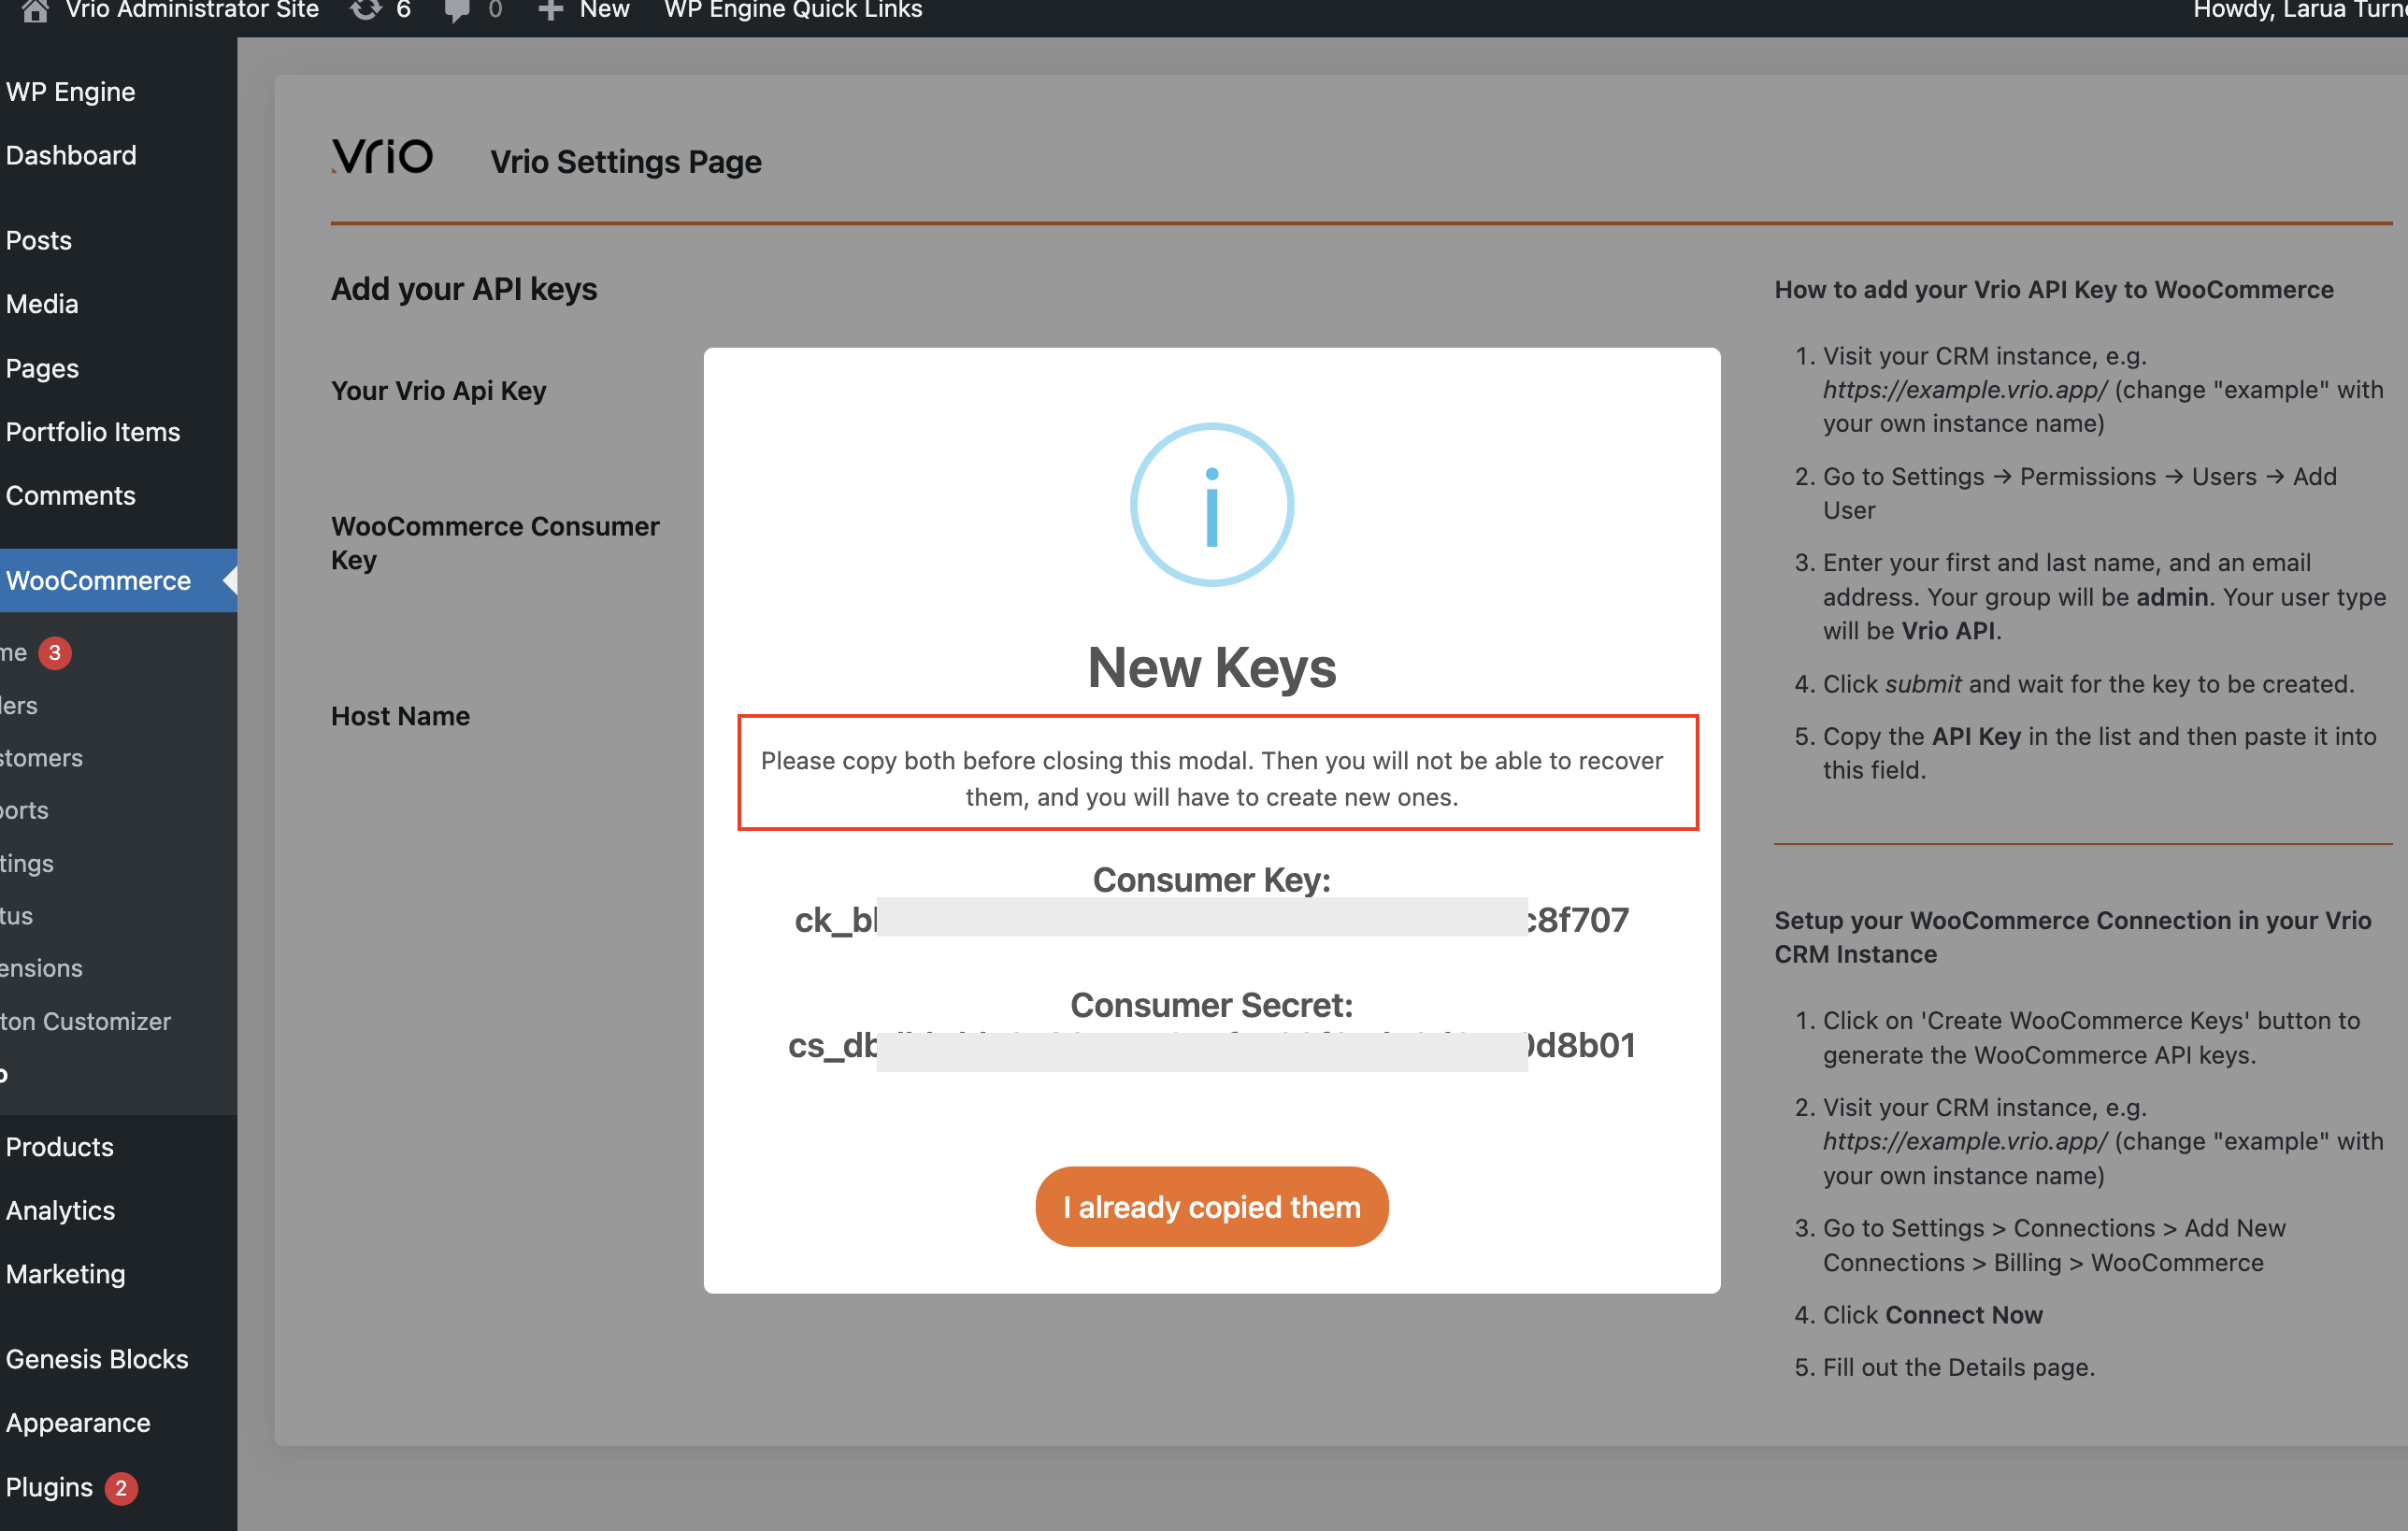
Consumer Key and SecretWhen you click Create WooCommerce Keys, the pop up will provide the Consumer Key and Consumer Secret. This is the only time you can copy these keys.
You will not be able to recover again. If you did not copy the Key and Secret, you will have to create new ones.
-
Once you have your Key and Secret copied, click "I already copied them"
-
Then click Save Changes
-
Navigate to your Vrio CRM Instance (e.g. https://example.vrio.app/ (change "example" with your own instance name)
-
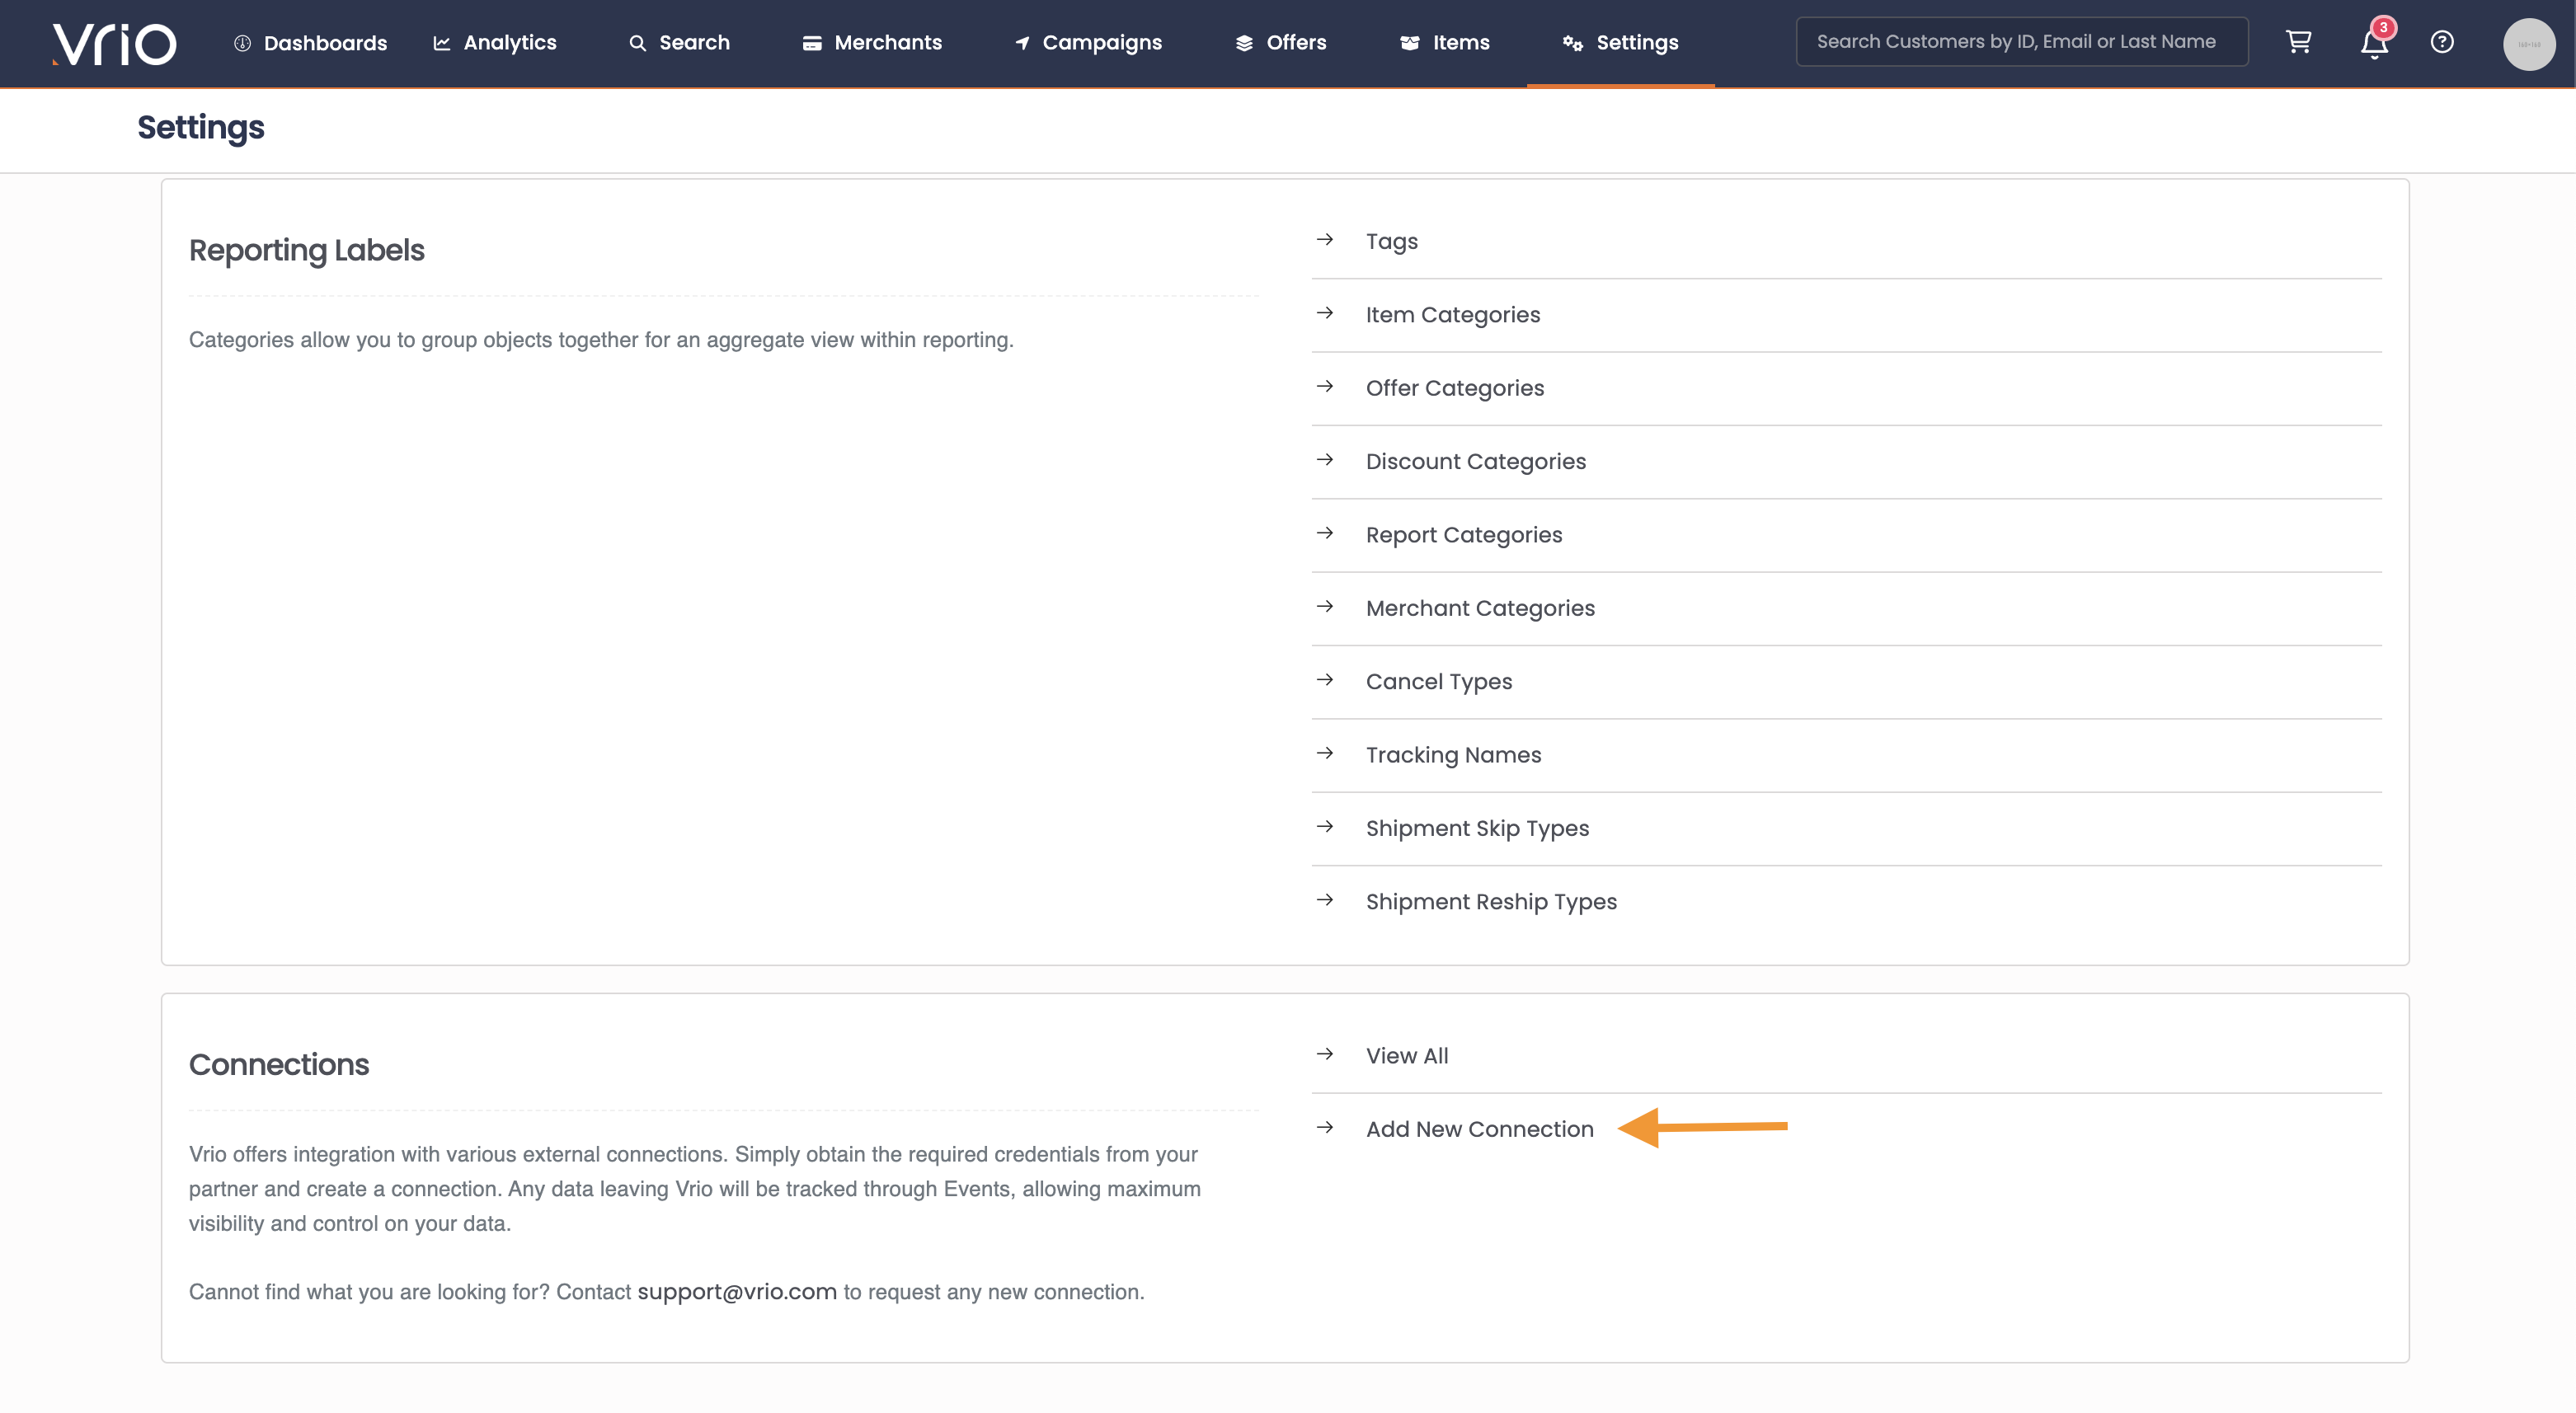
Go to Settings > Connections > Add New Connections > Billing > WooCommerce
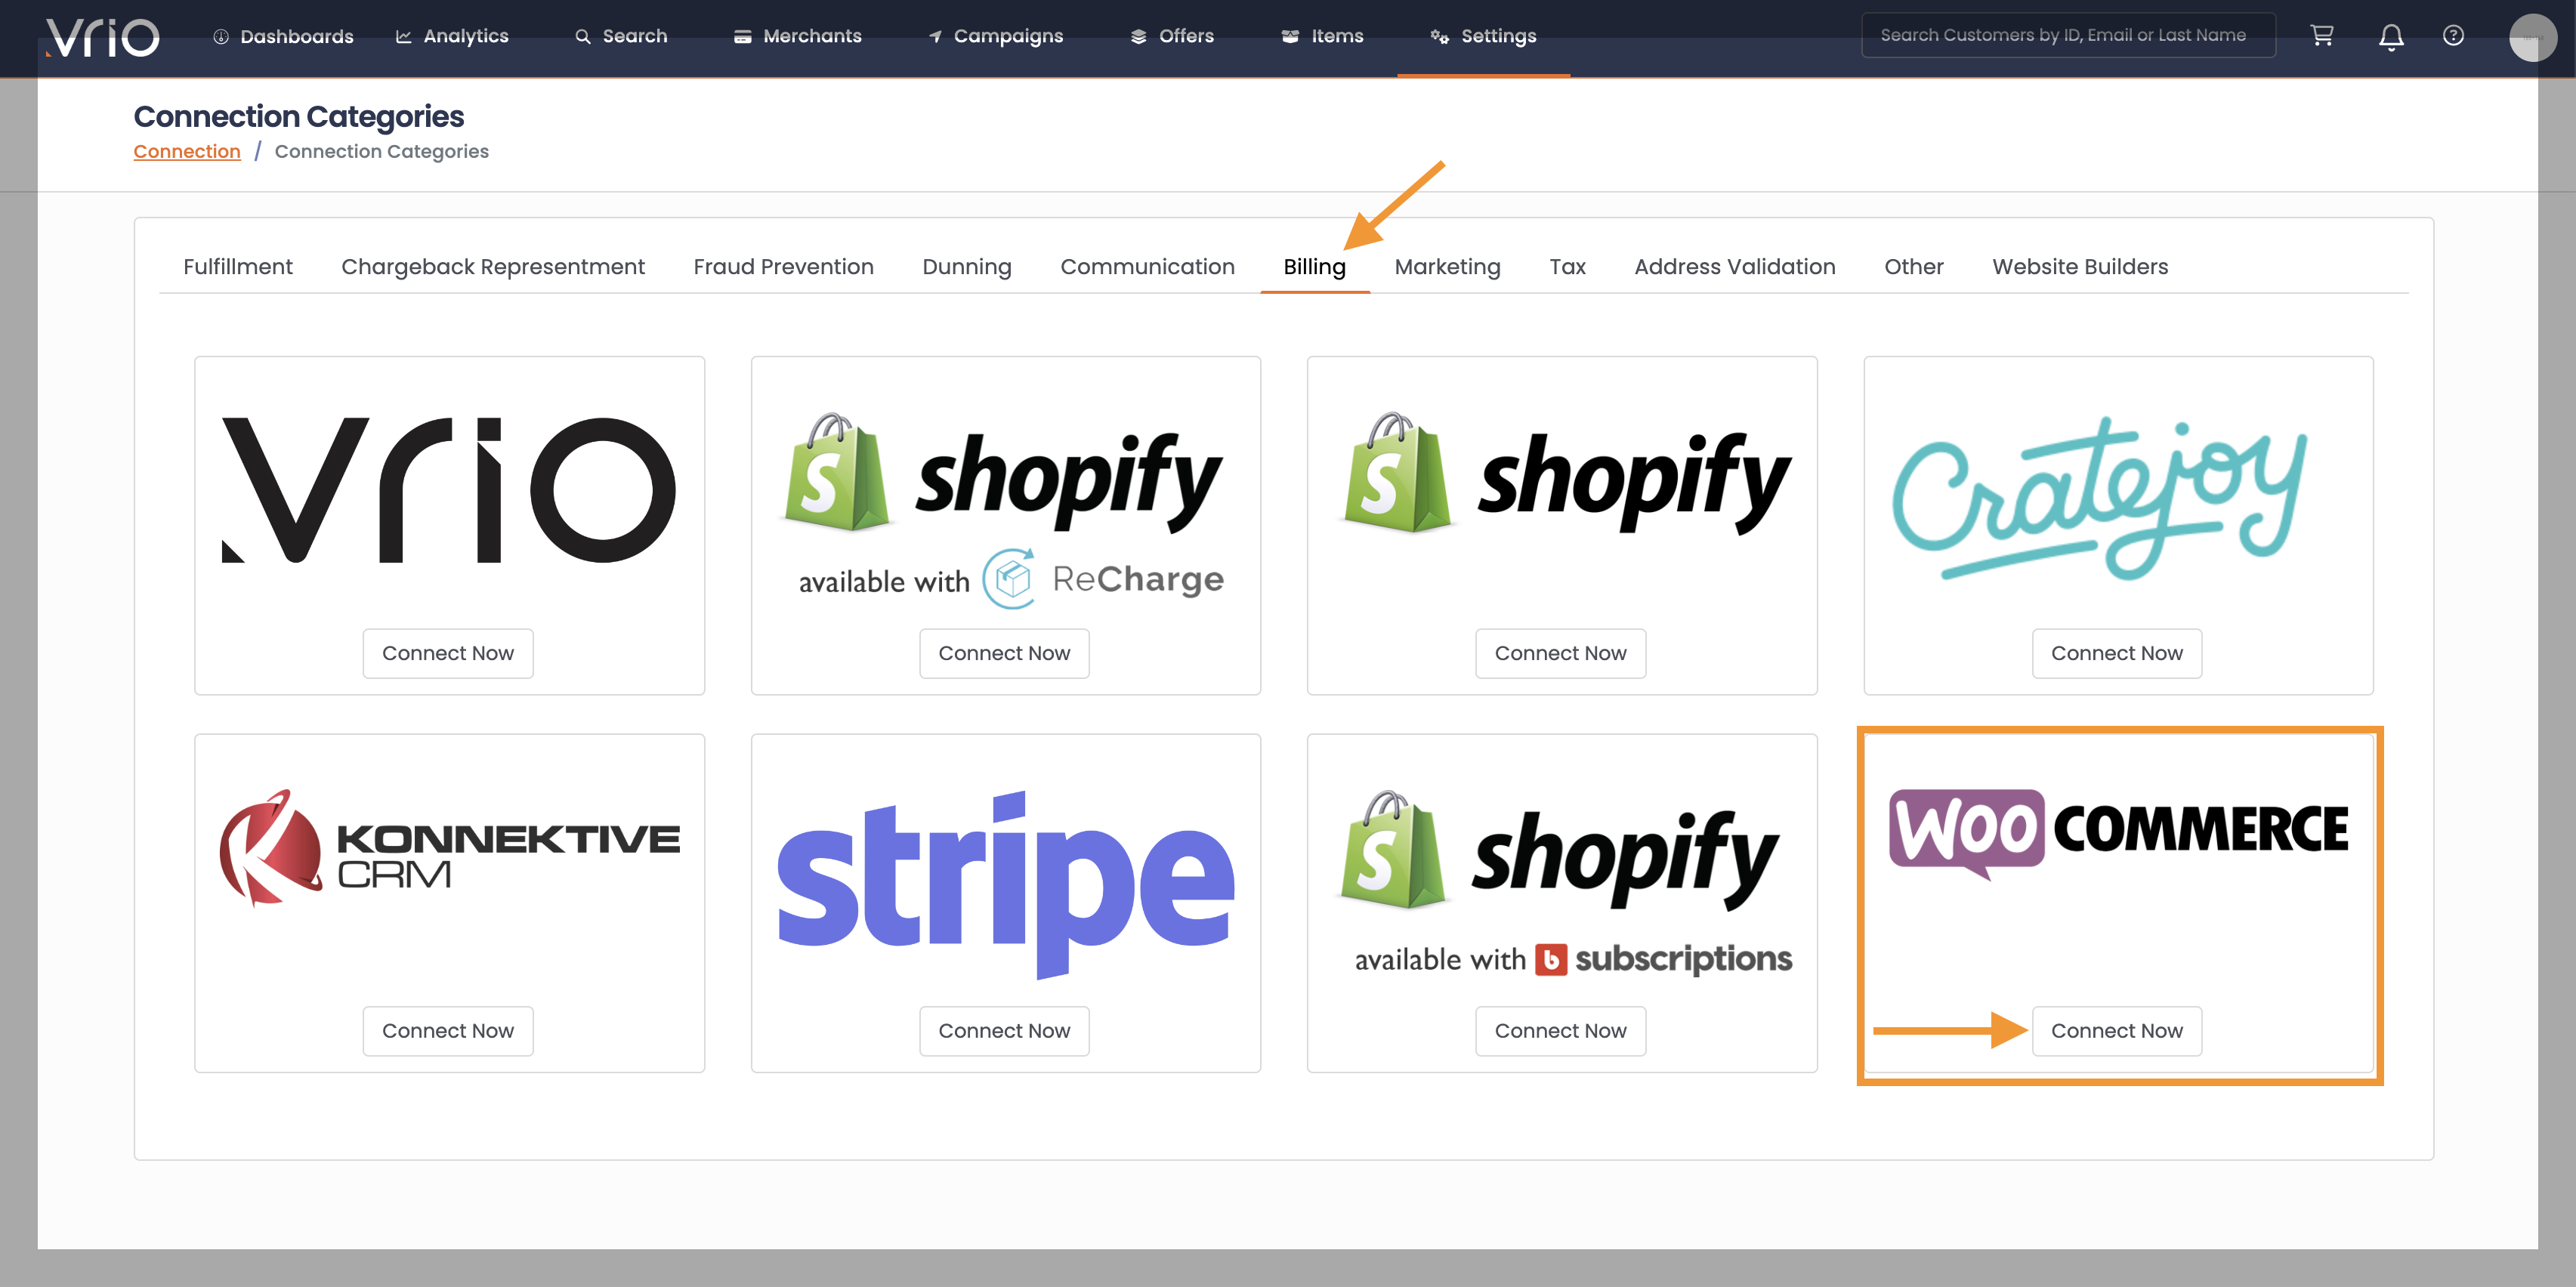
- Click Connect Now
- Enter your Woo Store URL
- Enter your Woo API Key & API Password from step 3
- Select the following:
Payment Type SelectionYou may select the Test Merchant if no merchants have been added into Vrio.
This setting can be adjusted after adding the connection
Payment Type: | Router or Merchant (single merchant) Once selected, the applicable Routers or Merchants available will be selected. |
Create new Vrio Billing Connection | |
Use the Woo Connection for Fulfillment | When checked, all the handling of the shipment will happen within Woo Commerce When unchecked, Vrio will manage the fulfillment connections and post shipment data to the preferred provider. |
Active |
- Hit Submit
Campaign CreationOnce the WooCommerce connection is made, a Default Campaign is created using the Payment type chosen at setup.
All customers and orders that come through Woo Commerce will be directed to this Vrio Campaign.
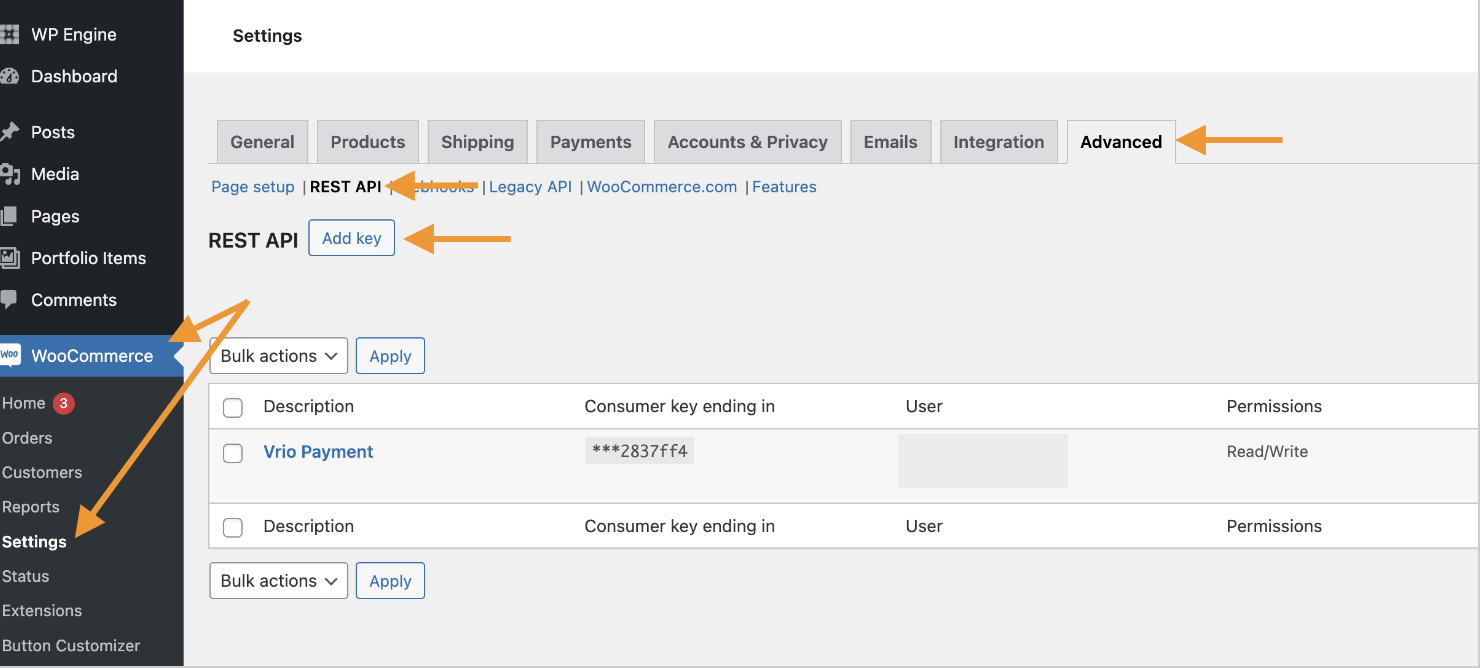
Rotating your WooCommerce Consumer Key
-
Within Woo Commerce, navigate to Settings
-
Click on Advanced
-
Select Rest API
-
Add Key or Edit existing
-